
Spicy Fresh Sesame Chicken

Korean barbeque has been growing in popularity for years now, and for good reason. The combination of ingredients yields sauces that are bright, sweet, spicy and tangy. Most recipes call for a grated pear of some kind, typically an Asian pear. Asian Pears are round, soft and extremely juicy. I love them but they are often difficult to find. You can substitute any pear, or even apples, and get the same result.
I’ve been stress eating comfort food for weeks now and I’m finally reaching my peak. I love mashed potatoes, mac and cheese, and pasta in all forms but I cannot live on carbs alone. This chicken is fresh, bright, a little spicy and, a little sweet. It has many of the basics of a Korean barbeque sauce including fresh pear, ginger, and gochujang. Ultimately, the result is a fast, easy, fresh recipe that beats take out and is quick enough for any night, even when we’re not in the middle of a pandemic.


Spicy Fresh Sesame Chicken
Ingredients
1 onion, chopped
4 garlic cloves,
1 jalapeno or Fresno chile
2” chunk of ginger
1 ripe pear
1/4 cup plus two tablespoons soy sauce
1/4 cup mirin
1/4 cup toasted sesame oil
2 tablespoons gochujang
2 tablespoons fish sauce
1 tablespoon honey
2lbs chicken tenders
Directions
Combine all the ingredients except the chicken tenders in a food processor or blender and process until well blended and smooth.
Toss the chicken tenders with most of the sauce, reserve a little for dipping and serving. Marinate the chicken for about 25-30 minutes.
Spray a heavy griddle with cooking spray and heat over medium-high. Working in batches, cook the chicken 4 minutes on each side or until the juices run clear.
Serve with steamed rice, remaining sauce, and toasted sesame seeds.
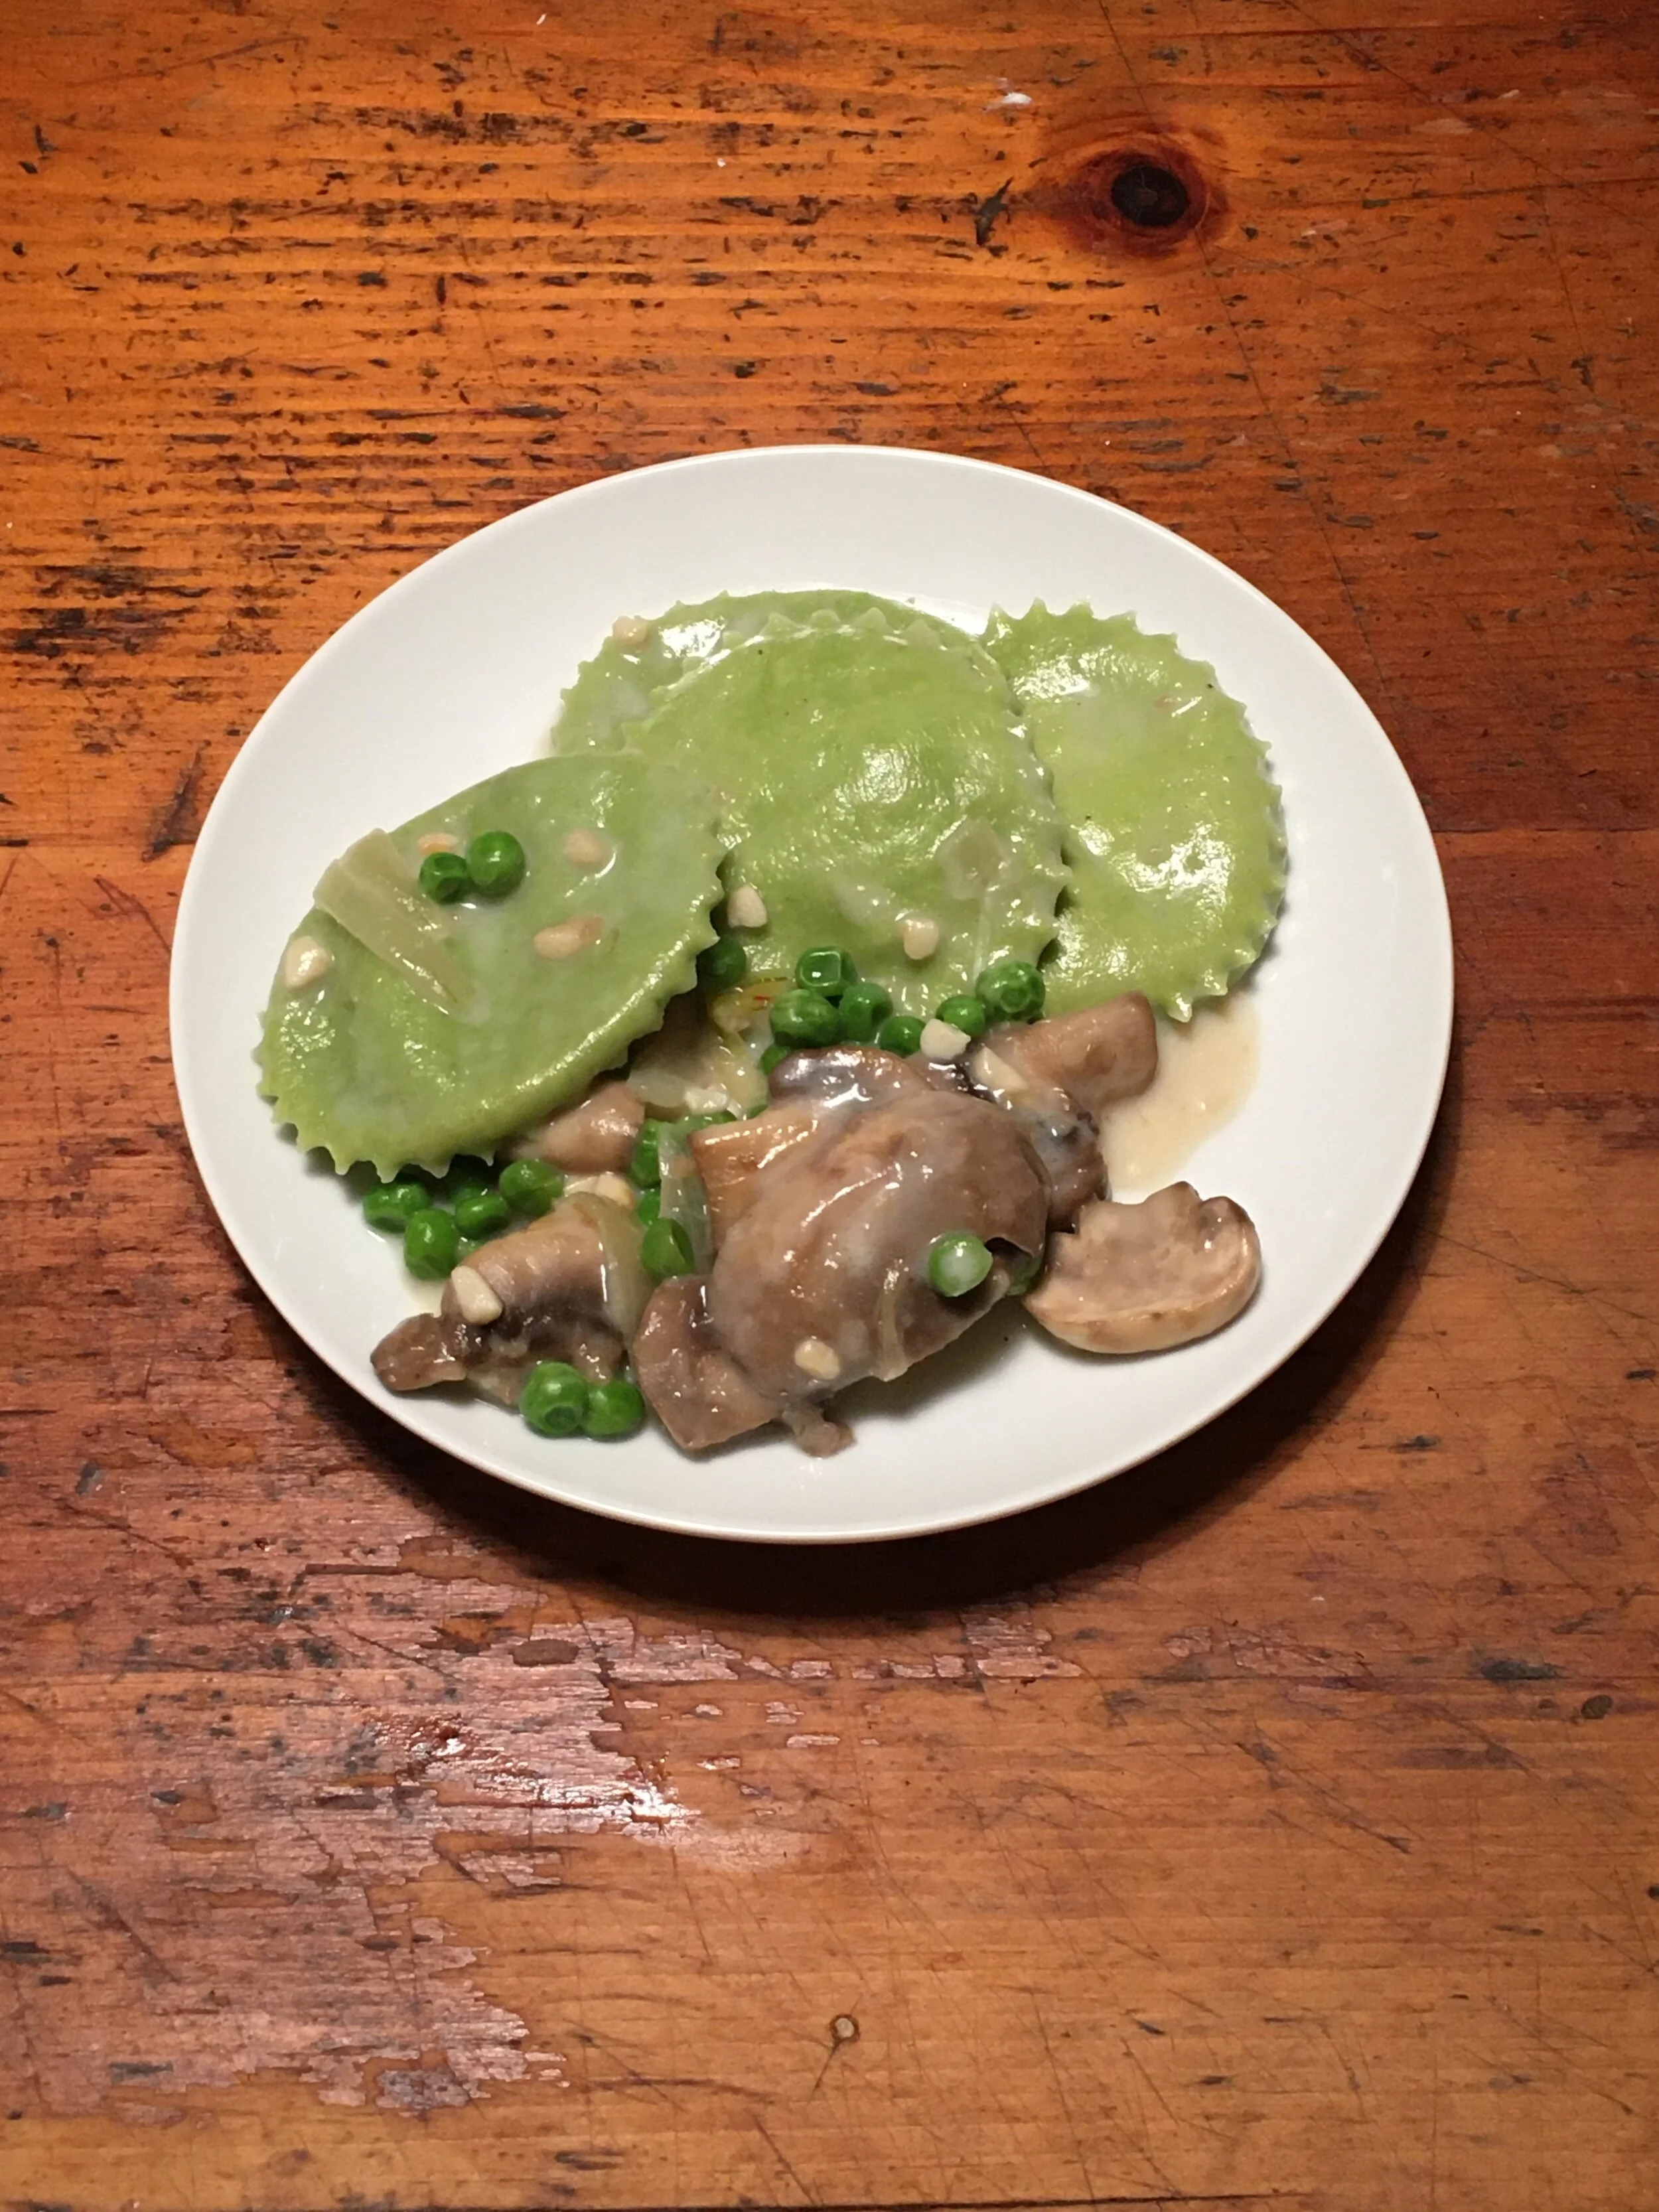
Pea and Ricotta Anolini with Mushrooms and Alfredo
I went to the grocery store last night to pick up some vitals - flour, butter, eggs, and several bottles of wine. Despite living with chronic anxiety, I have been relatively level headed through this whole thing. I’m not as calm, cool, and collected as usual but I’m also not a puddle on the floor or hoarding toilet paper. Still, I can feel our collective unease wherever I look. There is a sensation of something bubbling just below the surface. It’s in the eyes of the cashiers, the rushed pace of people at the grocery store, and all over social media. We’re all scared.
I am not afraid of catching COVID-19. I am young, relatively healthy, and should recover without complications should I contact the virus. Sadly, I’ve been avoiding the older people in my life to prevent spreading the virus to them, should I happen to contact it. What is really scary to me however is the mass hysteria that has swept so many people up. The strangers stocking up on pasta, beans, and toilet paper. The people who are going out and buying guns and body armor. Some seem to think we are on the brink of societal collapse and I can say is, only if you behave that way. It is unnerving to see the worst in society come out in a time like this. Hoarding will not solve this problem. Neither will shaming those people who are scared. The only way to get through this is to keep marching forward, together.

To soothe my soul and avoid the chaos, I turned to the activities that keep me calm. I’ve been cooking more than usual, playing the piano, drawing, and started learning a cello-piano duet with Anthony. I’ve begun to wrestle with the reality that the pasta workshop I’ve been planning all winter will likely be canceled and as much as it breaks my heart, I know it will be for the best.
I don’t know when COVID-19 will pass and I don’t know what we will learn from this experience if anything. What I hope we learn though, is that in times of great turmoil and strife, we have the capacity to care for each other and not retreat into the fearful and dangerous parts of our collective psyche. I know people are scared, I’m scared. Being scared and anxious right now is a natural reaction and if you’re feeling that, know that you’re not alone. Do what you need to do to keep yourself together and try to retain whatever routine you need.
Long story short, if you’re worried about COVID-19, get educated. Learn what you can and understand that some anxiety is OK and warranted, these are critical times we are living in. Just remember, we are all a little scared and uneasy. Be nice to each other. Stop mocking those who are worried and scared. Find peace, find comfort, eat pasta.
Notes about the recipe.
As I’ve mentioned before, if you can’t find eggs at the store, feel free to use water instead. Start with a cup and adjust from there.
I used fresh spinach to color the pasta dough but you can use whatever greens you have on hand. Swiss chard, kale, parsley, whatever you can get your hands on will be just fine.
To make the spinach puree, take a handful of spinach, place it in a food processor or blender with 1/2 cup of water and puree until its smooth. You can run it through a fine-mesh sieve if you want, otherwise, just mix it in with the eggs and get to kneading.

Pea and Ricotta Ravioli with Mushrooms and Cream
Ingredients
2 tablespoons pureed spinach
1 whole egg
4 egg yolks
2 tablespoons olive oil
hefty pinch of salt
2½ cups flour
2 cups ricotta
2 oz soft goat cheese
2 cups frozen peas, separated
1 cup parsley
pinch of salt
1 lb sliced mushrooms
1 onion, thinly sliced
1 tablespoon minced garlic
4 tablespoons butter
2 tablespoons flour
1/2 cup milk
Directions
Make the pasta dough. In the bowl of a stand mixer, combine the pureed spinach, eggs, and oil. Stir until everything is evenly mixed. Slowly incorporate the salt and flour and mix with a dough hook until a firm ball is formed. Dump the dough out onto a lightly floured surface and knead until the dough is firm. Wrap the ball in plastic wrap and chill while you make the filling.
Make the filling. Toss the parsley, 1 cup of peas, goat cheese, and ricotta in a blender and pulse until everything is smooth. You may need to scrape down the sides of the mixer as you work. The result should be smooth and bright green without any lumps or rogue parsley stems and leaves.
Roll the Dough. Take the dough out of the refrigerator and cut it into 8 even pieces (think of it as pie pieces). Grab to wedges to work with and cover the remaining dough with plastic to keep it moist. Roll one piece of dough until it is 1/8 inch thick either with a rolling pin or pasta machine, set this aside and do the same with the next piece.
Spread the filling. Using a spoon, gently spread the filling over the dough in an even layer, about 1/2 inch thick. Take the second rolled sheet and place it over the filling. Gently press the pasta dough into the filling, working from the center out to the edges, and press any air pockets out.
Stamp out the anolini. Using a pasta stamp, pastry cutter or simply a knife, stamp or cut the pasta to the shape you desire - I prefer to keep them 1 -2 inches in diameter max but you do you.
Cook the onions and mushrooms. Heat 1 tablespoon of olive oil in a skillet until it shimmers. Add the onions and saute over medium-high heat until they are soft about 5-6 minutes. Add the mushrooms and a pinch of salt. Cook until the mushrooms release their liquid and soften, another 5 minutes or so. Add the peas and cook until they are soft, about 3 minutes and then add the minced garlic and cook until it is aromatic about 1 minute. Transfer everything to a bowl and return the skillet to the stove.
Make the sauce. Melt the butter in a skillet over medium-high heat. Add the flour and stir constantly while it cooks - this is a roux. Once the roux is golden brown, about 3 minutes. Remove from heat and add a splash of milk. Stir vigorously while you add the rest of the milk, stirring to incorporate. Season with salt and pepper and add the mushrooms and onions back to the pan. Stir to coat everything evenly.
Cook the pasta. Bring a big pot of water to a rapid boil and add a hefty pinch of salt. Add the ravioli, working in batches if necessary, and cook until they float. Remove with a slotted spoon and add to the mushrooms and sauce. Reserve 1 cup of the cooking liquid before dumping it out.
Toss it all together and serve. If the sauce has thickened, add some of the reserved pasta water and stir to incorporate. Serve with parmesan cheese and garnish with parsley.

Corned Beef and Kimchi Sandwiches
It is amazing how quickly life can change. While I was working on this recipe over the weekend, Anthony questioned whether or not people would know where to buy kimchi. I laughed and told him every grocery store in America carries kimchi and that these ingredients would be SO simple to find. Fast forward to last night at the grocery store and it is an image all too familiar in America; empty shelves, panicked shoppers, stressed-out parents, and wide-eyed clerks.
In light of all the scary things that are happening in the world, life does move on and we adapt. Some friends from college and I spent two hours last night on a zoom call, we dubbed it our “digital happy hour”. It was the first time we had all been together since my wedding in 2018 and I didn’t realize it at the time but I really needed it, even if I did drink too much.
In the spirit of progress, I’m sharing this recipe. If you have everything at your house, awesome. If you don’t please just save this for our post-pandemic life. Don’t leave your house unless you really need to. The kimchi cuts through the fattiness of the corned beef with hits of heat and funk. I had a little leftover corned beef this morning so I made this again. It was a weird breakfast but tasted so good and I’d like to think that the punch of probiotics is keeping me healthy.

Corned Beef and Kimchi Panini
Ingredients
4 Rye Bread
Mayonaise
4 slices Swiss Cheese
Leftover Corned Beef, shredded
Kimchi
Directions
Heat a skillet over medium-high and spread some mayonnaise on one side of each piece of bread.
TO build the sandwich, place a piece of bread in the skillet, greased side down. Lay cheese, corned beef, kimchi, cheese, bread. place a piece of foil over the sandwich a place another heavy skillet on top of it to compressed the sandwich. Toast until each side is golden brown.
Transfer the sandwich to a plate and allow it to rest for one minute. slice and serve.

Fresh Pasta Dough

In light of authorities telling everyone to remain calm, the grocery store is again looking like a war zone. I went shopping last night for the essentials - eggs, butter, wine, and cheese - when I noticed that not only is all the toilet paper gone but so are the boxes of pasta that once lined the shelves. Rather than panic purchase more pasta, I turned to my own kitchen and made a batch of spinach dough. Its easy, affordable and the perfect activity for when you’re social distancing but want those noods.
The recipe is for a basic dough and if you don’t have a pasta roller, do not despair or impulse buy one. You can make fresh pasta without a rolling machine just as easily. If this is you, go with a shape like cavatelli. Below is a quick video on how to make cavatelli at home.
EDIT: If, like me, you get to the store to find that all the eggs are gone, know that you can still make pasta without the eggs. Substitute the eggs for 3/4 cup of water and follow the rest of the instructions below!
Fresh Pasta Dough
Ingredients
2 whole eggs
4 egg yolks
2 tablespoons olive oil
hefty pinch of salt
2½ cups flour
Directions
In a large bowl, stir the eggs, yolks, olive oil and salt until evenly mixed. Add the flour and stir with a rubber spatula until the dough comes together into a sticky ball.
Turn the dough out onto a lightly floured surface. With floured hands, kneed the dough until a firm, smooth ball is formed. About 8 minutes. Wrap the dough in plastic wrap and chill for at least 30 minutes.
Cut the dough into eighths and toss lightly with flour. Press each wedge flat and roll with a rolling pin, shaping into small discs. Feed the dough discs through the pasta roller. Start at the widest setting and roll until the dough is thin but still sturdy, “5” on most machines.
Trim the edges of the dough so you are working with a uniform rectangle. Fold the dough in half twice and cut into 1/2 inch ribbons. Dust the noodles with cornmeal and set aside.
Spinach Pasta Dough
To make spinach pasta dough, use the recipe above but substitute 2 tablespoons pureed spinach for 1 whole egg. Follow the rest of the directions, adding more flour as necessary.

Better Corned Beef and Cabbage
The last time I checked, there are close to 20 million results for “corned beef and cabbage” on Google. With so many options out there, does the world really need another recipe for this iconic dish? Probably not. Instead of reinventing the wheel, I’ve taken some time to reflect on some of my favorite methods and pulled techniques together to make, what I believe, is a better-corned beef and cabbage dinner.
First, use your slow cooker. I know, everyone has an InstantPot these days and they are awesome. Hear me out, your slow cooker was made for this recipe. It has been waiting, patiently, to braise this salty, cured, tough cut of meat its whole life. Not only is it the best tool for the job, but it also means you can leave your house while it is doing most of the work for you.
Second, this is purely a personal choice and you do not have to follow it but, use a flat-cut piece of meat rather than a tip. This can be a thorny issue as I’ve seen online and both cuts have their merits but in my opinion, the leaner, flat cut beef is far superior. One of the things I dislike about corned beef is that the fat is always slimy and gelatinous and it just grosses me out.
Third, use your broiler! When I make steak inside, I use the reverse sear method - cook it in the oven and then sear it on the stove before serving. You can use the same method with corned beef and your broiler. This will give the beef a crispy exterior and maintain that tender, juicy interior.
Finally, while you’re more than welcome to stick with tradition and boil everything together, take a chance and be different. I opted for roasted my cabbage but kept the potatoes and carrots in the braising liquid. Why? Because I love how soft and pillowy the root vegetables get and roasted cabbage gives the humble vegetable a totally different flavor and texture. Of course, you can boil that too. Remember, there are no rules, merely suggestions!
A couple more tips
Bloom your spices before you start braising. This is a trick I learned while making Vietnamese and Thai food. Toss your spices in a skillet and gently toast them until they are aromatic - about 1 minute.
Don’t forget to rest! Rest the corned beef for at least 10 minutes before slicing it. This will give the meat time to cool and for the juices to really soak in. You’ve already waited all day for this moment, what’s another 10 minutes?
Hopefully, we can all enjoy St Patty’s Day in light of the recent coronavirus outbreak. In times of great need and calamity, sometimes you just need soft comforting food. Enjoy and wash your hands.
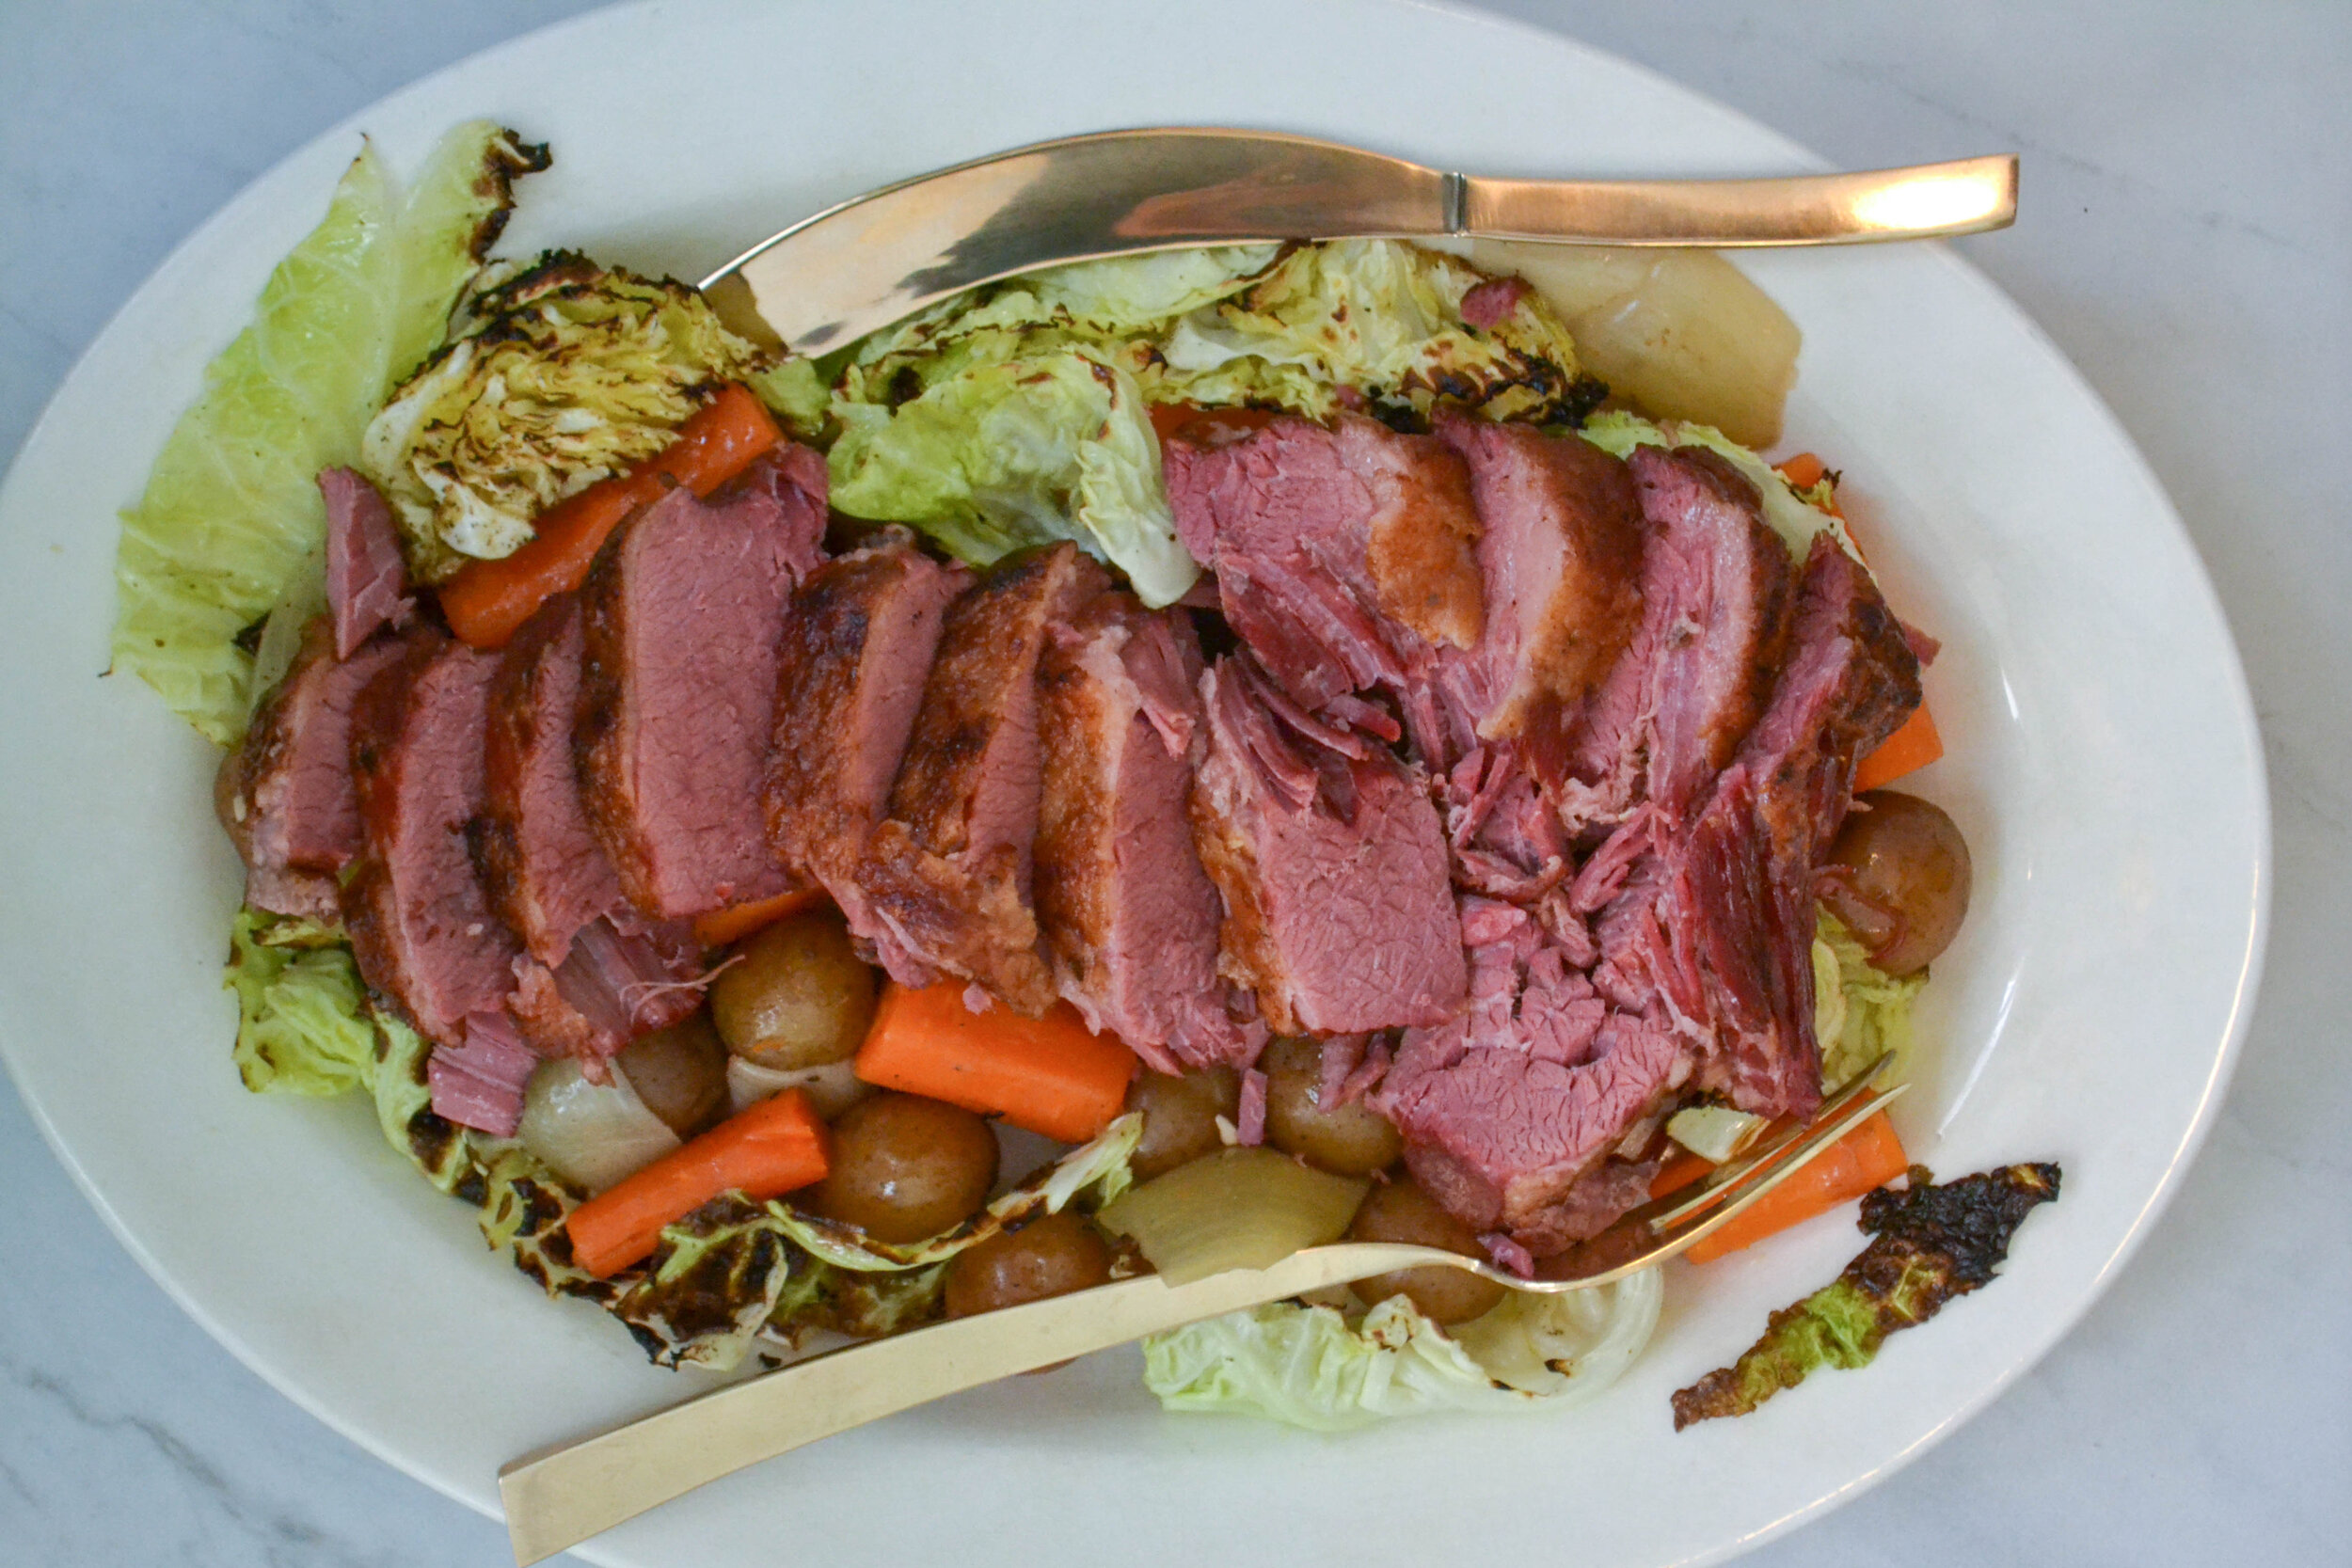
Better Corned Beef and Cabbage
Ingredients
2 1/2 lb corned beef brisket
4 carrots, chopped
1 onion, chopped, quartered
2 cloves garlic, smashed
4 bay leaves
1 tablespoon mustard seeds
1 teaspoon fennel seeds
1 teaspoon crushed red pepper
2 T peppercorns
2 T coriander seeds
6 oz beer
1 lb baby potatoes, washed and halved
4 tablespoons olive oil, divided
1 head cabbage, cored and quartered
Directions
Bloom the spices by tossing them in a dry skillet and toast until aromatic, about 1 minute.
Place the corned beef, spices, potatoes, turnips, and carrots in a slow cooker. Add the beer and enough water to barely cover the meat. Don’t worry if the vegetables float on top. Set the slow cooker to low and cook 8 hours or until the beef is tender.
About an hour before the beef is ready, preheat the oven to 400 and arrange the cabbage in a roasting pan, drizzle with olive oil, salt, and pepper. Roast 30 minutes, flipping halfway through.
When the beef is done, take it out of the liquid and transfer to a sheet pan with the fatty side up. Turn the broiler to high. Broil the beef until the top is crispy, about 3 minutes.
Slice the corned beef against the grain and serve with vegetables and mustard.

Asparagus and Radish Salad
It is almost spring and for the first time since I moved to Maine, I CAN SEE GRASS ON MARCH 1. To those in warmer parts of the country, this may not seem noteworthy but Maine springs are notoriously wet and we are often covered in snow until April - sometimes even into May. Anthony is a little bummed we won’t get to go snowshoeing again but personally, I’m thrilled. I love spring and in Ohio, spring is long, warm and glorious.

Weather patterns aside, I’m also excited its spring because that means some of my favorite produce will be returning to the farmer’s market. Radishes, peas, asparagus, onions, fiddle heads and more will soon be gracing the stands at the Portland Farmer’s Market and my plate. This means I’ll be whipping up all kinds of fresh new recipes from salads to ravioli.
One dish I am so excited to make is this salad. Asparagus and radish are two of my favorite vegetables and the first things to come up in the garden on the island every year. The nice thing about spring crops is that they are almost always tender, meaning you don’t have to cook anything in this recipe. That is a concept I can fully support and get behind. Not only does it cut down on dishes but it means I’m that much closer to a delicious meal. The best part? You can make this salad the night before and the flavors will blend together beautifully.
There are a few little tricks I’ve picked up that make this salad even better. First, use fresh asparagus on the thinner side. If all you can find is thicker stalks, that’s fine, just be sure to slice it into thin pieces. Second, stop cutting your asparagus and start snapping it like you do green beans. The stalk will snap where it is tender, discard the rest. Lastly, the olive bar at my grocery store always has a great selection that are reasonably priced. I prefer to use the kind marinating in oil rather than brine but you do you.
If you really wanted to, you could add some cheese to this salad but I love it just the way it is. The peppery radish, fresh lemon and tender asparagus team up for a crunchy, refreshing salad that will be a star on any table this spring.

Asparagus and Radish Salad
1 bunch asparagus, washed and snapped
1 lb radishes, thinly sliced
1/2 cup marinated olives
1 shallot, thinly sliced
2 tablespoons lemon juice
4 tablespoons olive oil
1 teaspoon kosher salt
1 teaspoon ground pepper
1 teaspoon oregano
Chop the asparagus into 1-inch pieces. If the asparagus is thick, slice the asparagus pieces in half.
In a mixing bowl, whisk together the lemon juice, salt, pepper, and oregano. Slowly add the olive oil while whisking until the sauce is emulsified and golden.
Toss all the vegetables with the dressing and cover. Chill at least 30 minutes before serving.

Seared Scallops with Creamy Linguini
I’m typically not a creamy pasta kind of guy. Its not that I don’t like it but I just never seem to crave it like I do other pasta sauces. That is, until I do crave it. Once that craving sets in, buckle up. I’m not going to settle for some off-the-shelf alfredo, nor am I going to settle for something half done. I want the real deal. I want cream. I want butter. I want carbs in all their glutenous glory.
The craving hit me last week while I was at work. It was a cold and wet day and I just wanted something comforting to eat. I didn’t have time to make something braised, I didn’t want something light like couscous or quinoa. I wanted something heavy in carbs and creamy af. I also had a strange craving for some kind of fish or shellfish. When I got to the market, I saw fresh scallops were on sale and I knew I needed them. I bought a pound of scallops, grabbed some butter, milk and pasta and was out the door.
The result of this craving was a pretty simple and straightforward dish that anyone, I repeat anyone, can make. Scallops are intimidating to some because they are a bit pricy and they can get a little rubbery if you don’t pay attention. All things considered though, they are pretty easy and low maintenance and you don’t need a ton to make a meal feel filling. I learned to make scallops from my mom and she is a pro. Her tip: dry the scallops and dust them with salt to extract any extra moisture. A good dry scallop will brown beautifully.
As for the pasta sauce. This alfredo is also super easy and basic. You don’t need heavy cream like most recipes require but whole milk will make the sauce much more rich and filling.

Seared Scallops with Creamy Linguini
Ingredients
1lb fresh scallops
1 tablespoon salt
1 teaspoon paprika
1 teaspoon black pepper
1/2 teaspoon cumin
1/2lb dried linguini
2 tablespoons olive oil,. divided
4 tablespoons butter, divided
1 onion, finely minced
2 garlic cloves, finely minced
2 tablespoons flour
1 cup milk
Directions
Take the scallops out of the packaging and rinse briefly under cold water. Pat the scallops dry with a paper towel and transfer to a dry plate. Season the scallops with salt and allow them to rest about 5 minutes. Wipe the excess salt off the scallops and transfer them to a small bowl.
In the bowl with the scallops, add paprika, pepper and cumin. Mix everything together until all sides of the scallops are evenly coated. Set the scallops aside.
Bring a pot of salted water to a boil and cook the pasta according to the package instructions. Reserve 1 cup of pasta water before straining.
In a skillet, heat the olive oil and half of the butter over medium heat. Add the onions and cook until translucent, 3 - 5 minutes. Add the remaining butter, when it has melted add the garlic and cook until fragrant, about 30 seconds. Season with salt and pepper then sprinkle the flour over the whole mixture, stirring constantly until the flour is incorporated. Cook 2 - 3 minutes or until the flour mixture turns a very faint brown. Remove from heat and slowly add the milk, stirring constantly to prevent any clumps of flour. If the sauce seems too thick, add a little pasta water until the desired consistency is reached. If it is too thin, reduce the sauce over medium-low heat.
Heat a tablespoon of olive oil in a heavy skillet over medium-high heat. Add the scallops and cook 1 1/2 - 2 minutes on each side. The scallops should have a nice crust on the outside and be opaque on the inside.
Working quickly, toss the pasta and sauce together and nestle the scallops on top, garnish with parsley and serve immediately.

Blueberry-Cardamom Champagne Cocktail

Sometimes in the dead of winter you just need a good, bright, fresh drink to remind you of the warmer days ahead. That’s been the case here lately. While it hasn’t been as cold as some years (nothing below freezing - yet) it has been cold and dreary. We are in the part of winter where there are no major holidays to celebrate and its too early to start seedlings for the garden. I call this the “purging” part of the winter. It is when I go stir crazy and drag things out of closets, the attic and wherever else Anthony and I have been storing things we don’t use regularly. Most of this stuff ends up at Goodwill or the dump.
This week, I was craving something light and bright to drink. I’m drinking less booze in 2020 but I’m not a full-fledged nondrinker. One of my favorite drinks is a French 75, named after a French machine gun used in WW I It is a delightful mix of gin, citrus, syrup and champagne. Indulgent yet light and refined, how very French. I couldn’t just settle on a French 75 though. Naturally, I had to make it a little more…extra. I dug through the spice rack and found some cardamom that was't doing anything useful and grabbed a few blueberries from the freezer. A little muddling, boiling and shaking and boom, a drink is born.
Ingredients
3 oz gin or vodka
8 blueberries
1 1/2 oz cardamom simple syrup (recipe follows)
juice of half a lime
2 dashes aromatic bitters
2 dashes rose water
Champagne
Directions
Muddle the bluerries and lime juice in a cocktail shaker. Add ice, the gin or vodka, simple syrup, bitters, and rose water. Shake well.
Pour the cocktail into two glasses filled halfway with ice, top with champagne and garnish with a lime slice.

Oysters with Mignonette
Maine has a burgeoning oyster scene. Given the cold waters of Maine and the many rivers, Maine, particularly Maine’s midcoast, are prime real estate for oyster farmers and harvesters.
I love oysters and have loved them for as long as I can remember. Raw oysters on the half shell, when fresh, have a clean, briny flavor to them that is just wonderful. Some people think I’m nuts and can’t stand the thought of eating something raw but those people don’t know what they are missing. In addition to being delicious, oysters are incredibly healthy and are quite possibly the most humble of warriors in the fight against climate change.
Health Benefits of Oysters
It pays to eat oysters. With a host of vitamins, minerals, and macronutrients, oysters are a nutrient-dense food.
Low in calories but high in protein
Not that I believe in counting calories but if I did, this would give me one more reason to love oysters. Coming in at a humble 40 calories, these little pups pack 5 grams of protein per oyster. 5 grams might not sound like much but considering the other nutrients found in oysters, its just one more reason to knock a few back.
Plenty of Zinc
Zinc is a critical mineral for a properly functioning body. From your immune system to your sense of taste and smell, zinc is involved in more bodily functions than any other mineral. It is theorized that low levels of zinc also inhibit male performance, hence the belief that oysters are an aphrodisiac.
Heart Healthy
Oysters have high levels of heart-healthy compounds like Omega 3 fatty acids, potassium, and magnesium, all of which are important nutrients for a healthy heart.
Great source of Vitamin D
Vitamin D is another vitamin group that is crucial to overall health. Vitamin D is necessary for everything from healthy bones to lessening the effects of Seasonal Affective Disorder to reducing your risk of developing chronic diseases including diabetes, dementia and some cancers.
More B12 than beef or lamb
Vitamin B12 is important for maintaining healthy red blood cells and a healthy metabolism. Most people think of beef and red meat when they think of B12 but oysters have almost 6 times the amount of b12 found in beef and lamb. The only cut of meat with more B12 than an oyster is beef liver and who wants to eat that?
Environmental Benefits of Oysters
The impact of climate change is becoming more and more dire as years of inaction go by. Water pollution, rising sea levels, and erosion are major issues for coastal communities. Fortunately, oysters offer a solution to some of the threats we face with climate change.
Water Purifiers
Nitrogen is one of the most common pollutants found in water. Often, the source of the nitrogen comes from farms upriver where fertilizer runoff ends up in groundwater and tributaries that make their way to our oceans and lakes. For those of us fortunate enough to live near the sea, oysters offer a great solution. Oysters thrive on nitrogen and are efficient at filtering that and other pollutants from the water.
Erosion Control
Along the coast, one of the biggest threats is coastal erosion during major weather events like hurricanes. As reefs die and harbors and bays are dredged, the seafloor and coast are becoming more and more susceptible to erosion. Fortunately, there is a solution that is a win for everyone. Oysters!
Oysters grow in huge clumps, forming natural reefs that help hold the seafloor and mudflats in place while the water above rages.

Oysters with Mignonette
This is a basic mignonette consisting of simple ingredients. It is fresh and tart, pairing well with fresh oysters. Get creative and experiment with different flavors such as citrus, ginger, spices or other vinegars.
Ingredients
1 dozen oysters
1 shallot finely minced
1 jalapeno, seeded and finely minced
1/2 cup red wine vinegar
1 teaspoon sugar
1 teaspoon ground black pepper
Directions
In a small bowl, combine everything but the oysters. Whisk until the sugar has dissolved, cover and chill for at least 30 minutes.
Shuck the oysters by carefully inserting an oyster knife in the hinge of the shells. Carefully wiggle the knife until it is securely between the shells. Twist the knife until the shells “pop” apart and run the knife along the edge of the shells. Detach the oyster from the shell by running the knife underneath the meat, being careful not to puncture the oyster.
Arrange the oysters on a plate of ice and serve with mignonette and lemon wedges.


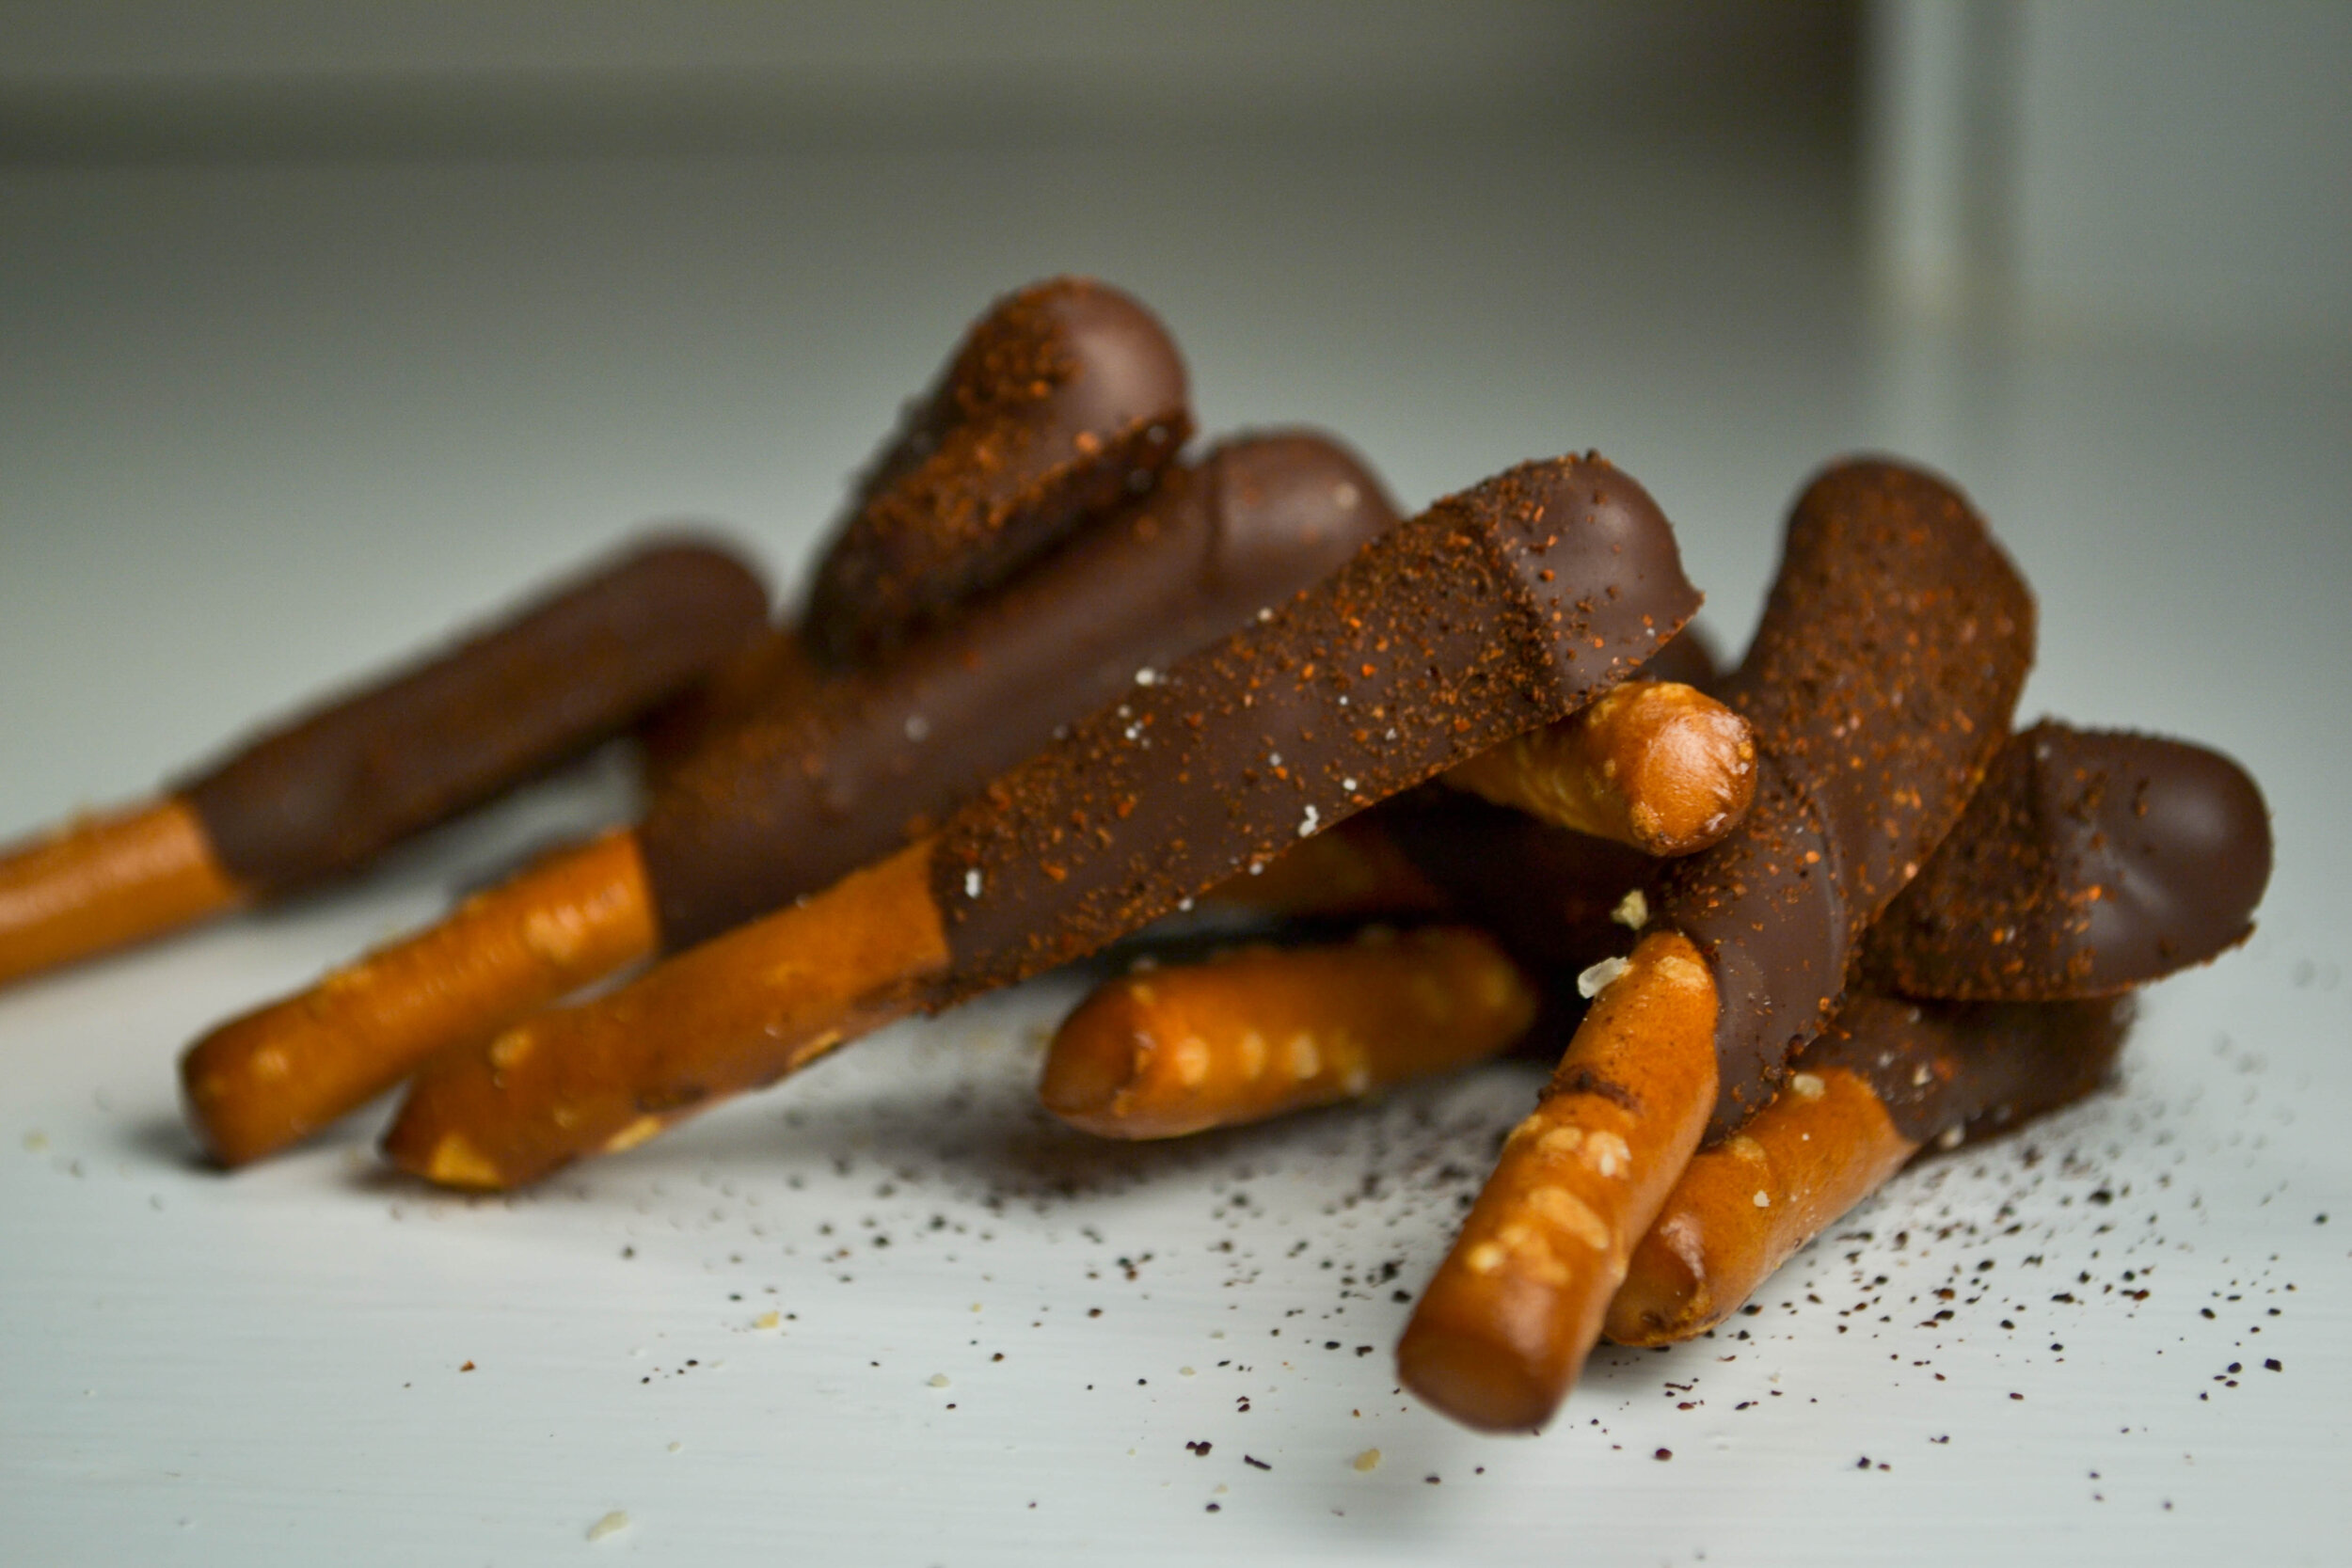
Chocolate Dipped Pretzels
Chocolate covered pretzels are the ultimate canvas for fun snacks. Whether your craving something sweet and salty or looking for something fun to do with the family or on a date night, these are low pressure, easy and delicious!

Chocolate Dipped Pretzels
Ingredients
1 bag of chocolate chips
2-3 cups pretzel sticks
¼ cup chopped hazelnuts
1 tablespoon ancho-chili pepper
1 tablespoon of sea salt
Directions
Place a metal bowl over a pot of boiling water. Add the chocolate chips and stir constantly until the chocolate is melted and smooth. Remove from heat and make sure not to let the water touch the chocolate.
Working quickly, dip the pretzels into the chocolate and place on wax paper. Season with your topping of choice and allow the chocolate to harden on the counter for about 2 hours, you can put them in the freezer if you need to speed up the process.



Gochujang-Ginger Wings
1.3 billion pounds of wings will be consumed today, Superbowl Sunday. I don’t even know who is playing tonight during Jlo’s concert but I am for sure having these wings. They are sweet, sticky, a little spicy and addictive. The best part? I already have all the ingredients in my kitchen and you probably do too. A quick pulse in a food processor makes this recipe super easy so you can get on with your night. Like many of my recipes, this one works but it isn’t a commandment. If you don’t have orange-apricot marmalade, don't sweat it. Use whatever you have on hand and enjoy your own creation!

Gochujang-Ginger Wings
Ingredients
2lbs party wings (about 12)
2-inch piece of ginger, roughly chopped
1 Fresno chili pepper, chopped and seeded
1/3 cup gochujang
1/3 cup orange-apricot marmalade
3 tablespoons soy sauce
3 tablespoons fish sauce
toasted sesame seeds, for garnish
cilantro, for garnish
Directions
Combine everything but the wings, sesame seeds and cilantro in a food processor and blend until smooth.
Toss the wings with the sauce in a large bowl and allow to marinate about 30 minutes.
Preheat the oven to 425 and line a cookie sheet with foil or a silicone mat.
Arrange the wings in an even layer and bake for 20 minutes. Remove the wings from the oven and baste with the remaining sauce. Bake the wings for 10 more minutes, then remove from the oven and allow to cool slightly before serving.
Plate the wings and garnish with toasted sesame seeds, cilantro and lime wedges.

Pappardelle with Mushrooms, Chilis and Lemon
Everyone knows I’m a sucker for a good pasta dish. There is just something so satisfying about a bowl full of carbs and sauce. I can’t help myself, that is partially why I took up making fresh pasta a few years ago; to feed my addiction. I’ve been busy this winter perfecting a few different shapes and dough recipes and will be teaching another workshop this spring. I can’t wait to share my noodle knowledge with more people!
This dish uses my favorite noodle shape, pappardelle. These thick ribbons of pasta come from the Tuscany region where it is typically served with meaty sauces made from game. I’m not big on game but I do just love a fat wide noodle. They are great for slurping up everything from the meatiest ragu to butter and parmesan. It helps that pappardelle is super easy to make. Simple run it through the pasta roller a few times and cut into 1/2 inch ribbons. If you’re going to make fresh pasta on a weeknight, pappardelle is your friend.
A great mix of mushrooms takes the place of meat in this dish and the chilies and lemon zest to make this bright and filling with a nice kick. It is a great meal that leaves you warm and satisfied. Grate some parm over the top and garnish with parsley and more lemon zest and you’ve got a great dinner worthy of bragging about.

Pappardelle with Mushrooms, Chilies, and Lemon
Ingredients
For the pasta
2 whole eggs
4 egg yolks
2 tablespoons olive oil
hefty pinch of salt
2½ cups flour
For the mushrooms
2 tablespoons olive oil
1 onion, halved and thinly sliced
1 fresno chili, thinly sliced
12 oz mixed mushrooms
4 tablespoons butter
1 cup chicken broth
zest of 1 lemon
Directions
Make the pasta. In a large bowl, stir the eggs, yolks, olive oil and salt until evenly mixed. Add the flour and stir with a rubber spatula until the dough comes together into a sticky ball. Turn the dough out onto a lightly floured surface. With floured hands, kneed the dough until a firm, smooth ball is formed. About 8 minutes. Wrap the dough in plastic wrap and chill for at least 30 minutes.
Roll the dough. Cut the dough into eighths and toss lightly with flour. Press each wedge flat and roll with a rolling pin, shaping into small discs. Feed the dough discs through the pasta roller. Start at the widest setting and roll until the dough is thin but still sturdy, “5” on most machines.
Cut the noodles. Trim the edges of the dough so you are working with a uniform rectangle. Fold the dough in half twice and cut into 1/2 inch ribbons. Dust the noodles with cornmeal and set aside.
Make the mushrooms. In a large heavy skillet, heat the olive oil over medium-high heat. Add the onions and peppers, cook until soft and tender. Toss in the mushrooms and season with salt. Cook until the mushrooms release most of their liquid and cook down about 8 minutes. Add the garlic and butter, stirring until the butter melts. Stir in the broth and reduce to a very low simmer.
Cook the noodles. Bring a pot of salted water to a bowl and add the pasta. Cook until tender, about 3 minutes. Reserve ½ cup of the pasta water and strain the noodles, rinse with hot water.
Combine it all. In a large bowl, combine the noodles, mushroom mixture, and lemon zest. Garnish with freshly grated parmesan and parsley.


Hummus with Spiced Lentils, Kale and Root Vegetables
I have been eating a lot of vegetables over the last few weeks. Staying in line with my resolution to eat more vegetables and less meat, I’ve been getting a little creative with how I get all the protein and nutrients I need without relying on meat and animal products alone.
Enter, this dish. With the hummus and lentils, you get plenty of protein and the dish overall packs a ton of fiber to keep you feeling fuller, longer. I’ve been serving this to Anthony for dinner a lot lately but it also makes a great, easy lunch. It can be served warm or cold making it a low maintenance and flexible dish.
Give my blend of spices a shot with the lentils but feel free to explore with other flavors as well. In my opinion, there are no rules in the kitchen, merely suggestions.
Make this for dinner this week and change the way you think about vegetables and protein.

Hummus with Spiced Lentils, Kale and Roasted Root Vegetables
Ingredients
2 cups hummus
1 cup dry lentils
3 cups water or broth
1½ teaspoons salt, divided
½ teaspoon allspice
½ teaspoon cumin
½ teaspoon coriander
½ teaspoon black pepper
2 carrots, peeled and cut into 1” chunks
2 parsnips, peeled and cut into 1” chunks
1 small red onion, halved and sliced into ½ inch slices
1 large sweet potato, peeled and cut into 1” chunks
2 cups kale, chopped and de-stemmed
¼ cup plus 1 tablespoon olive oil
Directions
Preheat the oven to 425.
Toss the carrots, parsnips, sweet potato and onion in a large bowl with olive oil, salt, and pepper. Pour everything onto a large cookie sheet and arrange in a single layer. Roast for 40 – 45 minutes or until tender.
Place the lentils in a mesh sieve and rinse thoroughly. In a large pot, combine the lentils, water, allspice, cumin, coriander, and black pepper. Add a pinch of salt and bring to a boil. Reduce the heat and cover. Simmer for 25 minutes. Strain the remaining liquid and set aside.
In a large skillet, heat the remaining tablespoon of olive oil and add the kale. Cook until the kale just tender, 2 – 3 minutes.
To plate, divide everything between four plates and garnish.

Roasted Fingerling Potatoes with Romesco
One of my goals for 2020 and beyond is to change my relationship with food and how I think about nourishing my body. For me, this means cutting back on how much meat and dairy I eat and consuming more vegetables and plant-based foods. Much to Anthony’s chagrin, we’ve been on an 80/20 diet lately where 80% of the time, we eat plant-based foods while the other 20% we eat meat and dairy. I love it. I feel better, I’m just as satisfied with my meals as I am when I eat meat and I am spending less money.
Romesco has long been one of my favorite sauces. Not only does it have a totally unique flavor profile of nutty acidic goodness, but it is also super flexible and goes with so many wonderful things. Originally from Catalonia and served with fish, this sauce goes well with roasted vegetables, pasta, chicken and even meatballs. Admittedly, I love a good Italian red sauce that simmers all day with meatballs and sausage but this sauce gives all others a run for their money in my mind. The toasty flavor of the broiled vegetables and the fat from all those almonds give this sauce so much body that I literally lick the plate clean whenever I make it.
Romesco Sauce
Ingredients
1 lb Roma tomatoes, seeded and chopped
1 lb red bell peppers, seeded and chopped
2 Fresno chili peppers, chopped
5 garlic cloves, skinned
1 yellow onion, skinned and quartered
1 t paprika
1 t smoked paprika
2 tablespoons olive oil
Kosher salt and black pepper, to taste
½ cup almonds, toasted and ground
Directions
Preheat the broiler to high.
Toss everything but the almonds together in a large mixing bowl, being sure to coat everything evenly. Pour the mixture onto a large cookie sheet and arrange in a single layer. Broil, on high until everything starts to char
Remove from the oven and allow to cool.
Working in batches, carefully puree everything in a blender or food processor until smooth and saucy. If the sauce looks too thick, dilute it with some water or olive oil.
Roasted Fingerling Potatoes
Ingredients
1 lb fingerling potatoes, washed and halved lengthwise
2 tablespoons olive oil
1 teaspoon rosemary
2 cloves garlic, minced
salt and pepper to taste
Directions
Preheat the oven to 425
In a large bowl, toss all the ingredients until the potatoes are evenly coated.
Spread the potatoes out on a large cookie sheet in a single layer, cut side down.
Roast the potatoes 20-25 minutes, flipping the potatoes halfway through. Remove from oven and serve with parmesan, parsley, and romesco


Lobster Arancinni
It is true. Anthony and I are trying to be healthier in 2020 and beyond. We are currently 5 days into dry January and my latest obsession is gut health and eating more plants. I’m proud of all our endeavors but balance is the key to success so this week I grabbed a pack of frozen lobster, mixed it with some leftover rice and made these deep-fried cheesy babies.
Technically, arancini are made with arborio rice, a great way to use up leftover risotto. Unfortunately, I didn’t have any arborio rice to spare so I went with plain old jasmine rice that was a few days old and stale. I know what your thinking, stale rice? Hear me out. Day old, cold rice is ideal for things like arancini and fried rice because it is already cooked and the starches have had time to settle and solidify. This means that when you fry them up, the rice gets extra crispy and you get extra credit for making such crispy rice.
These balls are not for the faint of heart and should not be logged in to whatever calorie tracker you downloaded on New Year’s Day. These are treat-yourself snacks to be indulged in and shared. You don’t have to invite friends over when you make these but you would end up being the favorite in your group.
The gochujang aioli used here is also superb with eggs, on sandwiches, wraps, whatever, so double the recipe and have some extra for later in the week.

Lobster Arancini with Gochujang Aioli
Ingredients
1/2 cup mayonnaise
1/4 cup gochujang
1 cup chopped lobster meat (about 1lb, or two lobsters)
3 cups cooked jasmine rice
2 tablespoons minced cilantro
1/2 cup fontina, shredded
1/2 cup mozzarella, shredded
3 eggs
1 1/2 cup breadcrumbs, divided
1 cup flour
Directions
In a small mixing bowl whisk the mayonnaise and gochujang until pale orange in color and there aren’t any chunks of gochujang remaining. Set aside.
In a large bowl, combine the lobster meat, rice, cilantro, fontina, mozzarella, and two eggs. Add 2/3 cup of the breadcrumbs and form into 16 1 - 2-inch balls and set aside.
Whisk the remaining egg with a little water and pour into a wide shallow bowl. Place the flour and remaining breadcrumbs in a shallow separate shallow bowls as well.
Dredge the balls first in flour, then in egg and finally in the breadcrumbs. Set each finished ball on a parchment lined tray and allow them to cool for one hour before cooking.
Fill a large pot with 2 inches of oil and heat until a thermometer reads 350. Working in batches, fry each ball until golden brown, about 4 minutes. Remove from the oil with a slotted spoon and all to drain on paper towels. Season with flaky salt and serve.

Farewell 2019 and Hello 2020
While 2019 comes to a close and the internet is either obsessing over baby Yoda or still trying to figure out what day it is, I’ve been spending time reflecting on the last year. Sure there was impeachment, Kanye became a gospel artist and who will ever forget the great Popeyes versus Chik-fil-a debate of 2019? For me, 2019 was a year of growth, celebration, and hope. Despite all that is wrong in the world, good things did happen and I am happy to have shared in some wonderful, joyous moments.

Top Five Moments of 2019
I became an uncle again! As a tree was crashing through my house, my sister was giving birth to my nephew, Wyatt. The night he was born there was a wind storm moving across Maine and leaving a path of destruction in its trail. Despite the damage and work that had to be done, Anthony and I were so excited to wake up to the good news. Wyatt is proof that every dark cloud has a silver lining.
Anthony and I celebrated our first anniversary. I’m not sure how I convinced him to stay with me after all this time, let along marry me, but he did and here we are. We celebrated with seared duck breast and a Bianca Del Rio show. Mrs. Kasha Davis was there too.
I finally gave up all forms of nicotine. This one was a long time coming. I started smoking when I was 18 and smoked on and off up until January when I bought a Juul. I ripped on that Juul all summer long, not knowing how bad it actually is, until this fall when I switch to Nicorette and eventually gave that up as well. I’ve tried quitting multiple times in the past however this time feels like the final time. I couldn’t be happier and I know everyone around me is happy too.
I took over managing my family business. Despite how much I enjoyed working at the bank, nothing compares to managing the family business. I’ve sent every summer of my life on Cabbage Island and have worked there in some capacity since I was 13. Working alongside my parents, uncle, aunts, cousins and my 99-year-old grandmother is a rewarding way to spend a summer. It helps that I get to drive a boat every day too.
My sister opened her own business. This one technically happened last year but The Collective really took off this year! My sister opened an artist collaborative, gallery and workspace in late 2018 and has been working hard to build the business all year. I am so proud of what my sister has accomplished and even more thrilled it is in the same space as our parents’ old flower shop.

Goals for 2020 and Beyond
Learn to exercise for joy. Exercise for me has always been about metrics. I have long obsessed over how much I weigh, how fast I can run a mile and how many pushups I can do. To me, that was the whole point of exercising. To get faster, stronger and thinner. It wasn’t until I was listening to an interview with Kelly McGonigal on 10% Happier with Dan Harris that it occurred to me that I can exercise simply because I enjoy the activity and not because I want to be faster, stronger or thinner. To some, this might seem like an obvious notion but it frankly took me by surprise. You mean to tell me that if I don’t enjoy a certain form of movement, I don’t have to do it?! Where has this advice been all my life!? In 2020 and beyond, I will focus more on finding joy in movement that punishing myself for not running a 6-minute mile.
Deepen my meditation practice. On the same page as enjoying exercise for non-critical reasons, I also plan to deepen my meditation practice. I took Tae Kwon Do lessons for 10 years when I was younger and we always started and ended each class with meditation. At the time, I didn’t understand the benefits but when I found myself on a therapist’s couch a few years ago, he recommended I give it another try. Since then, I’ve been meditating daily-ish and really embraced the practice. I listen to 10% Happier with Dan Harris every week and listen to all the wonderful guests he has on to talk about meditation, its benefits and its place in western civilization. In 2020, I hope to deepen this practice and attend a retreat, even if it’s just a short one. If you haven’t tried meditation, I highly suggest you give it a try. It doesn’t have to be new age and weird, just sit and know you’re sitting.

3. Teach more pasta classes. I taught a pasta and ravioli class this fall at my sister’s store, The Collective and absolutely loved it. I loved it so much in fact that I plan to make a little side hustle out of teaching people of all ages how to make fresh pasta and ravioli. I am probably on the obsessive end of this spectrum but for me, making pasta and ravioli is not only fun but therapeutic and I can’t get enough of it.
4. Share my blog (this one!) with the world. For almost a decade, I’ve talked a big game about wanting to start a cooking blog. I’ve told pretty much everyone I know that it is what I want to do and they have all told me the same thing “that’s great, Ryan. So do it”. Well, a year ago I did. However, I haven’t told a soul about it because publishing this blog and sharing it with people I know is absolutely terrifying. What will my friends think? What about my family? Will the trolls come out of the internet to make fun of the way that I write, the way that I cook or any other fault they may perceive? I simply don’t know. What I do know, is that I’m tired of not trying to follow my passion for food. I’m tired of being scared and I’m tired of seeing other people do what I know I can do. So here it is. If you like this blog. Share it. Tell your friends, tell your mom, tell the stranger on the bus.
5. Start planning a family with Anthony. This is the one I am the most excited about in 2020. I have wanted to be a father for as long as I can remember. I remember being young and my mom forcing me to get rid of old clothes that didn’t fit and toys I didn’t play with and reminding her that my future children might appreciate the broken Power Rangers doll I had to throw away - I was 9. This year, Anthony and I are taking the first step towards becoming fathers. We are open to all paths to parenthood and are exploring everything from fostering to surrogacy. We are still a few years away from bringing a little one into our lives but I’m SO excited to get this ball rolling.
Whatever your hopes and dreams are for 2020, I hope you find the strength to be vulnerable and go out and get them. Happy New Year.

Delicata Squash Salad
I love, love love delicata squash. In my opinion, it is one of the most underappreciated winter squashes out there. The flavor is sweet, texture is smooth and the skin is so tender that you don’t have to peel these babies.
This salad is one of my latest favorites. it is light, fresh and easy to pull together. Crunchy. Sweet. Savory. Full Bodied. All ways you could describe this salad and me.
I’ll be making this for the family this year when I go back to Ohio for Christmas along with a few other little numbers.

Ingredients
1/4 cup tahini paste
1 tablespoon olive oil
2 cups plain yogurt
1 delicata squash, seeded and sliced 1/2 inch thick
1 tablespoon olive oil
salt and pepper to taste
1/2 teaspoon cinnamon
4 cups arugula
1/4 cup pomegranate arils
1/4 cup salted pumpkin seeds
1/2 cup parsley, chopped
1/4 cup chopped mint
Directions
Make the tahini yogurt by combining the tahini paste, yogurt and olive oil in a food processor.
In a large bowl, toss the squash, olive oil, cinnamon, salt and pepper in a large bowl. Spread evenly on a cookie sheet and roast 20 minutes at 425. Remove from the oven and allow to cool slightly.
On a platter, spread the tahini yogurt evenly over the surface and top with the arugula.
Toss the squash with half of the herbs and pile over the yogurt. Top with pomegranate arils and pumpkin seeds. Garnish with the remaining herbs and finish with some flaky sea salt.

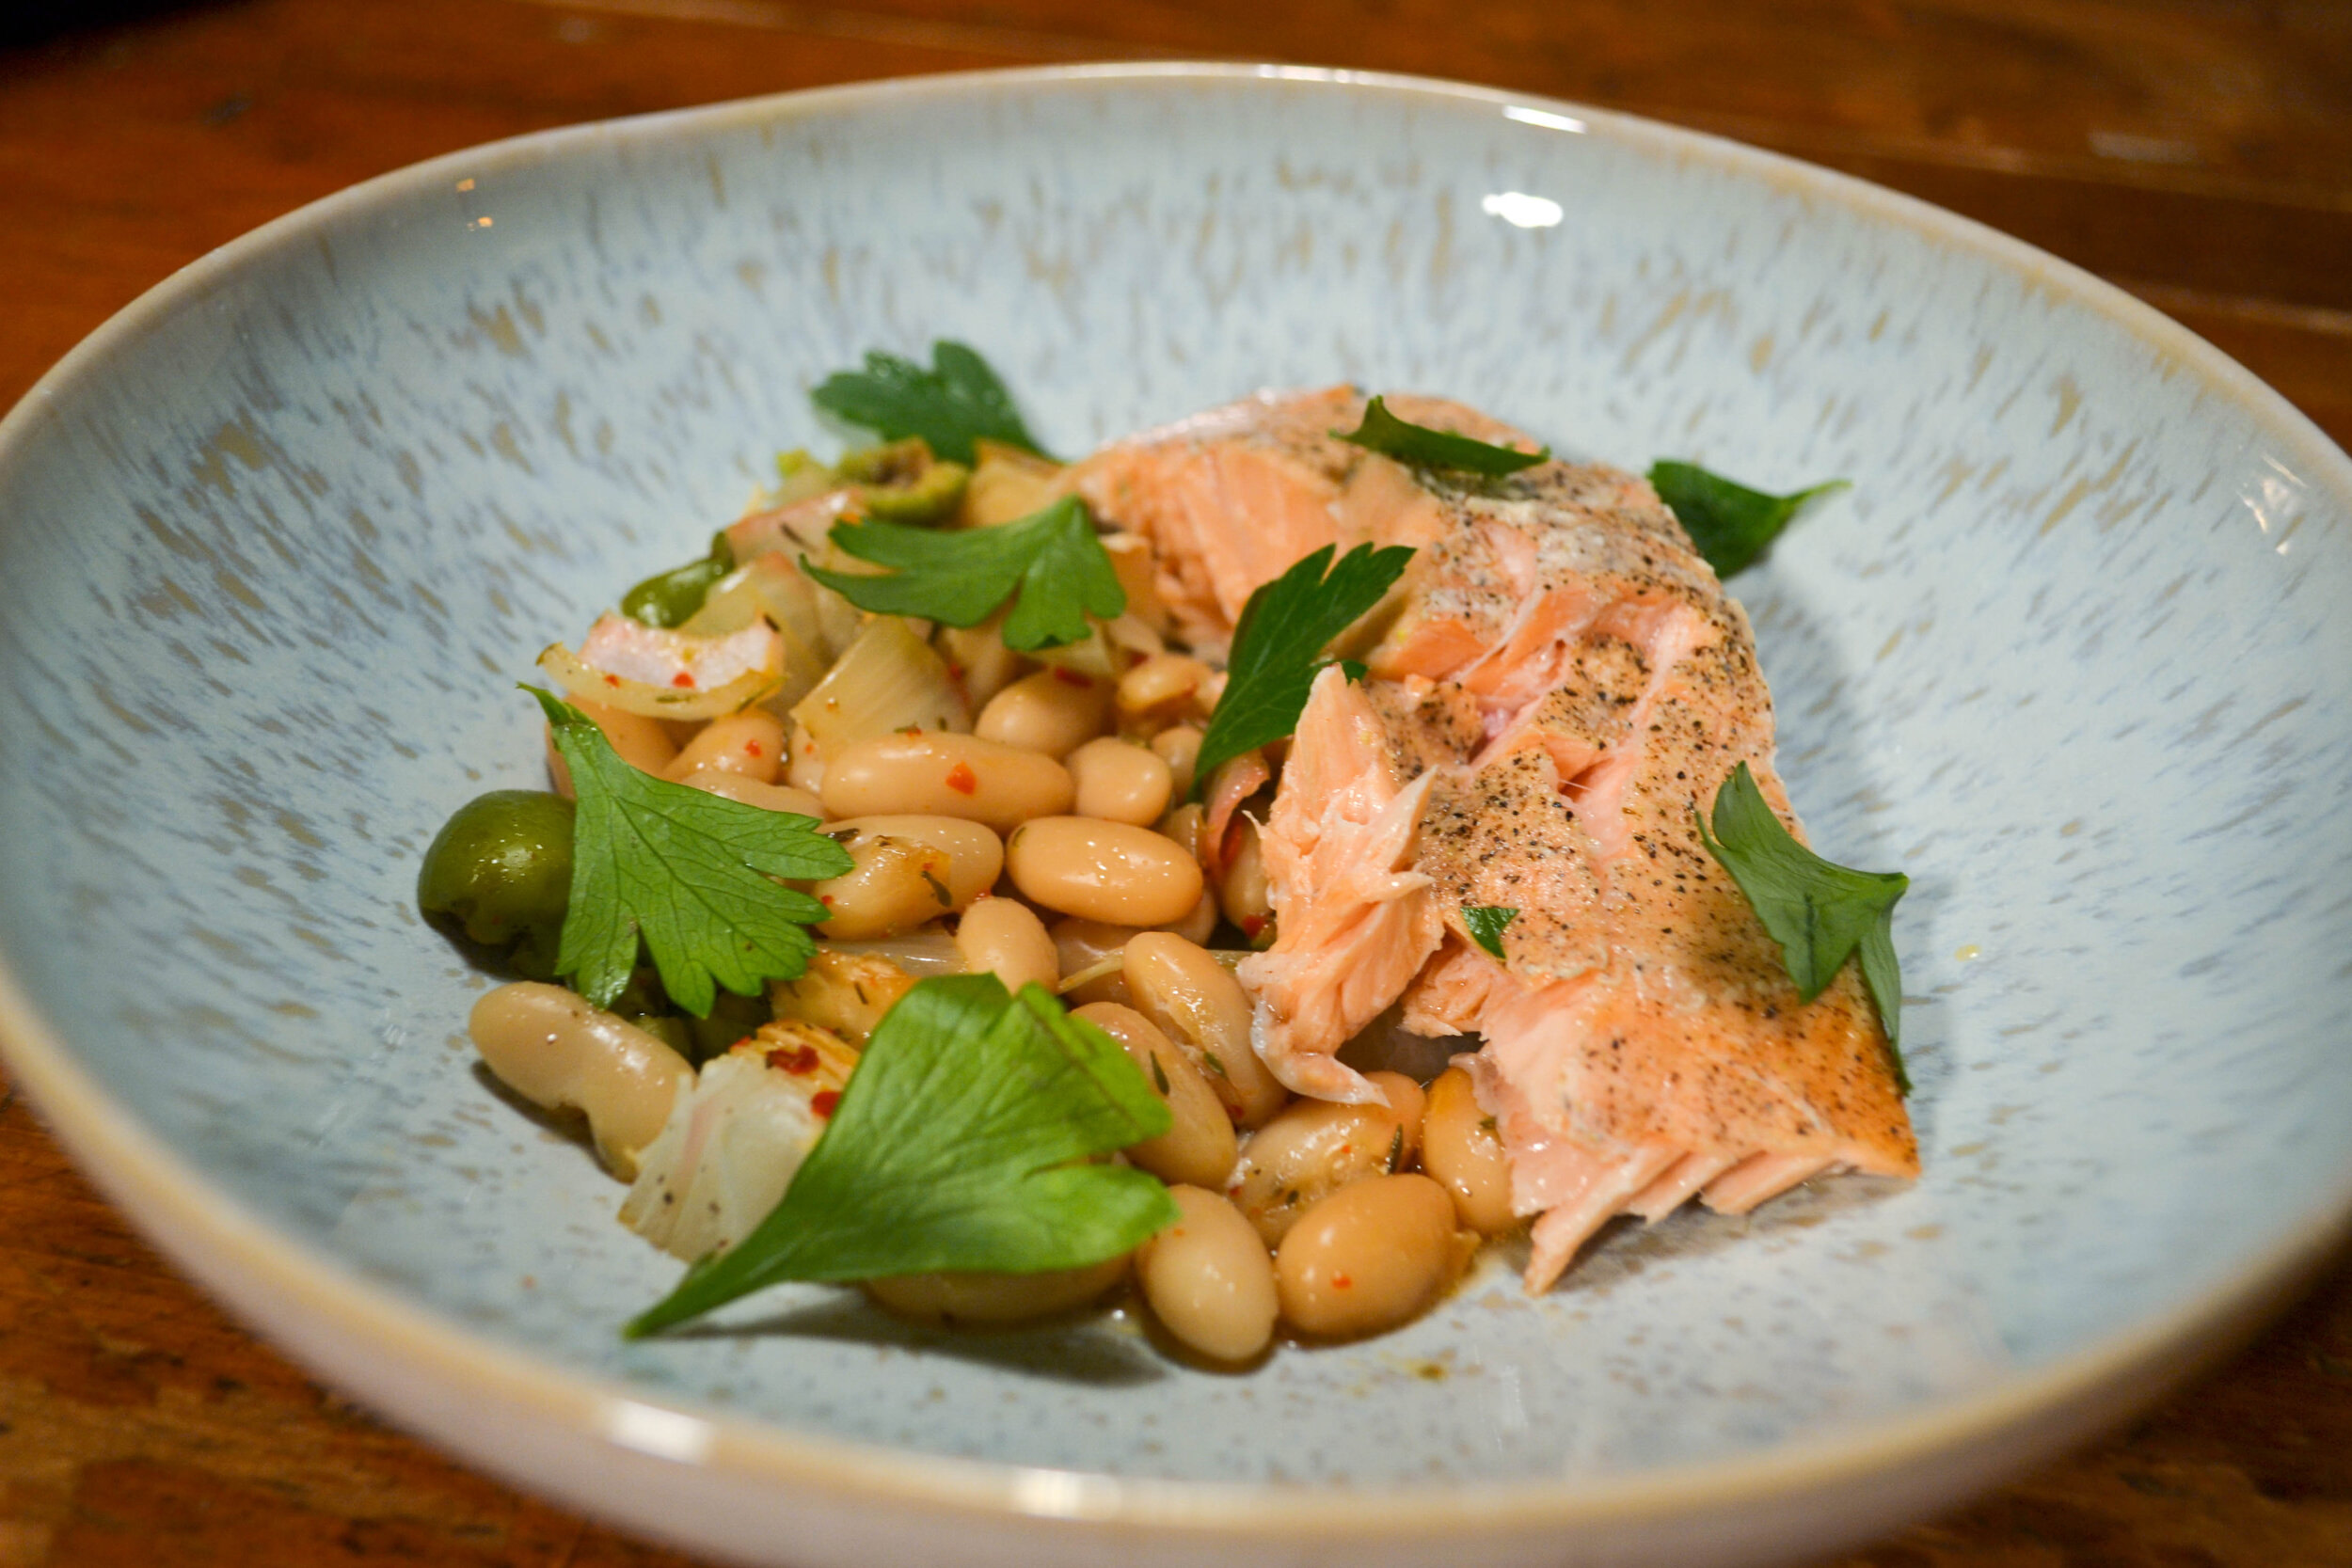
Roasted Salmon with Cannellini Beans and Lemon
Roasted Salmon with Cannellini Beans and Lemon
The holidays are upon us and that means many things. Gift giving. Tacky decorations. Oversharing relatives, and (delicious) butter-laden foods as far as the eye can see. While I do really love all the comfort foods of Thanksgiving and Christmas, I can’t help but feel the need to lighten things up in between. This recipe is one of my go-tos not just because of how delicious it is but because it is light-ish and I can write it off as a healthy weeknight dinner that comes together quickly and with little effort.
Ingredients
1 can cannellini beans
½ cup Castelvetrano olives, chopped
½ cup white wine
4 tablespoons butter
1 teaspoon dried thyme
1 yellow onion, finely chopped
2 garlic cloves, diced
1 teaspoon red pepper flakes
1 lb salmon
2 lemons, thinly sliced
salt and pepper, to taste
Directions
1. Preheat the oven to 450
2. Combine the beans, olives, wine, butter, thyme, onion, garlic, and red pepper flakes in a casserole dish. Carefully arrange the salmon and top with the lemon slices.
3. Bake 15 minutes or until the salmon is cooked through and flakes easily with a fork.

How to Make a Wreath

Wreaths are one of my favorite things to make during the holidays. Granted, I am a bit of a nut when it comes to decorating for the holiday season. Fresh wreaths and garlands not only add festive touches to your home but make the room smell absolutely wonderful! I was reminded of the source of my love of all things evergreen while back in Ohio this fall. Growing up, my mom would have piles and piles of fresh pine in the courtyard at her shop. Though she has since sold her business, the piles in the courtyard remain. My sister, Lindsay, opened her own store in the same space as our mom’s and now teaches workshops along with 18 other artists at The Collective.
Decorating this time of year calls for pulling out all your best tricks. For Anthony and me, that means wreaths, garlands, centerpieces and pine arrangements galore. Every room gets something, and the result is a festive and aromatic home.
Despite what you might think, making a gorgeous evergreen wreath is not difficult. All you need is some fresh material, floral wire, and a little patience.
The first step in making your home a holiday wonderland is to find some fresh greens, fortunately, this time of year they are in almost every store on the block. You won’t have to go far to find fresh greens, but it is my recommendation that you start with a local garden center or flower shop. The greens you will likely find there are going to be fresher, higher quality and in many cases, locally sourced. I like to work with two or three different types of greens to really get as much texture and contrast as I can. In the photos below, I am working with balsam fir and white pine, two common and easily sourced types of evergreen. Other options include Carolina Sapphire, cedar, boxwood, magnolia leaves and more.
When it comes to making wreaths, you have a couple of options. You will need to select a base for your wreath and while either option will give you a great foundation, the real difference is in how difficult they are to work with. Your two options for a wreath base are a grapevine wreath or a wireframe.
Grapevine wreaths are exactly what they sound like; dried grapevines that are coiled, tied and dried. They are a dependable and sturdy base that I find the easiest to work with. To make a wreath with a grapevine base, simply shove the greens wherever you want them and voila! You have a wreath.
Metal frames, on the other hand, are a little more cost-effective. Most garden centers and flower shops us simple metal hoop wreaths because they are cheaper, giving them a better margin on their sale.
This year, Anthony and I made one of each. He really likes asymmetrical wreaths whereas I prefer a fuller and more uniform look. Let’s start with the grapevine wreath.

Grapevine Wreaths
Start by hanging your wreath on a door, wall or some other vertical space where you can work. Wreaths always look different hanging than they do when they are hung so I always work vertically.
Next, cut your greens down to 6 – 8-inch segments and make piles of each type of green you use.

Now you’re ready to start building your wreath. Start with one green type of green and work your way around the circumference of the wreath until you have base layer down. Simply stick the woody ends of the greens into the tightly wound base and work in a circular motion. Next, add your white pine, working in the same circular pattern as before. Keep going in this fashion until you’re satisfied with your piece.
As mentioned, I love grapevines for their ease of use and versatility. You can make a wreath as full or thin as you wish, and it will more than likely look great. I made a wreath with balsam, white pine and silver-dollar eucalyptus that turned out beautifully thanks to the differing textures and scale of the foliage.


Metal Frames
For a metal frame, start by cutting your greens into pieces that are all about 6 – 8 inches in length.
Next, make small bundles of greens, usually 3 or 4 stems per bundle, and tightly wire them together at the base. These bundles will be wired onto the metal frame when you start to assemble the wreath so it is important to make all your bundles ahead of time.


Once you’ve bundled all your greens, it is time to start assembling. Take your first bundle and with a paddle of floral wire, tightly wire it onto the frame by going around the entire thing a few times. Now, ad your second bundle and without cutting your wire, wrap it around the whole frame again. Continue this method until you’ve completely covered the frame and then cut the wire, affixing it to the frame at the end.


No matter what avenue you choose, I hope your wreaths turn out to be beautiful. Don’t sweat about making the “perfect” wreath, even pros get frustrated at times. The important part of this project is to simply enjoy yourself and the company you’re with. It is the holiday season after all so spread some cheer, make a wreath and adore it no matter what!

Kale Caesar Salad with Roasted Chickpeas
With Thanksgiving squarely in the rearview mirror, its time to focus our attention on the other big day. Christmas is upon us and with it comes all the sweets and guilty pleasures we can muster. In our house, Anthony and I are almost done with everything from Thanksgiving except the extra turkey my mom sent me home with from Ohio. Holiday parties are filling up our calendars and there are plates of cookies as far as the eye can see. In addition to all this, the malls are a madhouse and
To keep things relatively healthy and light, I’ve been keeping this Kale Caesar Salad on constant rotation this year. Though kale is past its hype, I still love it and think it deserves a place on every table. My dad isn’t convinced, he thinks it tastes like grass. By gently massaging the kale with salt, the greens end up very tender, not grassy and a bold bright green.
This recipe seems like a lot when you look at the instructions and is indeed a multistep process however the resulting salad is sure to wow your guests.

Ingredients
For the Chickpeas
1 (15 oz) can chickpeas
1 tablespoon olive oil
1 teaspoon paprika
salt and pepper to taste
For the Croutons
4 dinner rolls, torn into bite-size pieces
1 tablespoon olive oil
1/2 teaspoon garlic powder
1/8 teaspoon oregano
1/8 teaspoon thyme
For the Salad Dressing
2 tablespoons anchovy paste
1 tablespoon dijon mustard
2 teaspoons garlic paste
2 tablespoons lemon juice
2 egg yolks
2 tablespoons grated parmesan
salt and pepper to taste
2 cups olive oil
For the Salad
1 bunch kale
1 tablespoon salt
1/4 cup shredded parmesan
Directions
Preheat the oven to 400
Rinse the chickpeas and pour them on a kitchen towel. Pat them dry and remove any loose skins. Drizzle with olive oil and toss with the salt, pepper, and paprika. Roast the chickpeas on a cookie sheet for 20 minutes or until they are crispy.
Toss all the ingredients for the croutons in a large bowl and pour onto a cookie sheet. Bake at 400 until crispy, about 8 minutes.
IN a medium bowl, whisk together the anchovy paste, garlic and mustard, add half of the lemon juice and egg yolks, whisking until smooth. Add the remainder of the egg, parmesan, salt, and pepper then gradually add the oil, whisking constantly.
Wash the kale and remove the thick center stems and veins. Tear the leaves into bite-size pieces and toss with salt. Gently massage the kale until it releases a distinct grassy smell, softs and turns bright green, about 3 minutes.
In a large bowl, toss the chickpeas, croutons, dressing, and kale together, topping with the shredded parmesan cheese and serve.