
Spiced Chocolate Chip Cookie Bars
I spent yesterday driving home to Ohio. My friends all think I’m crazy to drive instead of fly but I would rather spend my day in my car with my own music under my control than sit around in an airport full of strangers and overpriced food and booze. Trust me, I’ve done my fair share of drinking in airports and its not a pretty sight.
Interstate 90 is very familiar to me. This is the route my family and I would take every summer to get to Maine and I have come to know it in all seasons and all conditions. I’ve almost wrecked with my dad during a mid-April snow squall in upstate New York and I’ve seen the trees coming back to life when I drove out in May a few years ago.
This year, I will be spending my first Thanksgiving in Ohio since I moved to Maine in 2012. I’ll be back for ten days and will be catching up with family and friends and even teaching a workshop at my sister’s store, The Collective. Most importantly, I’ll be spending plenty of time with my niece and new nephew. It is a trip I’ve been looking forward to for months.
To save myself from the blight of eating fast food all day, I made sure to prepare a cooler full of food for my trip. This included chicken salad croissants, apples, nuts, cheese, and my favorite: spiced chocolate chip cookie bars. After all, diets don’t count when you’re driving for 12 hours alone, right?
These cookie bars are no joke. I love them. Anthony loves them. You’ll love them too. These are the result of a gamble taken in the kitchen a few months ago. I might have had a few cocktails before deciding I wanted something sweet to round out my evening. I’m a big fan of salty-sweet-spicy combos and felt bold. As I was sifting the flour and baking soda, I grabbed a bottle of cinnamon and a bottle cayenne and did my best Emeril impression and BAM. Spiced chocolate chip cookies were born. Truth be told, this first batch was OK but not great. I went a little heavy on the cinnamon and not heavy enough on the cayenne. Fast forward through a few more iterations and a lot of note-taking and a recipe is born.


Spiced Chocolate Chip Cookie Bars
Ingredients
8 T butter, room temp
1/2 C granulated sugar
1/2 C brown sugar
1 egg, room temp
2 t vanilla
1¼ C flour
1/2 t baking soda
1/2 t kosher salt
1/8 t cinnamon
¼ t cayenne
1 C chocolate chips
Directions
1. Preheat oven to 350
2. Combine the flour, salt, baking soda, cinnamon and cayenne in a large bowl and sift once.
3. In a stand mixer, beat the butter and both sugars until creamed. It should look light and fluffy, about 3 minutes.
4. Add the egg and vanilla and mix until well combined.
5. Slowly, add the flour in batches. Mix until smooth. Fold in the chocolate chips and pour into a greased pan. Bake 20-25 minutes, remove from oven and cool on a wire rack.

Forcing Bulbs for Winter
We all know fall is the time to plant bulbs for next year. But in Maine, we’ve reached the end of our planting season and I still have bulbs that never made it into the ground. Translation: I never intended these for the ground.
You see, winters in Maine are long, dark affairs. Most of our foul weather doesn’t come until February and March. While the rest of the country is beginning to thaw, Maine is preparing for the deep freeze. That’s why I’m OK with waiting until now to start thinking about bulbs. It might be another 6 months before I even see another plant flowering outside. Forcing bulbs gives me the joy of flowering bulbs, months before I would see them.
This is a project I take on every year and once you know the basics, it is a fun and easy project to tackle.
Choosing Your Bulbs
Bulbs come in tremendous variety. There are over 3,000 types of tulips alone. Our obsession with these early monikers of spring goes back centuries. During the mid-seventeenth century, the Dutch used bulbs as currency.
Because bulbs are so varied, take time to find a special and unique specimen to force. After all, if you’re going to wait for them to bloom, they might as well be special.
When selecting your bulbs, be sure to choose specimens that are firm, free of mold and any soft spots.
About Chilling
Some bulbs need to go through a dormancy period before blooming. To do this, chill the bulbs to mimic winter conditions. Chilling bulbs push them into their dormancy cycle and prepare them to bloom. The ideal temperature range for chilling bulbs is between 25 and 35 degrees, making an unheated garage, shed or root cellar ideal. Some people store their bulbs in a refrigerator but use caution here, fruit and vegetables give off ethylene gas that can damage your bulbs, causing them to either not bloom or rot all together.
During this time, keep an eye on the soil and if the soil feels
When the chill time is up, you will bring them inside to jump-start the blooming process. Below are some bulbs I have had success forcing in the past and recommend to others.
Bulbs that Need Chilling
Tulips need 14 - 20 weeks to chill before blooming.
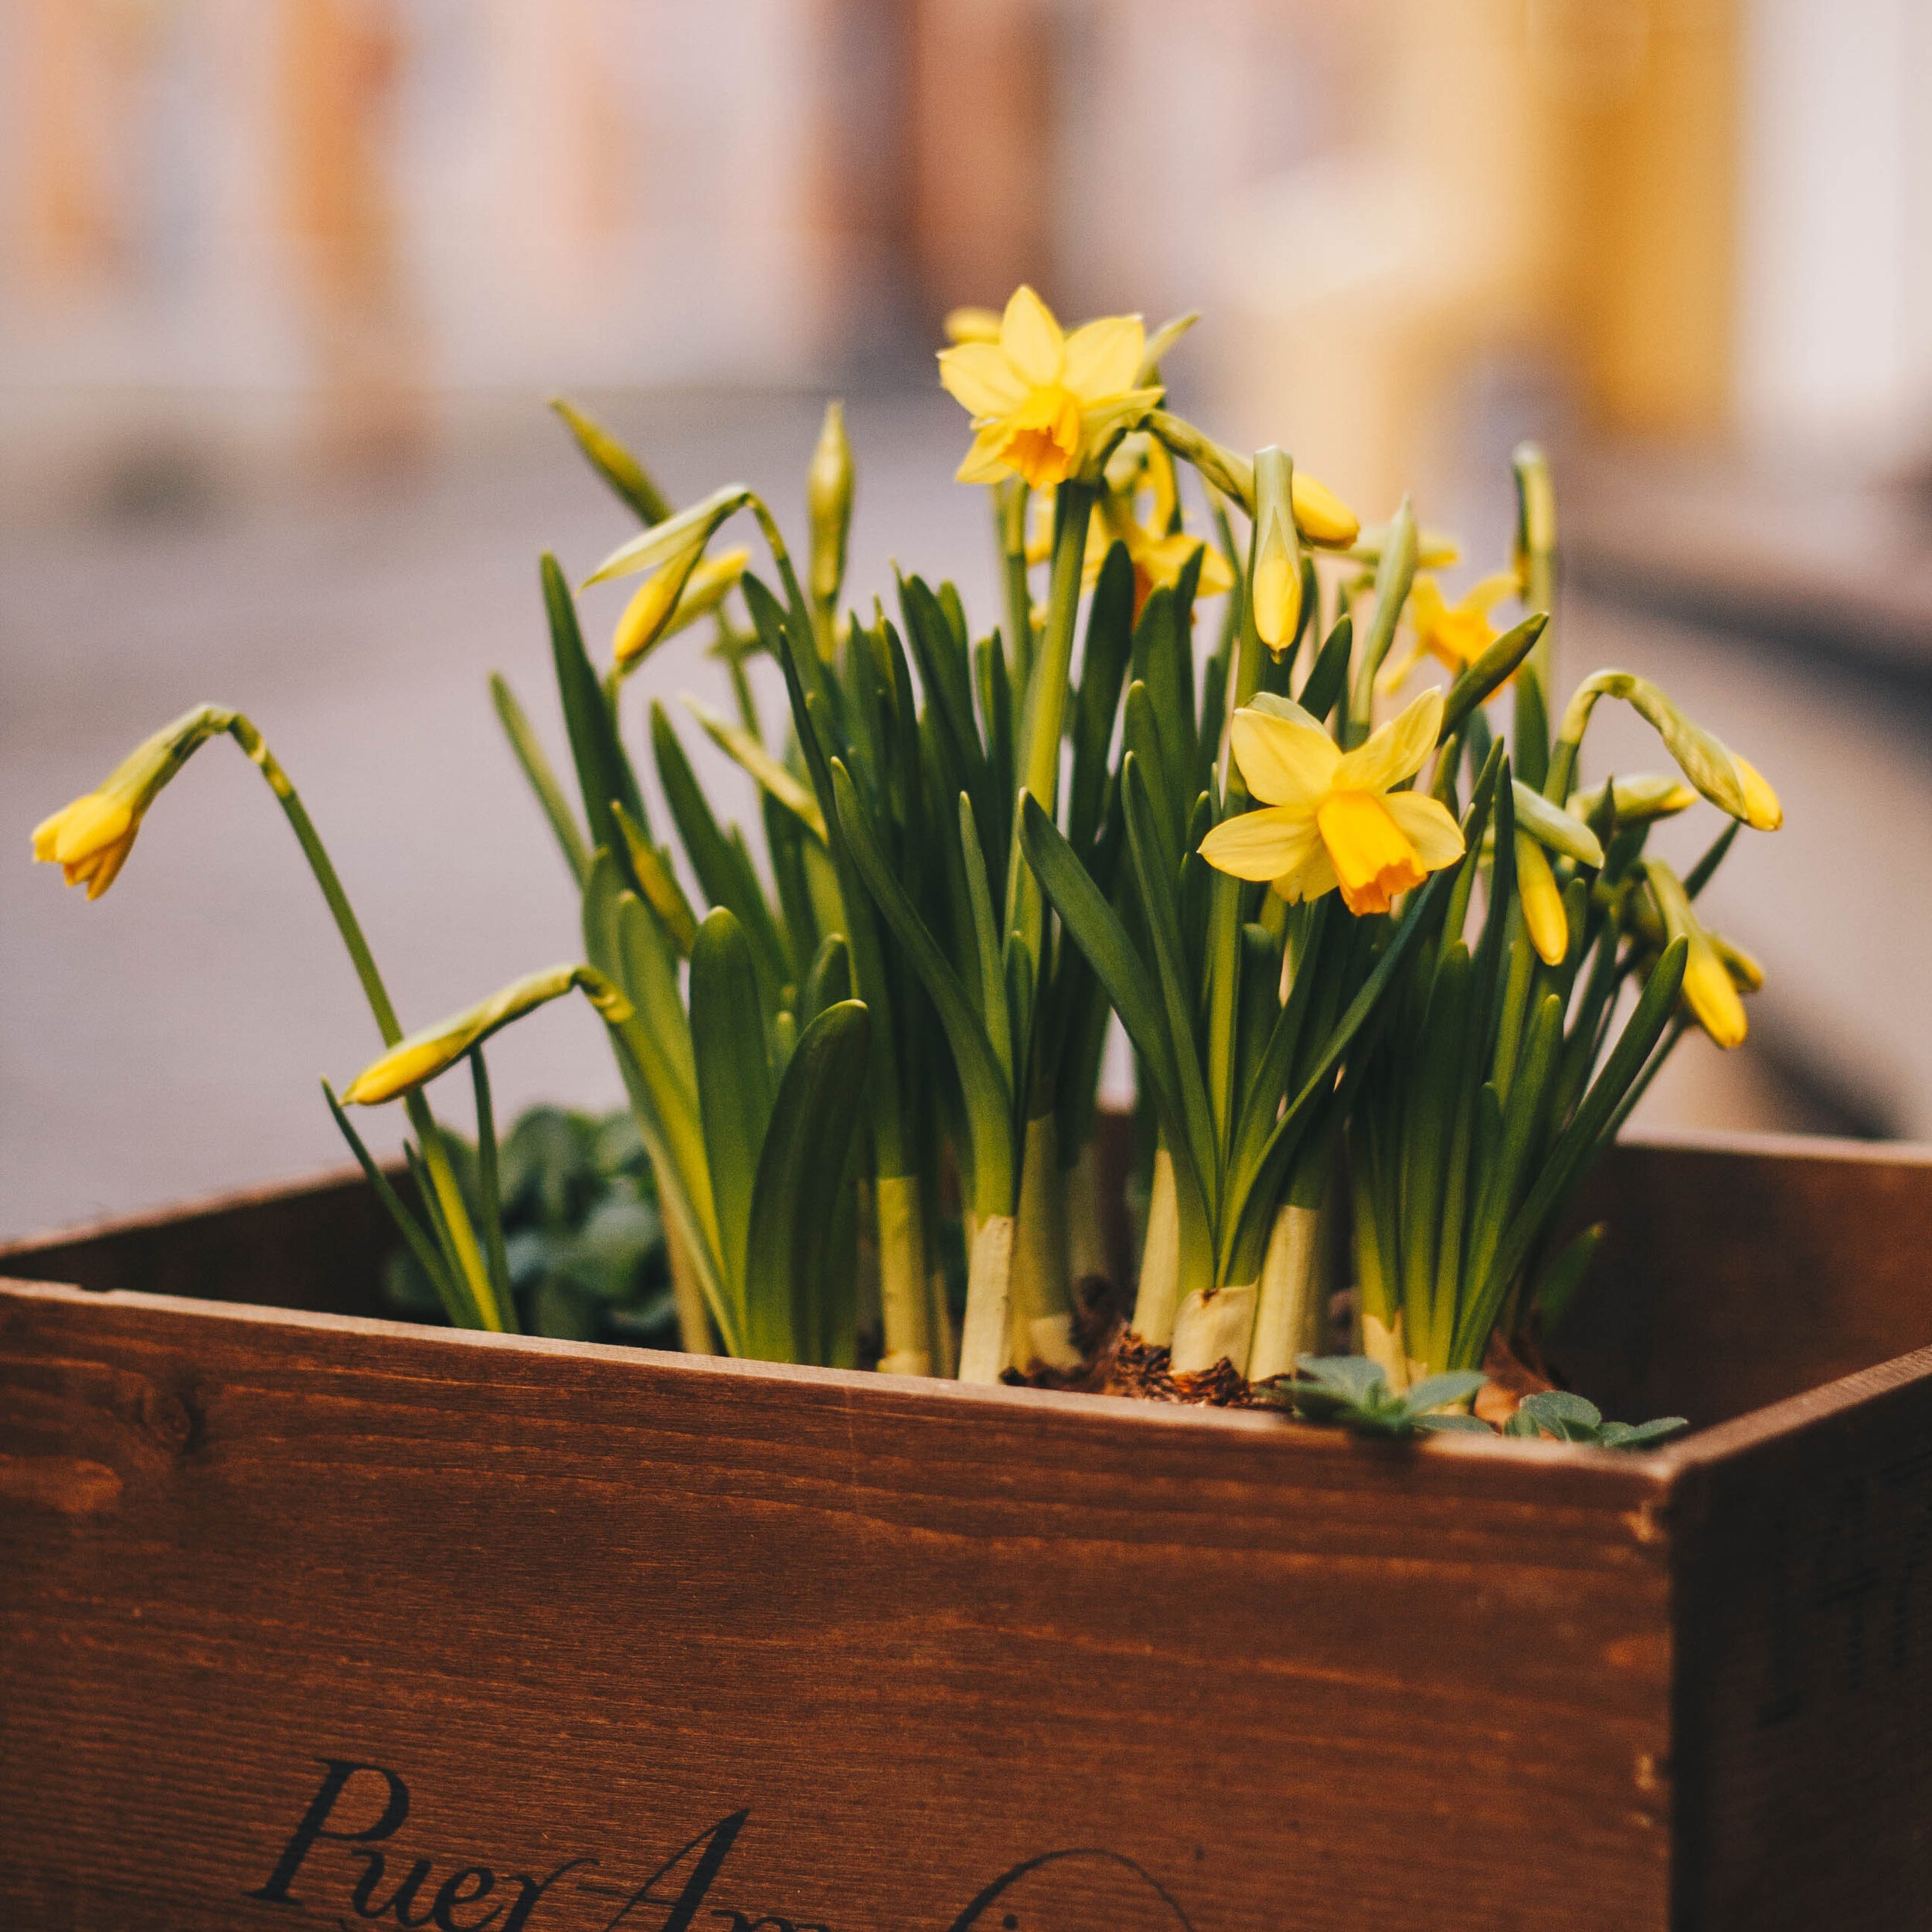
Daffodils need 15 - 17 weeks to chill before blooming.
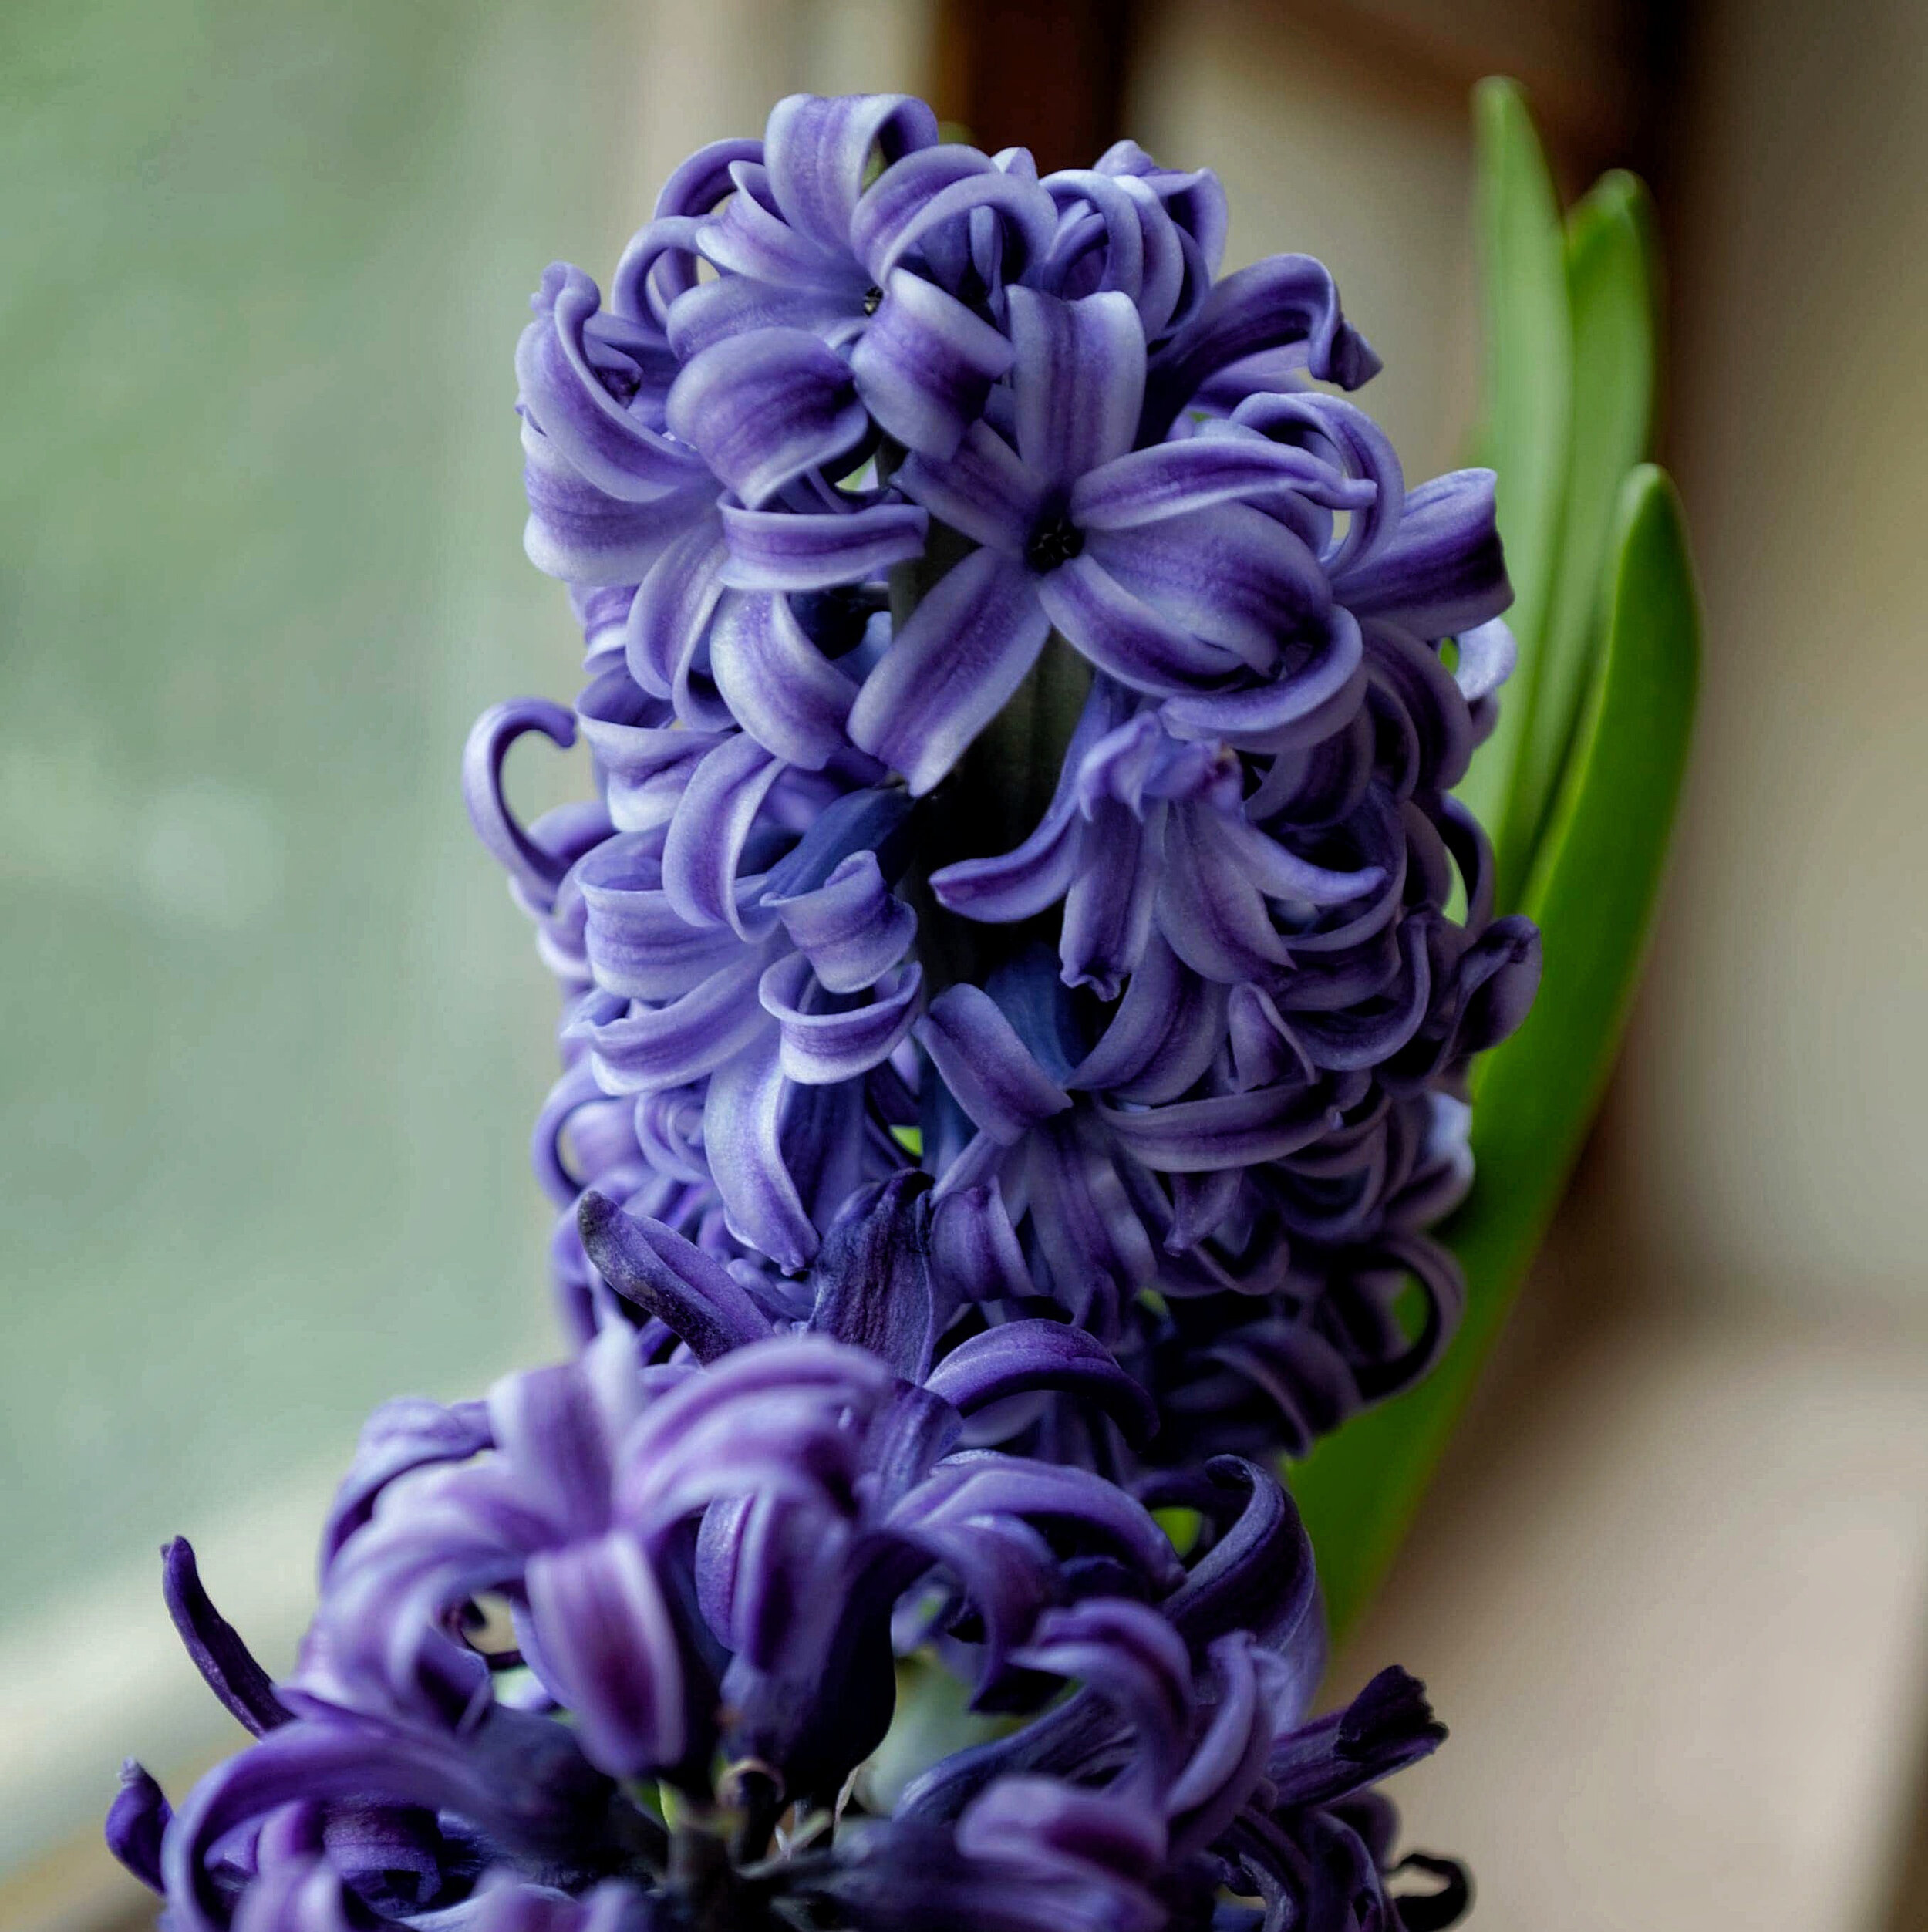
Hyacinths need 11 - 14 weeks to chill before blooming.
Snowdrops need 14 weeks to chill before blooming.
Grape Hyacinths need 14-15 weeks to chill before blooming.




Crocus need 15 weeks to chill before blooming.
Bulbs That Do Not Need Chilling
For those who are not patient enough to wait the full 4 months, it takes to force bulbs, you are in luck. Not all bulbs need a chilling time and you can force them all winter long with great success. Bulbs such as amaryllis, paperwhites, ranunculus, and anemones do not need a chilling period.




Choosing Your Method
There are two main ways of forcing bulbs indoors: water or soil and your selection of bulbs will determine which method you use.
Water Forcing
Bulbs that respond well to the water method include amaryllis, paperwhites, daffodils, and hyacinth. Other bulbs, such as tulips, fritillaria, and crocus are best down using soil.
Select a container
Most of us have seen bulb jars for sale around mid-winter. These are typical for forcing hyacinths as they have large, heavy bases that anchor the plant. The taller your plant is in full bloom will dictate how tall or heavy your container needs to be. Large glass vases are great for this as they provide support as well as the visual appeal of seeing the roots form.
Position and Plant the bulbs
Always position your bulbs with the pointy end up. If you are using a bulb jar, fill the bottom with water until it is no more than ¼ inch away from the bottom of the bulb. Do not let the bulb sit in the water, it will rot.
If you are using a vase, line the bottom with gravel, marbles or stones and rest the bulbs on the material. Fill the vessel with water until within ¼ inch of the bottom of the bulb.
Chill the Bulbs
As mentioned, chilling your bulbs is essential if you want them to bloom. Ideal locations include unheated garages, root cellars or, sheds. Refrigerators also work well for chilling. The warmest you want your bulbs to be during chilling is 40 degrees. It is best to keep them at or below freezing as this is what their conditions would be like outside.
Amaryllis and paper-whites do not need chilling. Set them in a sunny window until buds appear, then move them to a cooler location out of direct sunlight.
Soil Forcing
Most bulbs forced inside use soil or some other potting medium. It is a simple process and very straight forward
Select the Right Container
When forcing bulbs in soil, choose a container with ample drainage so the bulbs are not sitting in soggy soil. Terra cotta is my preference but you can also use ceramic or even plastic pots if you have some laying around. This is a great opportunity to showcase your flea market and vintage store finds. If you have a container you wish to use that does not have holes in the bottom, line the bottom with gravel and water.
Position and Plant
Fill the bottom third of the container with soil. Place the bulbs pointy end up. A general rule of thumb is 1 bulb per inch in diameter. If you have a 6-inch pot, you can fit 6 tulip bulbs in it. Cover the bulbs with potting soil so that the tips are poking out of the soil. Water and set aside while you pot the rest of your bulbs.
Chill the Bulbs
Place your bulbs in your desired location for the chilling period and check on them regularly. When the top layer of soil is dry, water the bulbs. When the chilling time is up, bring them inside and force them out of dormancy.
Coming out of dormancy
Regardless of what method you choose to force our bulbs, once they come out of the chilling period, it is time to bring them into a warmer environment.
Start with a warm but dim environment such as under a table or in a closet. Once the bulbs have put out 3 – 4 inches of growth, place them in a bright, sunny spot such as a south-facing window. After about 3 weeks, your plants should be putting out buds.
When your plants put on their buds, move them to a location where they are out of direct sunlight and away from drafts or heating vents. Here, they will bloom and the consistent temperature and lack of direct sunlight will help the plant keep its bloom longer.
Replant Your Bulbs
While you can’t force a bulb to bloom twice in one season, when you’re done with your forced bulbs, plant them outside and they will delight you again next spring with the snow melts and warm weather returns. Over time, some bulbs will naturalize themselves and spread. We planted a patch of daffodils on the island decades ago that have found a happy home on an east-facing slope where they bloom each spring.
Conclusion
Forcing bulbs is a great way to bring nature inside and presents great opportunities to decorate around your home. Place the forced bulbs in unique containers and use them as a centerpiece for Easter or any spring celebration. Better yet, chill a few extras and give them to a friend or neighbor. This is an easy and fun project that is accessible to all ages and abilities.

Aunt Ruth's Wild Rice
Last spring, my mom gave me two tins of recipes from her Aunt Ruth, her mother, and her grandmother. Of these three women, I only knew Great Aunt Ruth. My grandmother and great grandmother passed long before I was born.
In these tins are countless index cards with handwritten, pasted and otherwise documented recipes from the 50s – 70s. I don’t recognize many of the names and the handwriting is foreign to me, but I recognize the recipes. These are the recipes Ruth would make for us around the holidays or when we came to visit. Three Bean Salad. Johnny Marzetti. Oatmeal Cookies. Wild Rice Pilaf.
Since receiving the recipe tins, I’ve been cooking from them here and there. Trying to draw inspiration and connection to women I never met but have always known. One of the recipes I keep coming back to is Aunt Ruth’s Wild Rice. It is simple, starchy and comforting. I remember hearing stories of how special this recipe was “back in the day” from my mom. Wild rice was a luxury in the 1960s, making this recipe one reserved for holidays.
I remember visiting Aunt Ruth when I was young when she still lived in Columbus. Uncle Ron had a big berry and fruit patch in the back yard and there were Lincoln Logs in the basement. I remember her taking me to the zoo and to the park across the street from her house. She was a fashionable and smart woman.
In her later years, Aunt Ruth developed dementia and either forgot who we were or confused us with other figures in her life. These are the hard memories families don’t talk about. Difficult as it may be, I remember lives in their entirety. I can recall all the good times, what she gave me for Christmas when I was 9 and the way her house smelled (it was a good smell).
The way we choose to remember our loved ones after they have gone is a personal experience that we all share. Nobody is a stranger to loss or will be for long. As morbid as that may sound, especially around the holidays, impermanence is real. So, though I may mourn and lament, I celebrate lives lived because that’s all you can do.
The holidays always make me nostalgic and this year is no different. I often wonder what Ruth and my Grandfather would think of the world we live in now. Not the political chaos on television but rather the intimate world of our family. New babies, new spouses. Changes in careers and locations. A lot has happened in the decade that Aunt Ruth and my Grandfather have been gone.
Though Aunt Ruth has been gone for over a decade now, I will always remember her smile and warm embrace. I plan to make this wild rice for the holidays this year and I am certain everyone will remember Aunt Ruth as soon as they taste it.
Ruth’s Wild Rice
Total Time: 1 hour 20 minutes
Prep time: 5 minutes
Cook time: 1 hour, 15 minutes
Servings: 8
Ingredients
2 tablespoons butter
1 yellow onion, diced
2 celery stalks, diced
2 carrots, diced
8 oz portobello mushrooms, chopped
2 cloves garlic, minced
1 cup wild rice, rinsed
½ cup slivered almonds, toasted
3 cups chicken broth
1 teaspoon oregano
½ teaspoon cayenne pepper
salt and pepper to taste
Directions
Melt the butter in a large heavy pot and add the onion, celery, carrots, and mushrooms. Season with salt and cook until the mushrooms are softened. About 10 minutes. Add the garlic and cook until aromatic, about 30 seconds.
Add the rice and cook 2-3 minutes. Add the almonds, broth, oregano, and cayenne. Bring to a boil and cover. Reduce to a simmer and cook for 1 hour and remove from heat. Allow the rice to rest 5 minutes, then fluff with a fork and serve.


Beef Rendang


One of the perks of marrying Anthony is that I have learned so much about his mother’s heritage and side of the family. Anthony’s mom, Hayat, was born in Yemen and is a citizen of Singapore. She’s a fiery little woman with a very direct personality but one of the most caring and loving people I know. On a recent trip to Singapore, I asked her to bring me a cookbook and any ingredients she didn’t think I’d be able to find here in Maine. When she returned, she gave me a great cookbook on Indonesian cooking and recipes. I’ve had it for a few years and have managed to take some traditional recipes, tweak them a bit to work with what’s available here in Maine. Beef Rendang (pronounced: ren-dawn) is one of my favorite recipes I’ve developed from this cookbook and I am making it this year for Hayat’s birthday.
Indonesian cooking is a great medley of flavors and techniques because of its geographic location. Beef Rendang is believed to have been an adaptation of Indian curry when Indian spice merchants came through the area and the locals adapted to the recipe. “Rendang” means slowly which makes sense as this dish does take some time. This dish is heavily spiced and cooked slowly over an entire day until you end up with tender, aromatic beef that melts in your mouth.

Beef Rendang
Ingredients
6 shallots, chopped
3 cloves garlic, diced
2 tablespoons ginger, minced
3 teaspoons chili powder
1 tablespoon turmeric
1 teaspoon cinnamon
3 bay leaves
2 lbs stew beef
2 cans coconut milk
1 cup chicken stock
Directions
In a dutch oven or large pot, heat a little oil and saute the shallots until soft, about 3 minutes.
Add the garlic, ginger, turmeric, chili powder, cinnamon and bay leaves and cook until aromatic. About 2 minutes
Add the beef to the pot and stir to coat. Add the coconut milk and chicken stock, stirring to combine. Cover with a heavy lid and simmer over medium heat 6-7 hours or until the meat is tender.
Serve with rice and garnish with lime and cilantro.

Butternut Squash Ravioli
One of my favorite meals is ravioli. To be honest, I love pasta of all kinds but ravioli and other stuffed pasta steal my heart time after time. There’s something about the freedom to fill them with whatever my heart desires that I just love.

I’ve been working at a local farm this fall and its pumpkin season. We have pumpkin, squash and gourds of all shapes and sizes so I’ve been feeling inspired. With my workshop coming up, I decided to pull the pasta roller out and work through a couple recipes and techniques. After flipping through my book of recipes, I settled on this classic stand by.
Ravioli is best reserved as a project recipe. Not that you can’t crank it out on a busy weeknight but it is not as quick as other options. That is why I reserve this for a nice Sunday afternoon when I don’t have to feel rushed to get something on the table. I can have a glass of wine, roll some dough and relax to the meditative process of kneading and forming dough.
The toasted almonds in this recipe really give the dish some added depth. If you don’t have almonds on hand, walnuts or pecans would also work well. On a whim, I threw a little orange zest into the burnt butter sauce to highlight the sweetness of the squash and it was great.
Butternut Squash Ravioli
Ingredients
1 small butternut squash, halved lengthwise and seeded
1 tablespoon thyme
1 tablespoon sage
1 onion, peeled and quartered
2 garlic cloves
1/2 teaspoon nutmeg
1/2 cup almonds, toasted
1 cup ricotta
Fresh Pasta Dough
Directions
Preheat the oven to 375
Place the squash in a casserole dish, cut side up and baste with olive oil. Sprinkle the thyme, sage and nutmeg over the squash and season with salt and pepper. Tuck the onion and garlic in and around the squash. Bake for 45 minutes or until soft and tender.
While the squash cooks, pulverize the almonds into a course meal.
Allow the squash to cool a bit, then scoop out the flesh and puree with the onion, garlic and ricotta until smooth, transfer to a bowl and fold in the almonds. Allow the filling to cool slightly then fill a piping bag.
Cut your pasta into 8 pieces and roll out until about a ¼ thick. Then run the pasta through your rolling machine until 1/16 inch thick (mine is setting #4)
Lay your pasta sheets out on a cutting board and pipe your filling on the bottom half of the sheet. The filling should be about the diameter of a quarter and ½ inch thick.
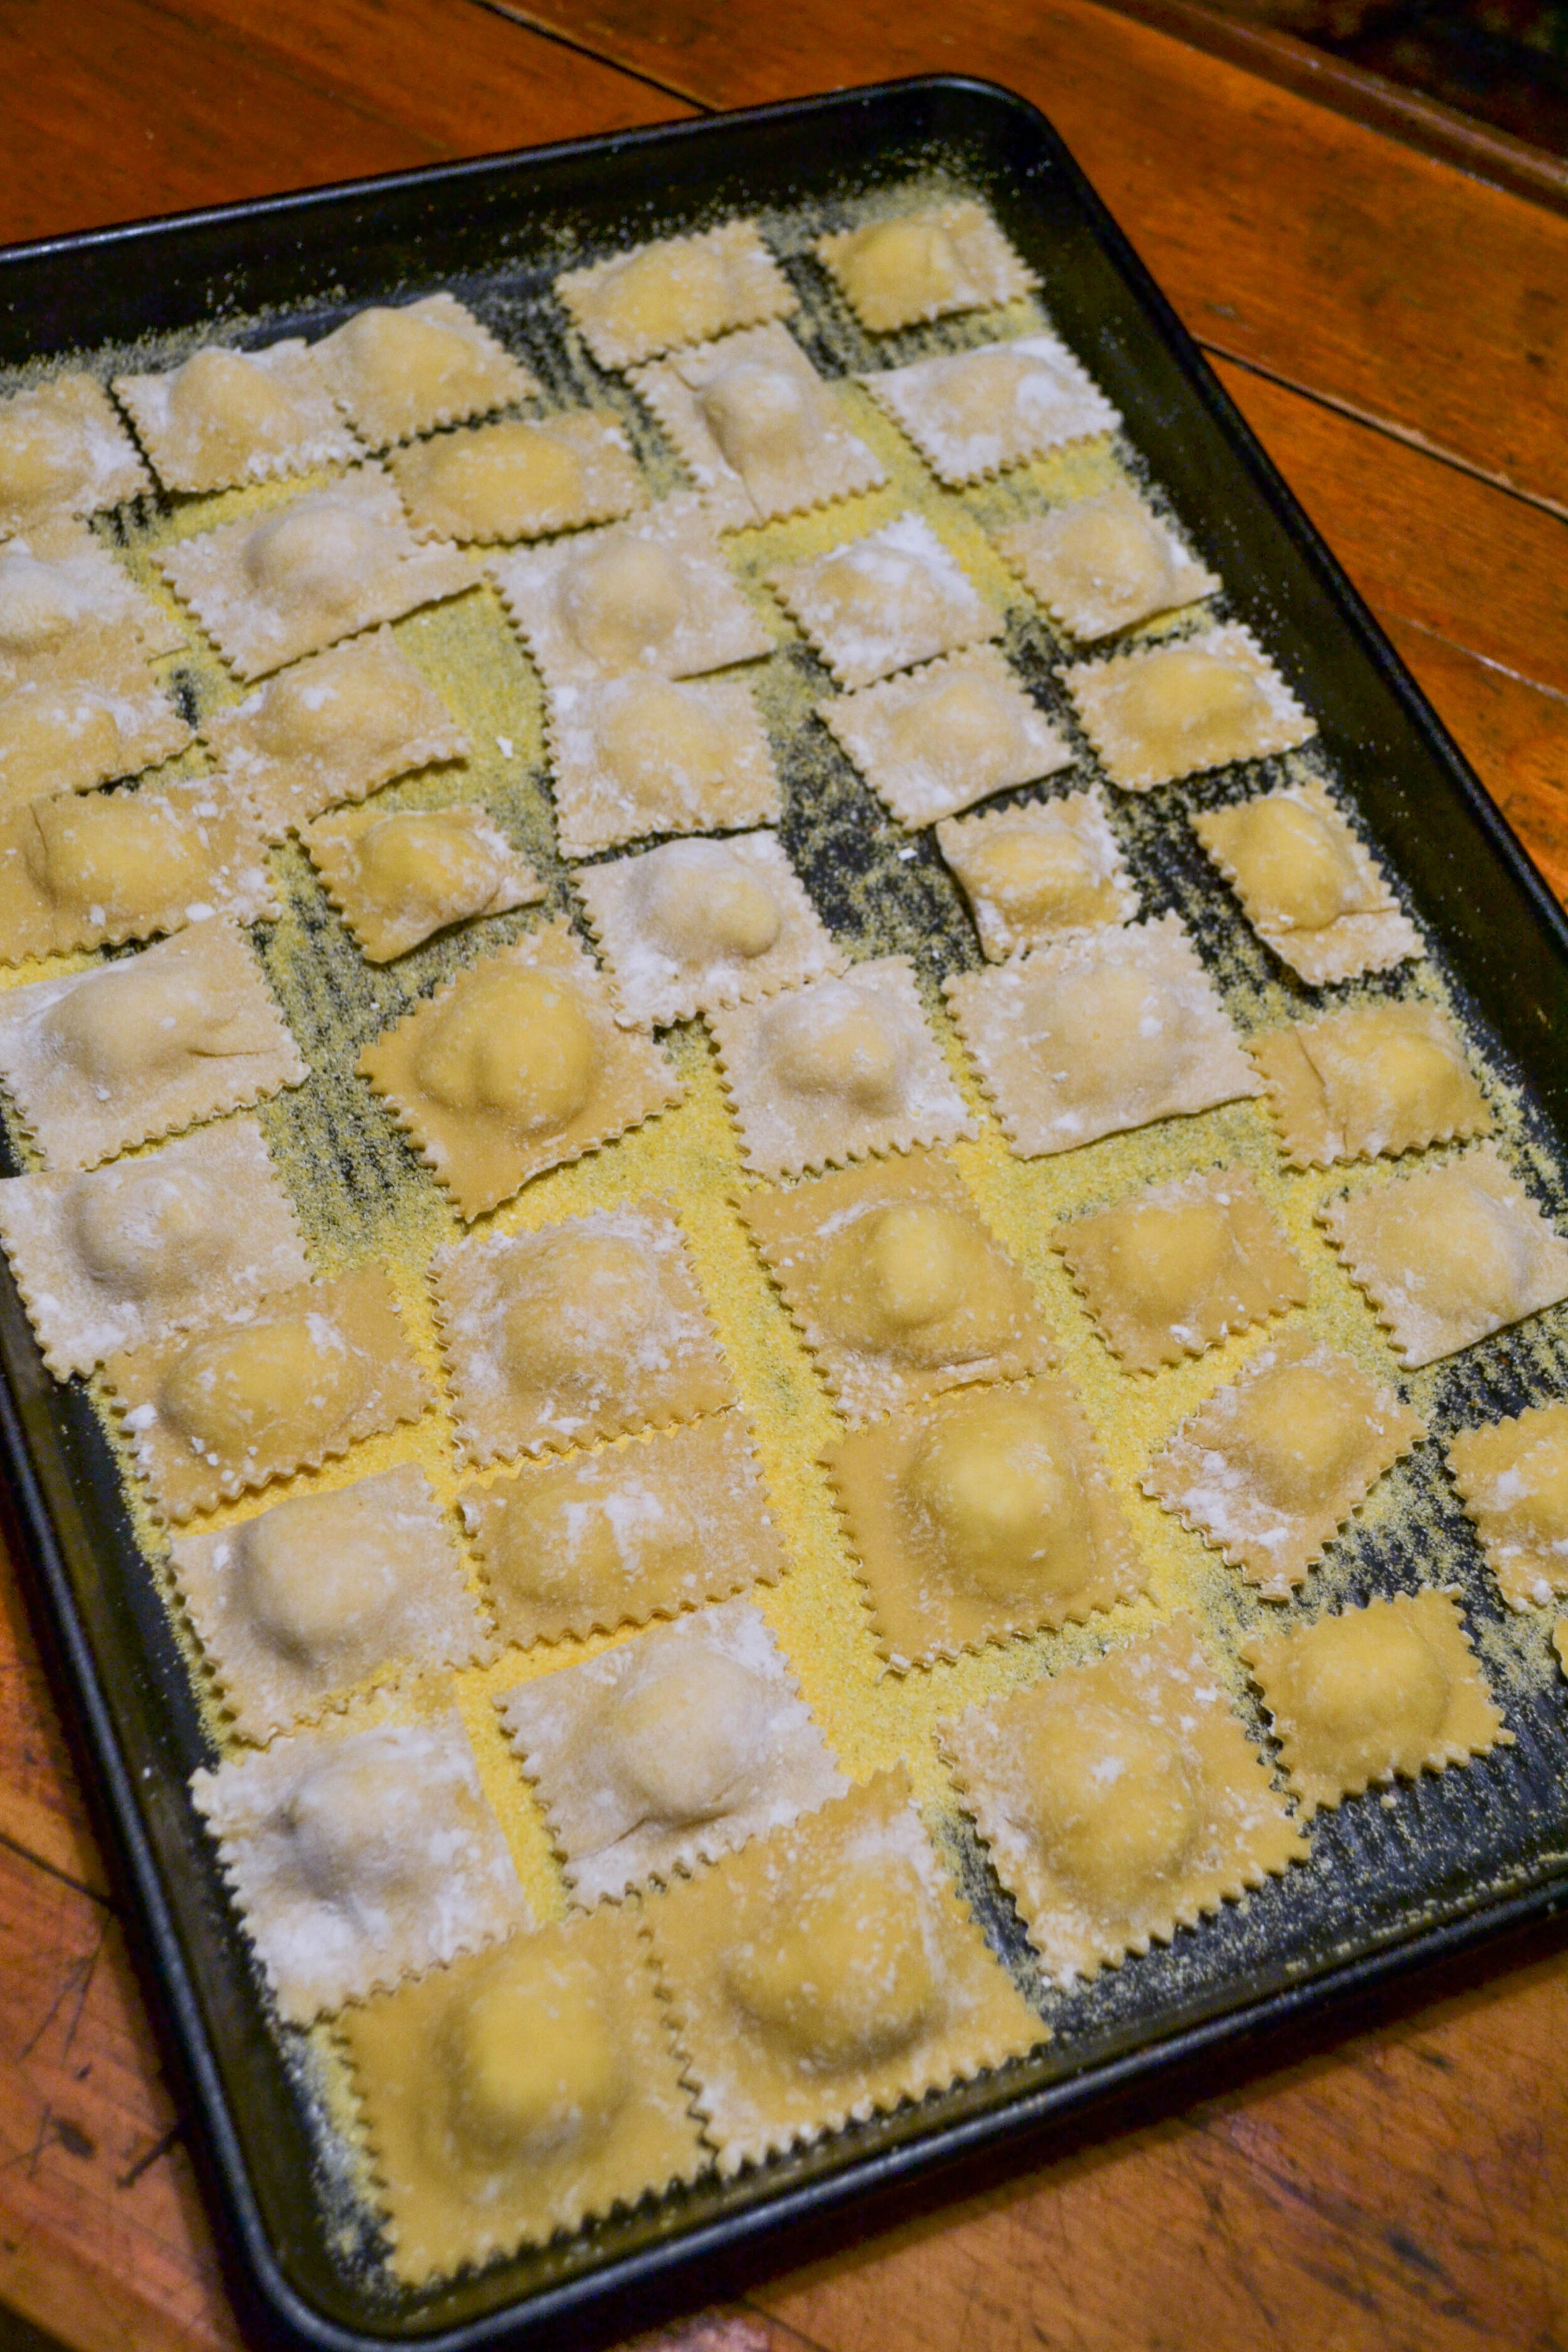
Fold the top half of the dough sheet over onto the bottom and seal by firmly pressing around the edges of the filling. Cut the ravioli using a fluted pasta cutter or a knife and transfer to a cookie sheet lightly dusted with flour or cornmeal.
Cook the ravioli in a large pot of salted water. Once the ravioli starts to float, cook another 60-90 seconds and then remove with a slotted spoon.
Serve with browned butter and Parmesan and a nice wine.

Fresh Pasta Dough
Fresh Pasta Dough
I use this dough recipe for all my pasta dishes. It is versatile, sturdy and comes together easily. Don’t stress too much about the proportions. If the dough seems to wet, add a little flour, if it seems a little dry, add some water. Letting it rest for an hour will allow the dough to really bind well and absorb any excess flour and egg. I use my stand mixer but you can easily make this by hand.
Ingredients
2 cups flour
1 teaspoon salt
2 eggs
4 egg yolks
1 tablespoon olive oil
Directions
In the bowl of a stand mixer with the dough hook attachment, combine the flour and salt.
Whisk the eggs, egg yolks and olive oil in a separate bowl.
Slowly add the egg mixture with the dough hook on low. Scrape down the sides and continue mixing until a dough ball starts to form.
Once most of the flour is absorbed, dump the whole thing out onto a lightly floured surface and knead until all the flour is absorbed. The dough should be smooth and firm. Wrap in plastic wrap and chill for one hour or up to 12.

Kale Salad with Apples and Barley
This fall has been action packed. In addition to celebrating our first anniversary, Anthony and I have been busy finishing our dining room and planning our next big house project. I also started working at one of my favorite haunts, Snug Harbor Farm, which means I’ve been busy keeping up with plants, design and the like.
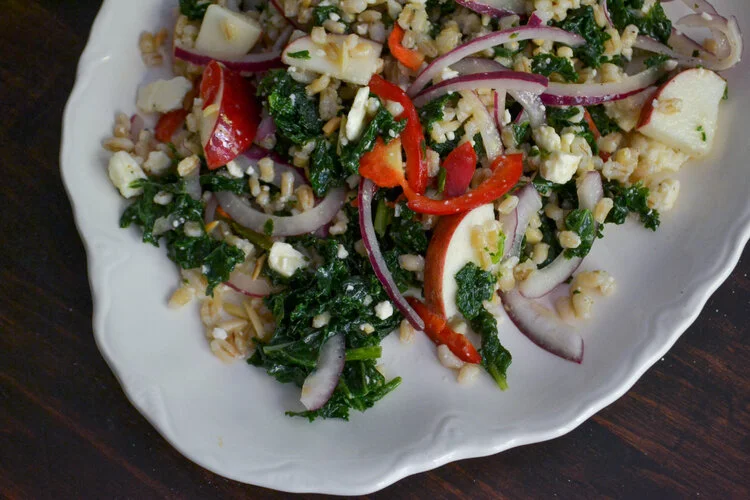
In an effort to save money that we can put towards our house, we’ve been packing our lunches a lot lately. I have been obsessed with this kale salad recipe since we went apple picking a month ago. I’ve made versions of this in the past but this one really takes the cake. I took some time to work out the dressing and adding a few extra flavors and textures that I think really set it off. Most importantly, this recipe is cheap, healthy and filling. Have it as-is or add a little roasted chicken and you’re on your way to a happy afternoon.

Kale Salad with Apples and Barley
Ingredients
1 cup pearled barley
3 cups water
1 bunch kale, washed and stems removed
½ red onion, sliced thinly
2 cherry hot peppers, halved and thinly sliced
2 apples, cored, halved and thinly sliced
6 oz crumbled feta
¼ cup apple cider vinegar
4 tablespoons lemon juice, divided
2 tablespoons honey
1 garlic clove, finely minced
1/3 cup canola oil
½ cup slivered almonds, toasted
Directions
Combine the barley and water in a large pot and bring to a boil. Cover, reduced heat and simmer for 25 minutes or until the barley is tender. Strain and rinse with cool water and set aside.
Combine the vinegar, lemon juice, honey, garlic and oil in a bowl and whisk until evenly mixed and set aside.
Tear the kale into bite size pieces and dust with salt. Gently massage the kale with your hands by squeezing a fistful at a time. Do this for about 3-5 minutes or until the kale turns bright green and feels more tender.
Combine everything in a large bowl and top with almonds. Toss and serve.

Korean Chicken Tacos
Tacos are one of my favorite foods. Whether fish, chicken, beef, vegan, breakfast or dinner, I love them in all their shapes, sizes and variations. This taco recipe is a standby for Anthony and I when we don’t really want to cook but need to feed ourselves. They go well with beer or a crispy white wine and the heat can be dialed up or down depending on your taste.
Gochujang is a central ingredient in this chicken marinade and is a Korean staple. Gochujang is a fermented soy and pepper paste that is in just about everything Korean and a flavor Anthony craves from his time as a teacher overseas. Though once elusive, gochujang is pretty popular now and can be found in most Asian aisle of the grocery store.
The vinegar slaw makes these nice and bright and the sriracha aioli gives the dish a nice spicy creamy kick. The best part about the aioli? It makes enough to use later in the week on things like breakfast sandwiches.

Korean Chicken Tacos with Red Cabbage Slaw and Aioli
Ingredients
FOR THE CHICKEN
2 T Gochujang
1/2 C fish sauce
3 T lime juice
2 T brown sugar
1 T honey
2 T freshly grated Ginger
2 lbs boneless skinless chicken thighs
FOR THE SLAW
1/2 head red cabbage, shredded
1 red fresno chili, thinly sliced
1 C Apple Cider Vinegar
1/2 t salt
FOR THE AIOLI
1/2 C Mayo
1/3 C Sriracha
GARNISHES
Taco shells or tortillas
Cilantro
Sesame Seeds
Directions
Combine all the ingredients for the chicken in a bowl or ziplock bag and allow to marinate for 30 minutes.
Make the slaw by combing all the ingredients in a bowl and allow to marinate for at least 30 minutes or overnight.
In a small bowl, combine the mayo and sriracha and stir until evenly mixed. Set aside and chill.
Heat a heavy skillet over medium high heat and cook the chicken about 4 minutes on each side or until done (no pink in the center). Set aside and tent with aluminum foil
Slice the chicken and serve with taco shells and garnishes.

Orange Pumpkin Bread
Its early October, the leaves have begun to change and I can see my breath when I run in the morning. Fall has officially arrived.
To celebrate the season, I dragged out an old family recipe given to me by my mother. What goes better with a chilly morning that a hot cup of coffee and Orange Pumpkin Bread?
This recipe belongs to my great-grandmother Gladys. A woman I’ve only known through stories and pictures as a child. She was married to William, my great-grandfather and namesake and lived on a farm where she and my great-grandfather raised horses and cattle.
Earlier this year, my mom gave be two boxes of family recipes from my great-aunt, grandmother and great-grandmother. As I’ve been working through the recipes, I’ve thought about who these women were, what they were like and what they would think of me. Of these three ladies, I only met my great-aunt Ruth. My great-grandmother passed long before I was born and my grandmother passed away from cancer at 49 (one more reason why I quit smoking). All the same, I’ve known these women through stories told to me by my mother, uncle and their family friends. Despite not meeting them, cooking their food is giving me a connection to a life I didn’t know and gives me a comfort I struggle to articulate.

Orange Pumpkin Bread
makes two loaves
Ingredients
2/3 C Crisco
2 2/3 C granulated sugar
1 orange
2/3 C water
1 (16 oz) can pumpkin
3 1/3 C all purpose flour
2 t baking soda
1 1/2 t salt
1 t ground cinnamon
1/2 t baking powder
2/3 C chopped pecans
2/3 C raisins
Directions
Preheat the oven to 350 and grease two 9x5x3 loaf pans.
In a stand mixer, cream shortening and sugar thoroughly
Cut the orange into wedges and carefully remove any seeds, then toss it into a blender or food processor with the water and puree until smooth.
Add the orange mixture to the creamed sugar and shortening along with the pumpkin and eggs.
Sift the flour, baking soda, salt, cinnamon, and baking powder in a separate bowl and carefully add to the pumpkin mixture in batches. Fold in the pecans and raisins.
Pour the mixture into the loaf pans and bake 1 hour and 10 minutes. Remove from the pan and allow to cool.

Fettuccine with Sausage, Fennel and Ricotta
As the days get shorter and the nights get cooler, I want something more substantial than what I’ve been eating through the hot summer. Something fresh but filling. Last week, it was particularly cool and I settled in on this dish. Its creamy, filling and satisfying without being overbearing and heavy. You could swap the sausage for mushrooms and have a wonderful vegetarian main or you can leave the sausage if you’re feeling carnivorous. Either way, you’ll love how creamy and starchy this dish is and how easy it is to prepare.
Ingredients
1lb Fettuccine
1lb ground Italian sausage
1 fennel bulb, cored and sliced
2 tablespoons olive oil
1 red Fresno chili, seeded and sliced
1 C ricotta
Directions
1. Cook the pasta according to package instructions. Reserve 1 cup of pasta water before draining.
2. In a large skillet, brown the sausage over medium high heat, remove from pan and set aside. Add some olive oil and heat over medium high heat and saute the fennel until soft, about 5 minutes. Add the pepper and garlic and cook another 2-3 minutes. Return the sausage to the skillet and mix.
3. Combine 1/2 C of the reserved pasta water and the ricotta and stir until smooth. Add to the fennel mixture and toss with pasta, adding more pasta water if necessary.

Hoisin-Sriracha Chicken Thighs with Peppers and Dandelion Greens
It is finally fall in Maine which means, among many things, it is finally braising season. This was my first full week back from The Island and after working every day for four months straight, I finally caught a cold. Not only did I catch it, I passed it along to Anthony. Needless to say, we were both pretty run down and cranky (neighter of us are very happy patients). This meant I needed something easy, comforting and spicy to get us through the worst of the symptoms.
Enter this delicious standby recipe.
These chicken thighs were everything I wanted and everything we needed to beat this cold. Sweet, spicy and tangy but as comforting as chicken noodle soup. Don’t wait until you get sick to try these thighs. They came together in about 30 minutes and I made a big enough batch to have for lunch the next day.
Ingredients
1 tablespoon Sriracha
2 tablespoons Hoisin
3 tablespoons vegetable oil, separated
1 1/2 lbs boneless skinless chicken thighs
1 bell pepper, cored and sliced
1 Anaheim chili, sliced in circles
1 onion, halved and sliced
4 cloves garlic, chopped
1 bunch dandelion greens
2 cups beef broth
cilantro, lime, toasted sesame seed for garnish
Directions
Combine the hoisin, sriracha, and 1 tablespoon vegetable oil in a large bowl and add toss with the chicken until evenly coated. Set aside.
Heat 1 tablespoon vegetable oil over medium high heat and add the chicken. Be sure to keep the marinade handy. Sear on both sides until browned, about 3 minutes. Move to a plate and set aside.
Add the remaining vegetable oil and quickly saute the onions, peppers and garlic. Add the dandelion greens and rest the chicken thighs on top. Combine the remaining marinade and beef broth and pour over the chicken. Reduce heat to medium low and braise until the chicken is tender, about 20 minutes. Serve over white rice and garnish with cilantro, lime and toasted sesame seeds.


Coming Home
September is a bittersweet month for me. Clambake season is over and I’ve packed my plants and Nugs (the cat) and moved home. My parents left for Ohio and the island is now a quiet and lonely place. I am notoriously bad at saying goodbye (read: I usually cry) and this year was no different. Even though I’ll see them soon, it is always painful to say goodbye to my family, especially when we’ve been in such close quarters for so long.
This being said, I have been looking forward to coming home for a few reasons:
Maine falls are wonderful. The summer crowds have gone and we are able to get to all the hot spots without dealing with traffic and fighting for parking spots.
Obviously the foliage is spectacular and the cool, crispy air means I can wear sweaters, scarves and boots again.
Most importantly, moving home this year coincided with my anniversary with Anthony.
To celebrate our Anniversary, Anthony and I spent the day doing all the things we love; visiting breweries, greenhouses and working in our garden at home.
For dinner, I wanted to make something new and different. After pouring through mountains of cookbooks and websites, I settled on duck. One of my favorite food writers, Eric Kim, of Food52 had posted a recipe earlier in the summer for Duck Breast with Blueberry Port Sauce and I decided to give it a try. I don’t always follow recipes to every detail but I’m so glad I did with this. The sauce was absolutely delicious and may have been the real star here.
Get the recipe for Eric Kim’s Duck Breast with Blueberry Port Sauce


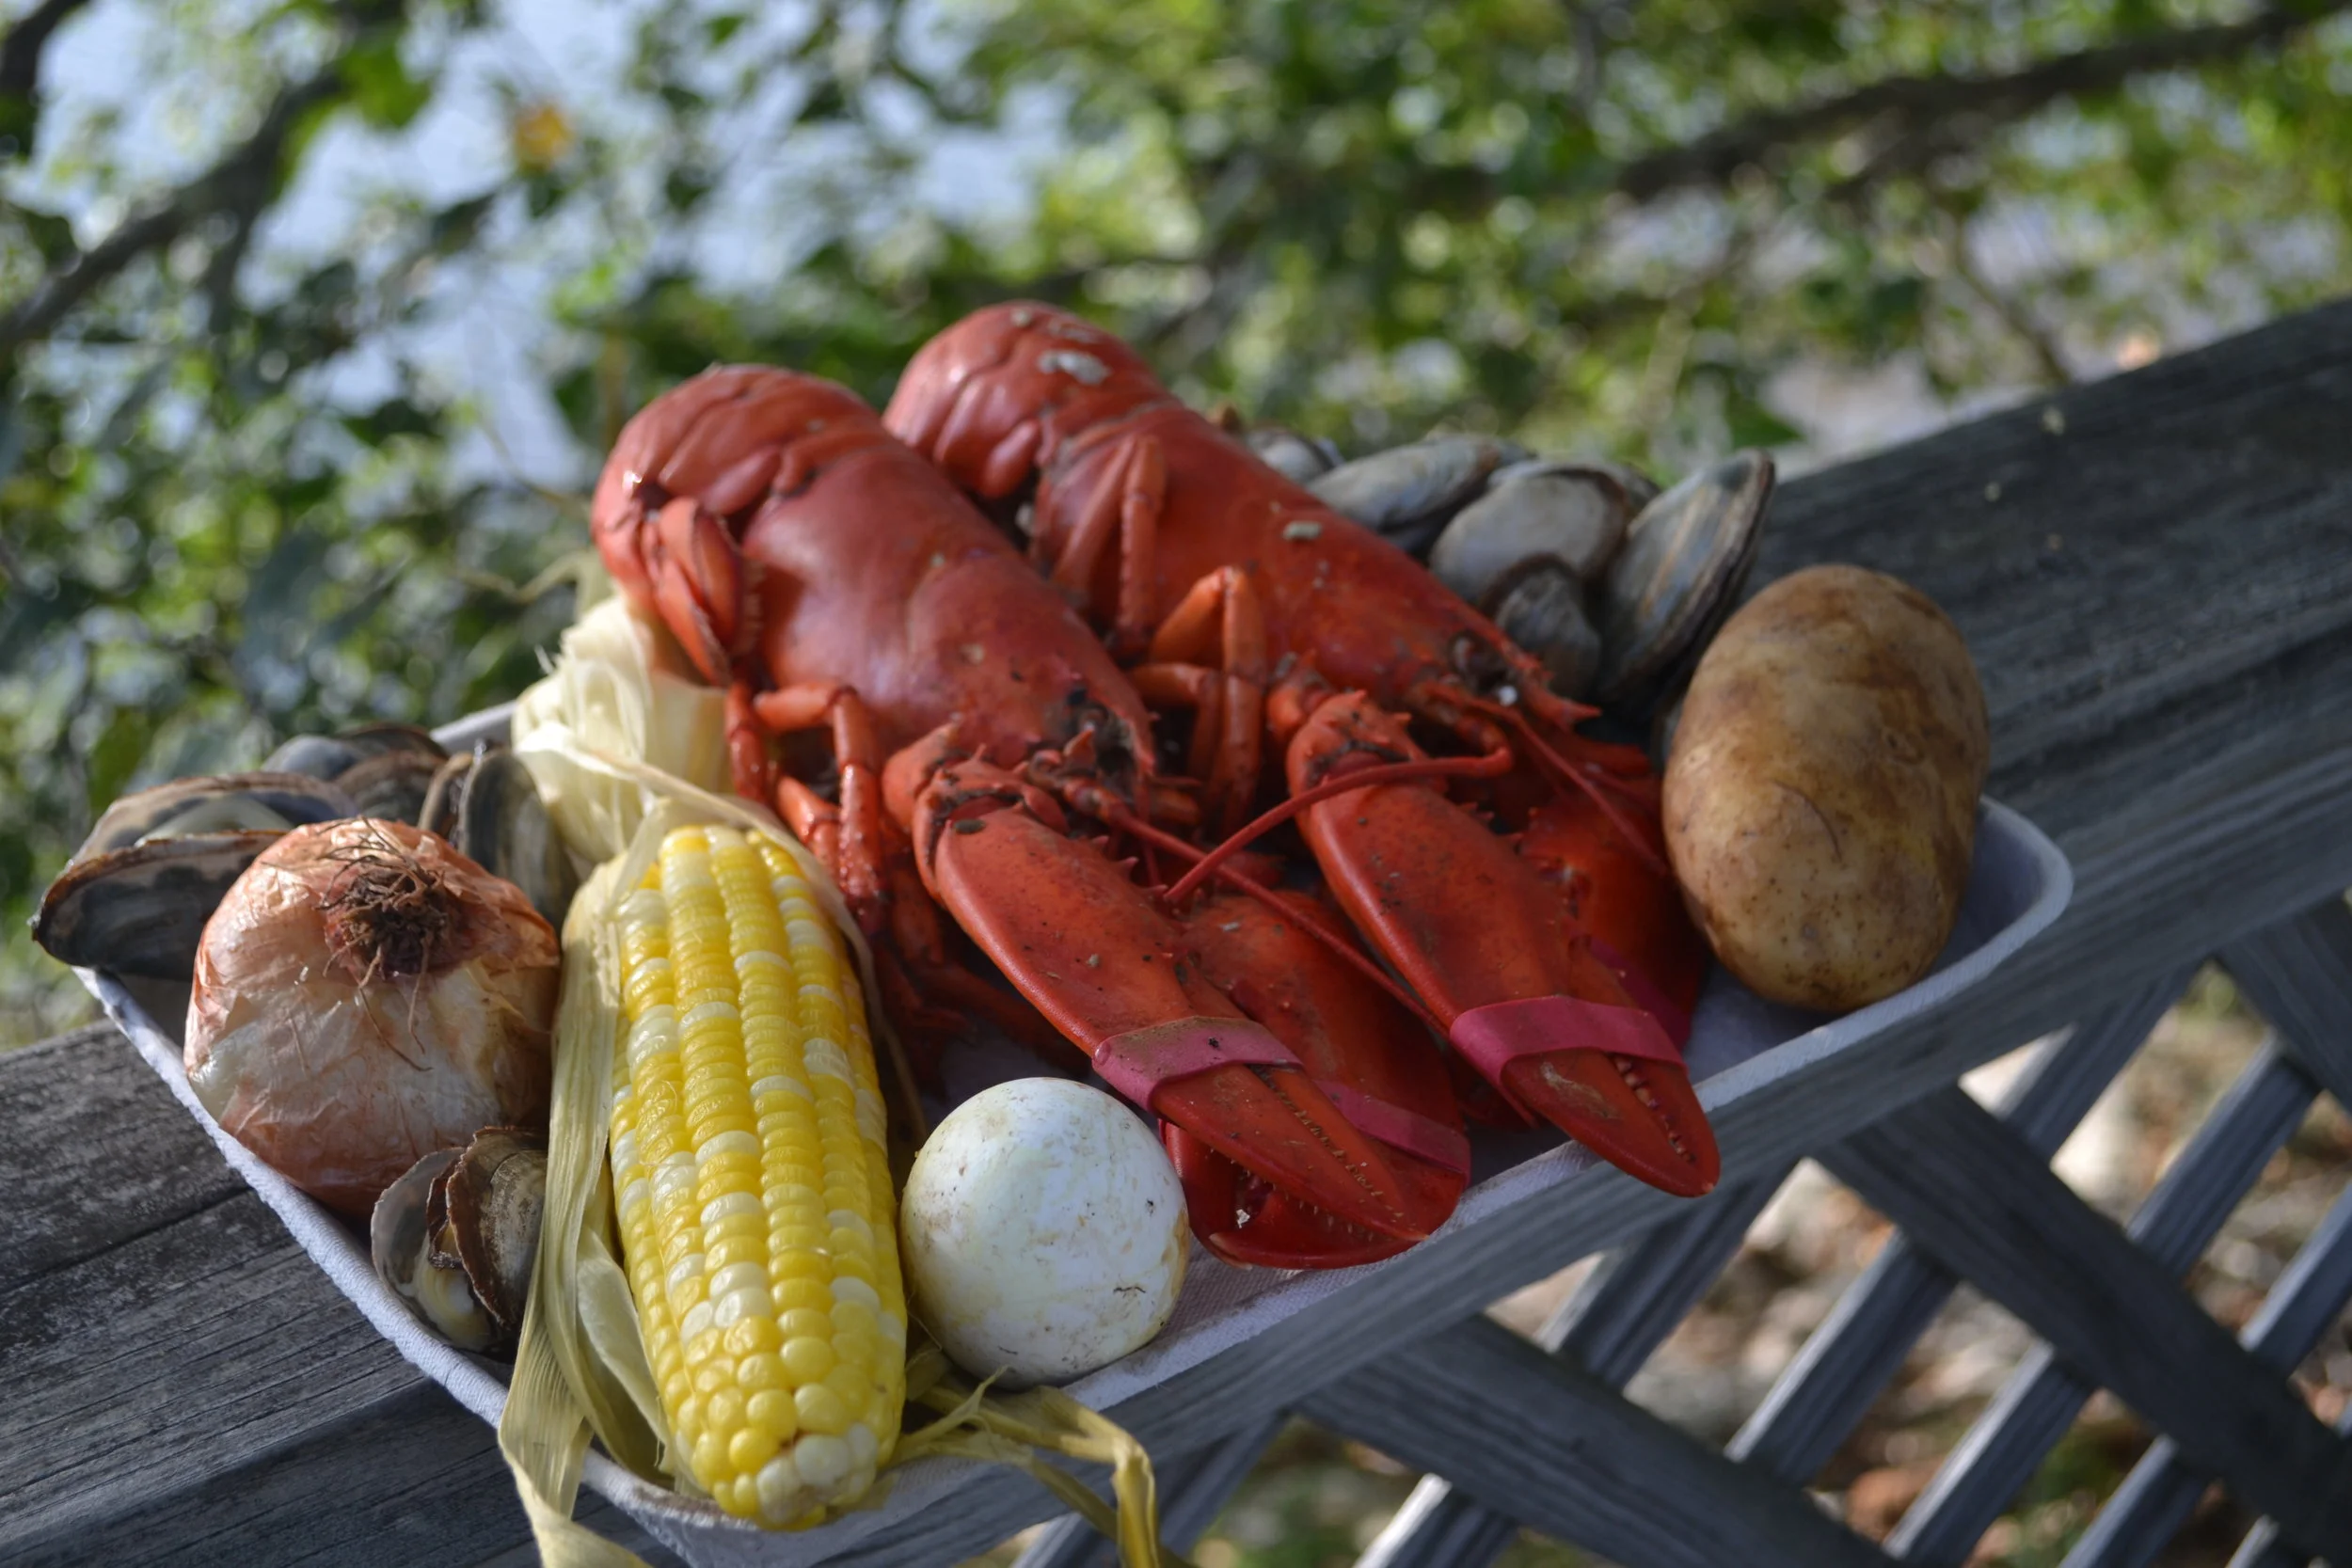
Cabbage Island Clambakes

I have made some major changes in the last year. Since turning 30 in August, I got married, quit my job, traveled for a month and now find myself taking on the role of general manager at my family business, here in Maine. Cabbage Island Clambakes is a family owned and operated experience in Boothbay Harbor, Maine. We offer a tour of the harbor, where you will see lighthouses, islands and perhaps a porpoise and seal. Then you arrive at Cabbage Island where my father and uncle will greet you on the dock, my 98 year old grandmother will greet you on the patio, my cousin is serving bar, another cousin serving tables and yet another cousin cooking everything you need for a traditional Downeast clambake. We’ve been at it for 30 years and I have grown up working alongside my parents, uncles, aunts, sibling and cousins for years.
Working in a family business is not for the faint of heart and it certainly comes with its own challenges. Navigating the complex relationships of father/son employer/employee can be messy and daunting at times. Fortunately, we have been at this for 31 years and have a good handle on how to operate both the business and ourselves.

The best part of working with your family and managing a successful business is the depth relationships take on over time. When one of us is struggling, the rest of us help out and lend a hand, this extends beyond our business function.
If you’ve never been to Maine, you need to come. While you’re here, come see us and enjoy a beautiful boat ride, a great meal and the warm hospitality we offer. I promise you won’t be disappointed.
For more information on Cabbage Island Clambakes, please visit our website at cabbageislandclambakes.com


Sunday Funday: Kennebunkport
One of my favorite Sunday Funday rituals is spending the afternoon in Kennebunkport. This quintessential New England destination is just down the road from Anthony and I and we visit very regularly.
Kennebunkport is known for its beautiful beaches, classic New England charm and quaint village. For years it has drawn visitors from far and wide to frolic in its charm every summer. Despite living only ten minutes from the village, Anthony and I seldom ever visit in the summer. Instead, Kennebunkport has become our winter stomping grounds. Whether frolicking around the greenhouses and Snug Harbor Farm or sipping cocktails at one of the many restaurants, Kennebunkport is our winter playground.
Snug Harbor Farm is one of my all time favorite greenhouse and nursery. It is situated just outside of the village and is host to exotic plants of all kinds and fabulous housewares, not to meniton the ponies, ducks and chickens. Tony Elliot is the owner of Snug Harbor Farm and leads a talented team of designers and landscapeers who create incredible landscapes, gardens and indoor plantings. Anthony and I are at the farm almost every weekend, hunting for new plants or simply admiring Tony’s work.


This winter, Anthony and I were happy to discover yet another brewery in our backyard. Baston River Brewing opened a tasting room in Kennebunkport earlier this year and has become a regular stop for Anthony and me when we visit the area. Their beers are delicious and spirits top-notch. The building their tasting room is in sits atop a small knoll in the village and has a great outdoor space with a fire pit overlooking the main street. Inside is a dark and moody interior when fine lighting, dark walls and a masculine aesthetic that exudes warmth.
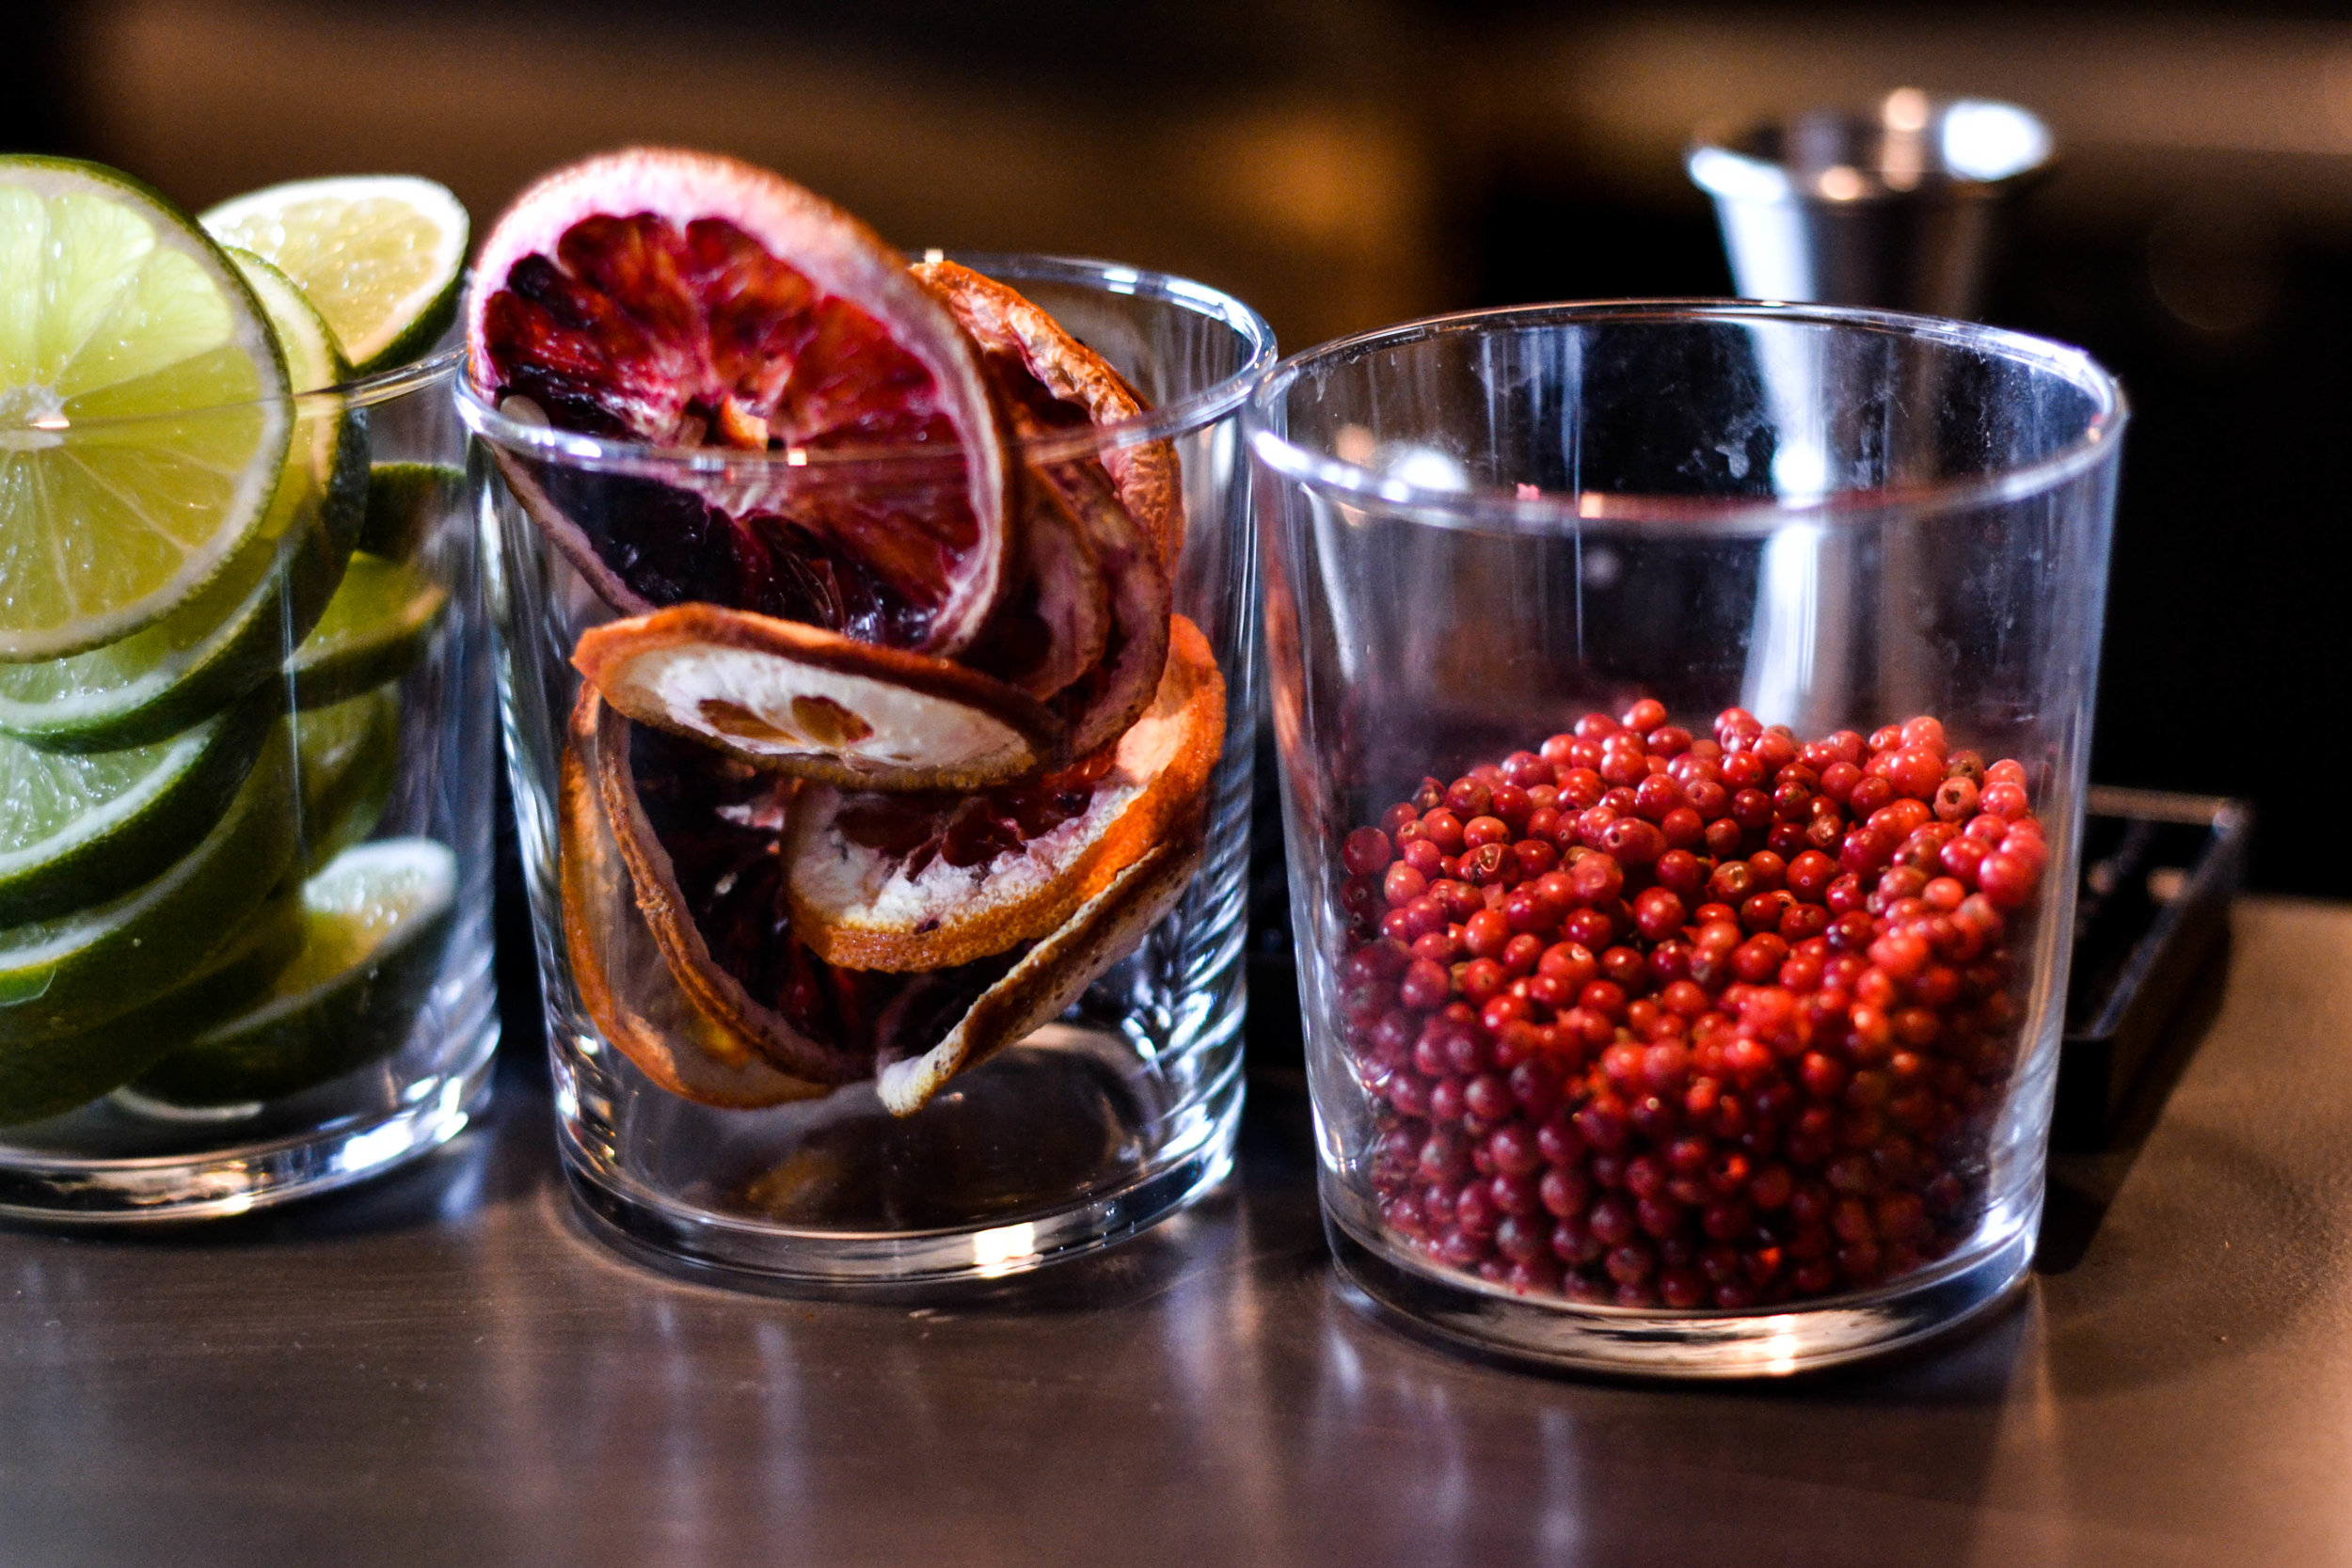
After being away from the ocean for a month, I naturally wanted to cook something from the sea when I returned. After scratching our heads, we settled on seared scallops with shiso pesto. It is an elegant dish that looks much more challenging to prepare than it really is.
I learned to cook scallops from my mom who insists on only flipping them once and searing them in hot oil and butter to get a nice crust. Since the pesto was already prepared, this dish came together in less than 20 minutes. Anthony, ever the particular designer, insisted on plating them himself and I have to say, I was quite please with his styling although I was ready to devour them before they even left the skillet.


Seared Scallops with Shiso Pesto
For the Pesto
1 bunch fresh shiso (you can substitute basil)
2 cloves garlic
¼ cup walnuts, toasted
¼ cup olive oil
For the Scallops
1 lbs dry, fresh scallops
salt and pepper, to taste
2 tablespoons butter
1 tablespoon olive oil
Directions
1. Dry the scallops with a paper towel and season with salt and pepper, set aside.
2. In a food processor, combine the ingredients for the pesto and pulse until smooth. The amount of oil you use may vary depending on your taste. I prefer a looser pesto, so I use more oil than some.
3. In a heavy skillet, melt the butter over medium high heat. Add the olive oil and continue to heat until the liquid shimmers. Carefully add the scallops one at a time. Depending on the size of your skillet, you may need to do this in batches, so you don’t crowd the pan.
4. Cook the scallops over medium high heat for 4 minutes before flipping. Cook another 3-4 minutes or until the scallops are just opaque. Scallops cook quickly so keep a close eye on them.
5. When the scallops are done, remove the pan from heat and remove the scallops. Add the pesto and stir with the cooking liquids until evenly incorporated. Add the scallops back to the pan and toss before serving.

Slow Mornings and Sourdough
Today is one of those mid-winter mornings I dream of all year. The ground outside is covered in snow, birds and squirrels dance carefully across the ice-covered meadow searching for seeds and food. The house is quiet, Anthony is still sleeping and the animals are resting sweetly at my feet. Its a beautiful, sunny morning and the ice on the windows reminds me of diamonds, glistening in the early morning sun. These are the types of mornings I like to savor. Moving slowly from this to that and then back to the writing room with my plants.
I have been on a mission to be more mindful in 2019. Mindful of my words, my actions and what I put in my body. For me, that means slowing down and being observant of what is happening around me and within me. I’ve taken up meditation and practice every morning before work. I’m not sure what I’m supposed to feel but I think I am seeing a change, if not, that’s OK.
One of my many intentions for this year is to become a better baker. I am admittedly not a great baker. It requires attention to detail and precision that do not come naturally to me. This year, I hope to change that. I created a list of what I think are the most essential baking recipes and will be ticking them off one by one this year until I’m a master.
This month, I am focusing my energy on sourdough. Sourdough always reminds me of my childhood. My dad would go to the greenhouses in Columbus to pick up plants and flowers for my mom’s flower shop and on the way back he would always stop at Panera and pick up a loaf of sourdough bread and dipping oil for my sister and me. It was a very simple act but something that we looked forward to every week and still talk about today, after all these years.
As you will learn, the first step in making true Sourdough is making a starter. By combining flour and water, you create a medium for wild yeast to attach itself to and grow. It takes about 5 days for a good starter to form from. Once you have a living and breathing sourdough starter, you can use it to make loafs, baguettes, bagels, pizza crust - just about anything.
I will be following a guide I found on TheKitchn that seems pretty fail-proof.
Follow me on Instagram this week as I take my first attempt at this culinary challenge.

Crack Crackers
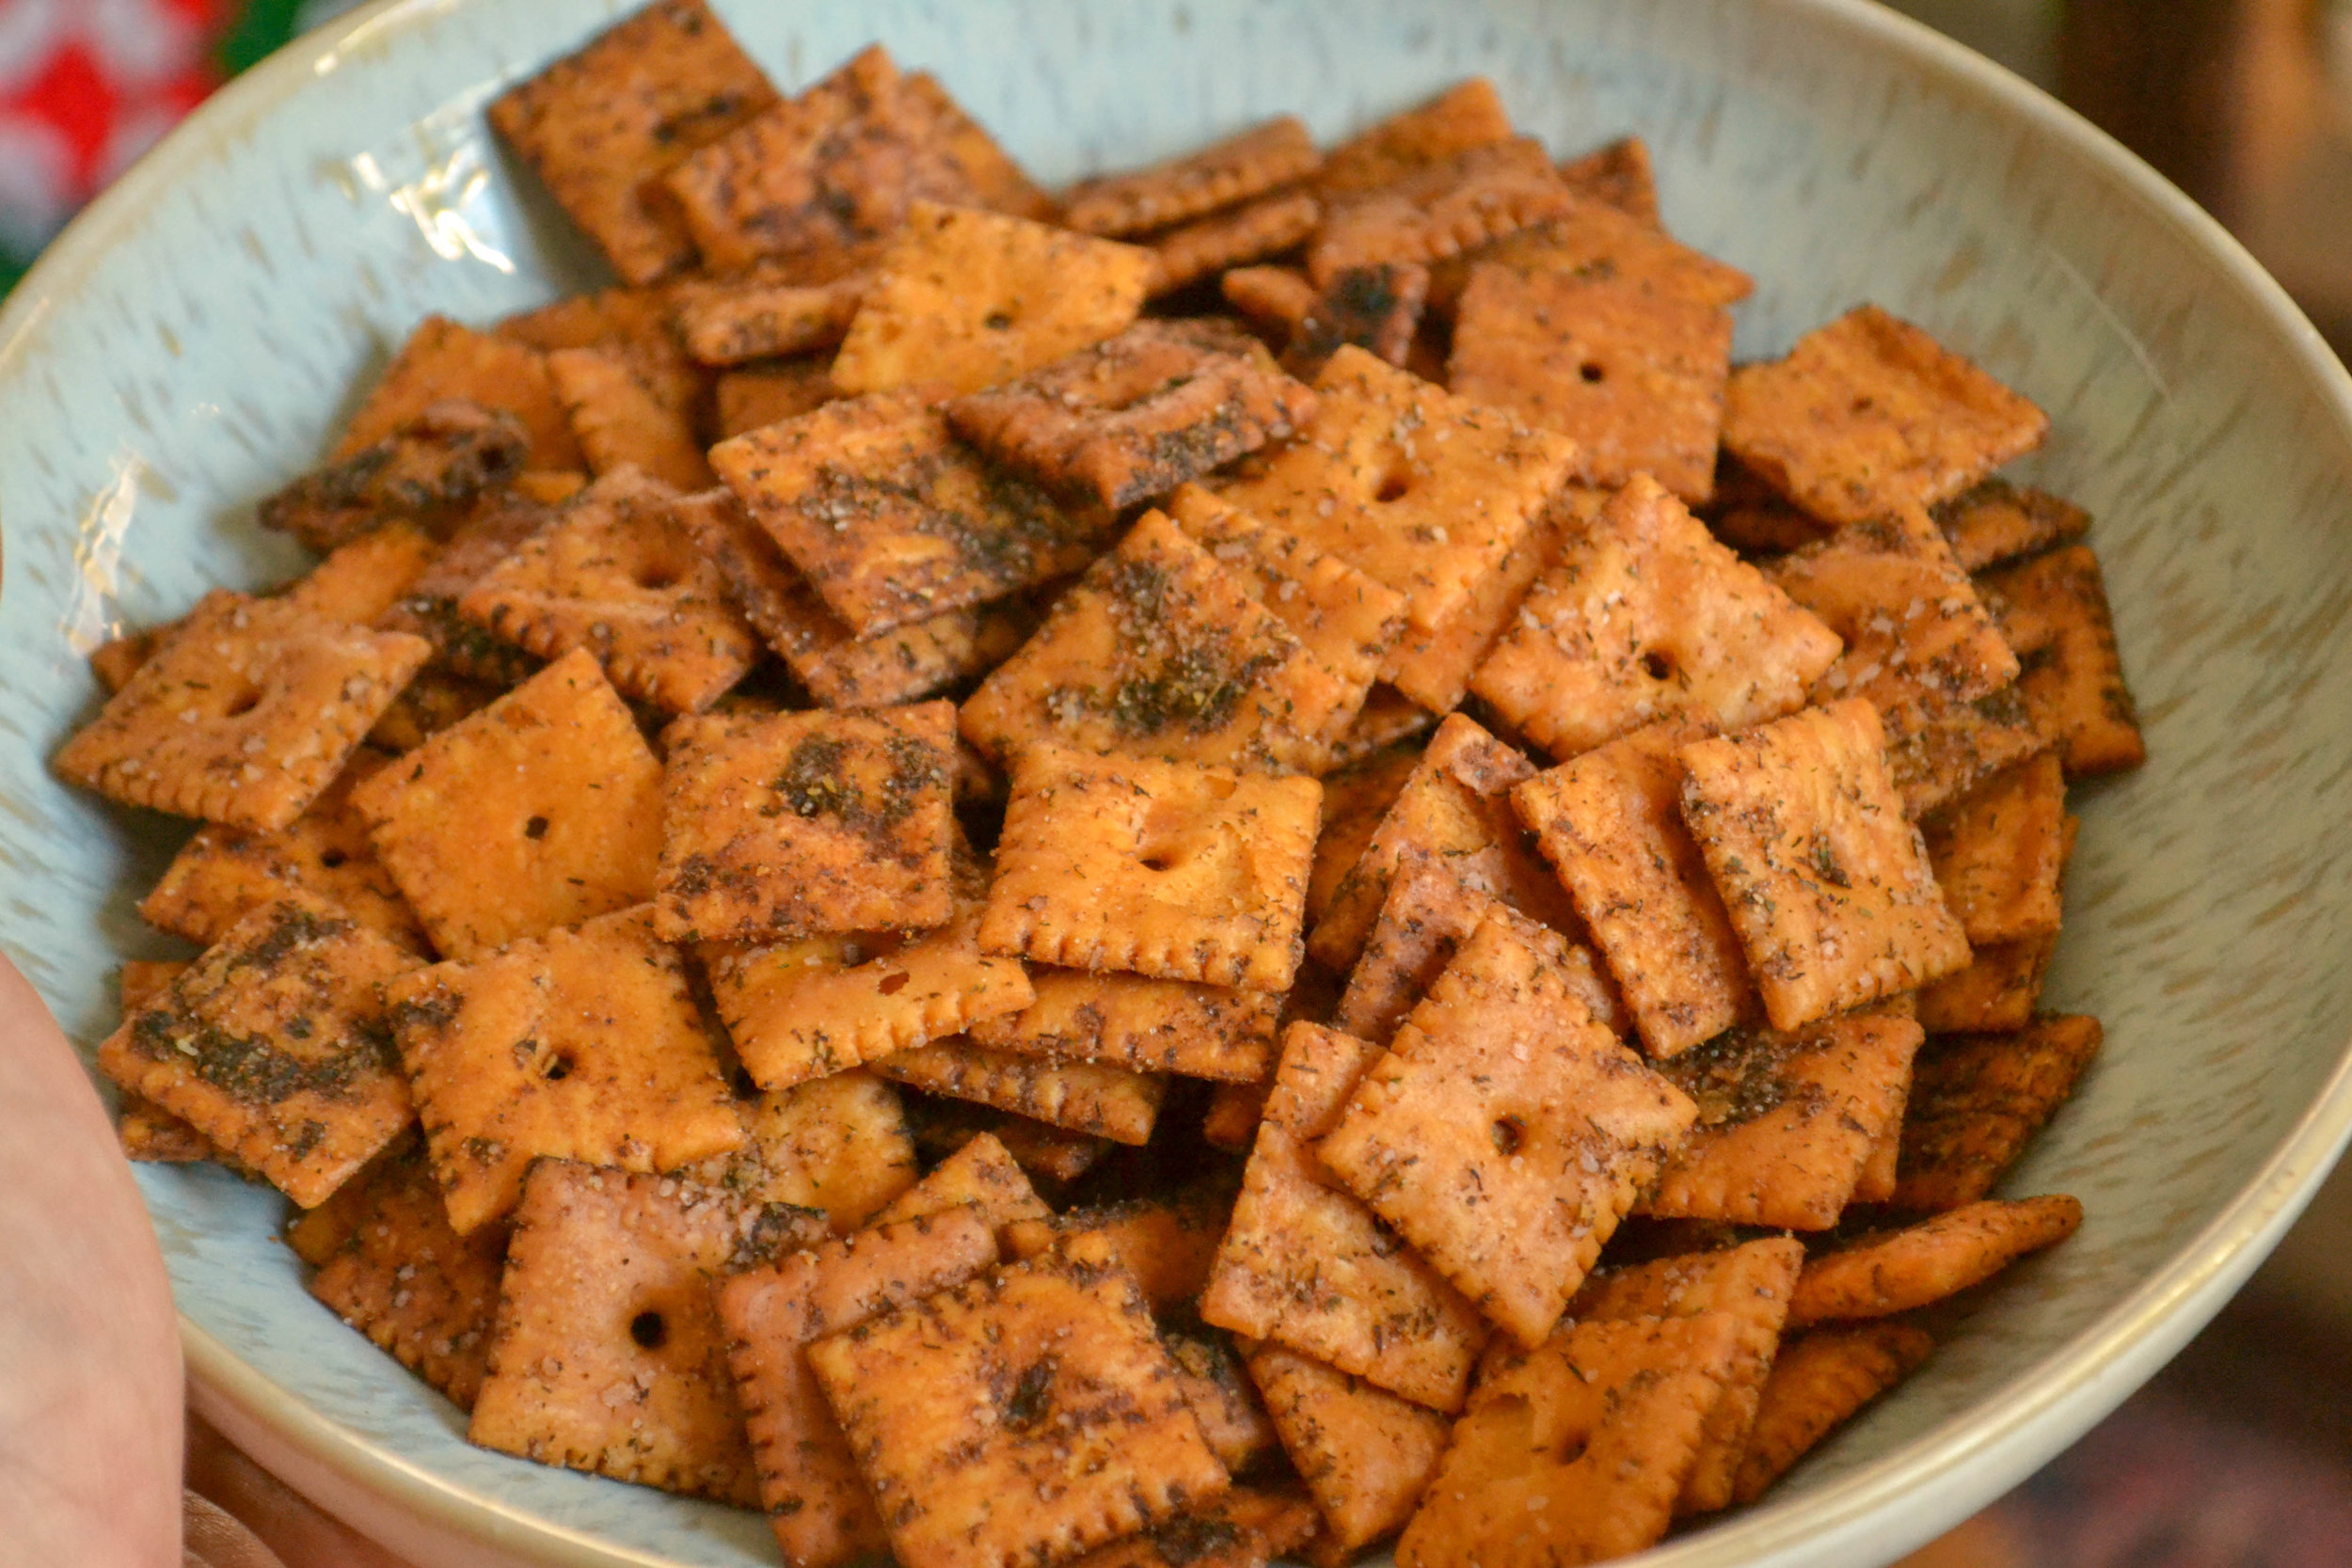
My mom makes these every year for Thanksgiving and Christmas and remind me of home with each bite. They are lovingly referred to as “crack crackers” because they are SO. ADDICITIVE.
Kathy’s Crack Crackers
Ingredients
1 package ranch dressing mix
1 tablespoon dill
1 tablespoon garlic powder
1/3 cup olive oil
2 16oz packages regular Cheeze-Its
Directions
1. Preheat the oven to 300
2. In a large mixing bowl, whisk the dressing mix, dill and garlic. Slowly whisk in the olive and and mix until evenly combined. Add the crackers and toss to coat.
3. Separate the crackers between two cookie sheets and bake for 30 minutes, stirring ever ten minutes.
4. When the crackers are browned but not burned remove from the oven and allow to cool on the cookie sheets.

Eternal Gratitiude
This year has been a wild ride. I turned 30, got married, made a major plans for the future and have found myself back in a place where I want to write. There have also been some mishaps, none all too serious but mishaps nonetheless. This morning, I am thinking of all I have to be grateful for and forgiving for the bumps along the way.
Never Ending Gratitude
My Pets

Everyone loves their pets and thinks they have the best dog, cat, fish, parrot around. I am no exception, barring the fact that I know my darling dog is not very well behaved and I have a very fat, lazy cat. Still, I love them unconditionally, even when Toby won’t come inside and Nugs won’t stop crying for water*.
Nugs, especially, has been with me longer than my husband or Toby. He’s my OG, ride-or-die compadre and I am so grateful to have him. He is mellow, agreeable and a great pillow.
Toby, on the other hand, is constantly wound for sound but so loyal. Yes, he wakes me up every morning at 5 am to go out but its those early mornings that endear him to my heart. He can also be high maintenance and isn’t a fan of having company over unless they are there to play with him and only him. He also doesn’t like when Anthony and I hug, touch, look at each other or breath. Despite all this, he still has moments when I think about how sweet and loving he is. For that, I am grateful.
My Home
I love my house and with Anthony’s help, we have turned it into a home together. It gives me a sense of belonging and safety and makes the long days bearable, knowing I have someone to return to at the end of the day where I am safe and hidden away. I am looking forward to renovating our dining room this winter and painting the outside this summer. When Anthony and I are done, we will have brought this home back to life and prepared it for what comes next in our lives.
My Friends

I have always known that I have the best friends. Since I was young, I have surrounded myself with good, honest, fun-loving people. This was never more evident than at our wedding this fall. Friends from as far away as Hawaii came to Maine to see me marry the love of my life and celebrate with us. It was a heartwarming day that was made better by their presence.
Friendship isn’t just about the big moments in life, its also about the little things and for that, I am eternally grateful.
My Family

I would not be here without the unstoppable love I receive each and every day from my family. My parents, my sister, my brother-in-law, all my cousins, aunts, uncles and grandmothers. Even my baby niece. The reciprocal love we have for each other is unstoppable, unconditional and never-ending. Without them, I wouldn’t be here, and I wouldn’t be who I am today.

My Husband
I absolutely love my husband. From the day we met, we have been drawn together and attached at the hips. He is my rock and I am his. Without Anthony’s constant love, support and shoulder to cry on, I don’t think I could even begin to think of the journey I am preparing to make. Even when we are fighting and bickering and its cold and there’s snow to be shoveled, I am so grateful for Anthony and all he has brought to my life.
As I said in my vows at our wedding, my only wish in life is if he should live for 100 years, that I live for 100 minus one day so I never have to live without him again.
Me, Myself and I

This final note will seem vain and in fact, it is. But sometimes, we all need a little vanity and self-love. I am most grateful for myself, the life I am building, my body. Without this gratitude, I wouldn’t be able to love and appreciate all the wonderful people and things I am so blessed to have in my life.

How to Poach an Egg
Sundays should be savored. They are the day of the week we should take time to do the things we enjoy and be with the ones we love. Whether that means going for a hike or staying in to read a good book, Sundays are perfect for taking it easy.
Sticking with this theme, I love to make Sunday breakfast. In my family, Sunday breakfast is a cornerstone of the week. Growing up, Sunday's meant poached eggs and toast. For as long as I can recall, my dad has made perfectly poached eggs for my mom, sister and me every Sunday. We prefer our poached eggs jammy, chopped and mixed with butter, salt and pepper.
When it comes to poaching eggs, there are two main ways of doing it. One way is with an egg poaching pan and the other is simply to drop them in a swirling pan of boiling water. Both methods yield deliciously poached eggs with velvety yolks.
Poaching eggs can be intimidating but its really not. Just boil, swirl, drop and scoop. Poof, you're done and you look like a boss. Here's my latest Sunday morning favorite: Poached Eggs with Arugula and Toast. What's your favorite breakfast?
Breakfast Salad with Poached Eggs
Ingredients
2 tablespoons olive oil
3 tablespoons white wine vinegar
2 cups arugula
Crusty bread
Butter
2 Eggs
white vinegar
Directions
In a small bowl whisk the olive oil, white wine vinegar, salt and pepper. Toss the dressing with the arugula and set aside.
Place the buttered toast on a plate, top with the arugula and set aside.
Fill a wide, low pan about two-inches deep with water and 1/2 teaspoon vinegar and bring to a gentle boil over medium-high heat.
As the water comes to a gentle boil, crack an egg gently in the middle of the water Simmer over medium high heat for 6 minutes or until the white around the yolk has set. Scoop egg out with a slotted spoon, nestle it gently on top of the salad and toast.

Crispy Roasted Brussels Sprouts
Brussels Sprouts, like beets, get a bad rap. My dad is one example of the knee-jerk reaction people tend to have to the delightful little cruciferous cuties. This recipe aims to convert haters to lovers. It is easy, light and satisfying. Oh, and there's bacon to really make it divine.

Bacon Confit Brussels Sprouts
Ingredients
3 slices bacon
1 lb brussels sprouts, washed and halved
1 medium onion, chopped
3 cloves garlic, minced
salt and pepper to taste
Directions
Preheat the oven to 450
Heat a heavy cast iron skillet over medium-high heat and add the bacon. Reduce heat and cook slowly to render the fat. Cook until crispy, remove from pan, cool, crumble and set aside.
Add the brussels sprouts to the pan and toss with the rendered bacon fat. Cook for 5 minutes, then transfer to a mixing bowl. Add the onion and garlic, season with salt and pepper and toss.
Pour the brussels sprout mixture to a large cookie sheet and arrange in an even single layer. Bake for 10 minutes, stir and bake an additional 10 minutes or until the brussels sprouts are tender. Remove from oven and toss with the crumbled bacon.

Gorgonzola and Pear Stuffed Pork Chops
Anthony was away for a week to visit his family in Singapore, leaving the animals and me to fend for ourselves. Because Anthony doesn't eat pork, I usually take advantage of his time away to get my fix. This week was no different. I ate real bacon, pork chops and pork loin. I cooked with rendered bacon fat and had a delicious BLT.
My favorite meal, however, the stuffed pork chops I made. These bone-In chops were seasoned and stuffed with pear, sage and gorganzolabefore being seared and baked in a heavy cast iron skillet. The result was tender, melt-in-your-mouth pork chops that hit all my favorite marks. Salty, savory and sweet in one bite.

Pear and Gorgonzola Stuffed Pork Chops
Ingredients
4 thickly cut bone-in pork chops
1 medium onion, sliced thinly
2 T olive oil, divided
1/4 C white wine
2 pears, washed, cored and thinly sliced
1/2 cup crumbled Gorgonzola cheese
8 Fresh sage leaves
salt and pepper, to taste
Directions
Preheat the oven to 300.
Carefully cut a pocket into the side of the pork chops. Make sure the cut is even and goes as deep as possible.
In a heavy cast iron skillet, heat the olive oil over medium-high heat. Add the onions and saute until soft. Add the white wine and cook until the onions are golden brown, about 3 minutes. Transfer to a small bowl and mix with the cheese.
Carefully stuff the pork chops with the onion and cheese mixture, followed by slivers of pears and sage. Season with salt and pepper and set aside.
Add the remaining olive oil to the cast iron skillet and heat over high. When the pan is very hot, sear the pork chops 3 minutes, flip and sear the other side for two minutes.
Place the pork chops in the oven and allow to cook until the internal temperature reaches 150.
When the chops are done, remove them and allow to rest at least five minutes before serving.