
Roasted Grape Crostini with Ricotta
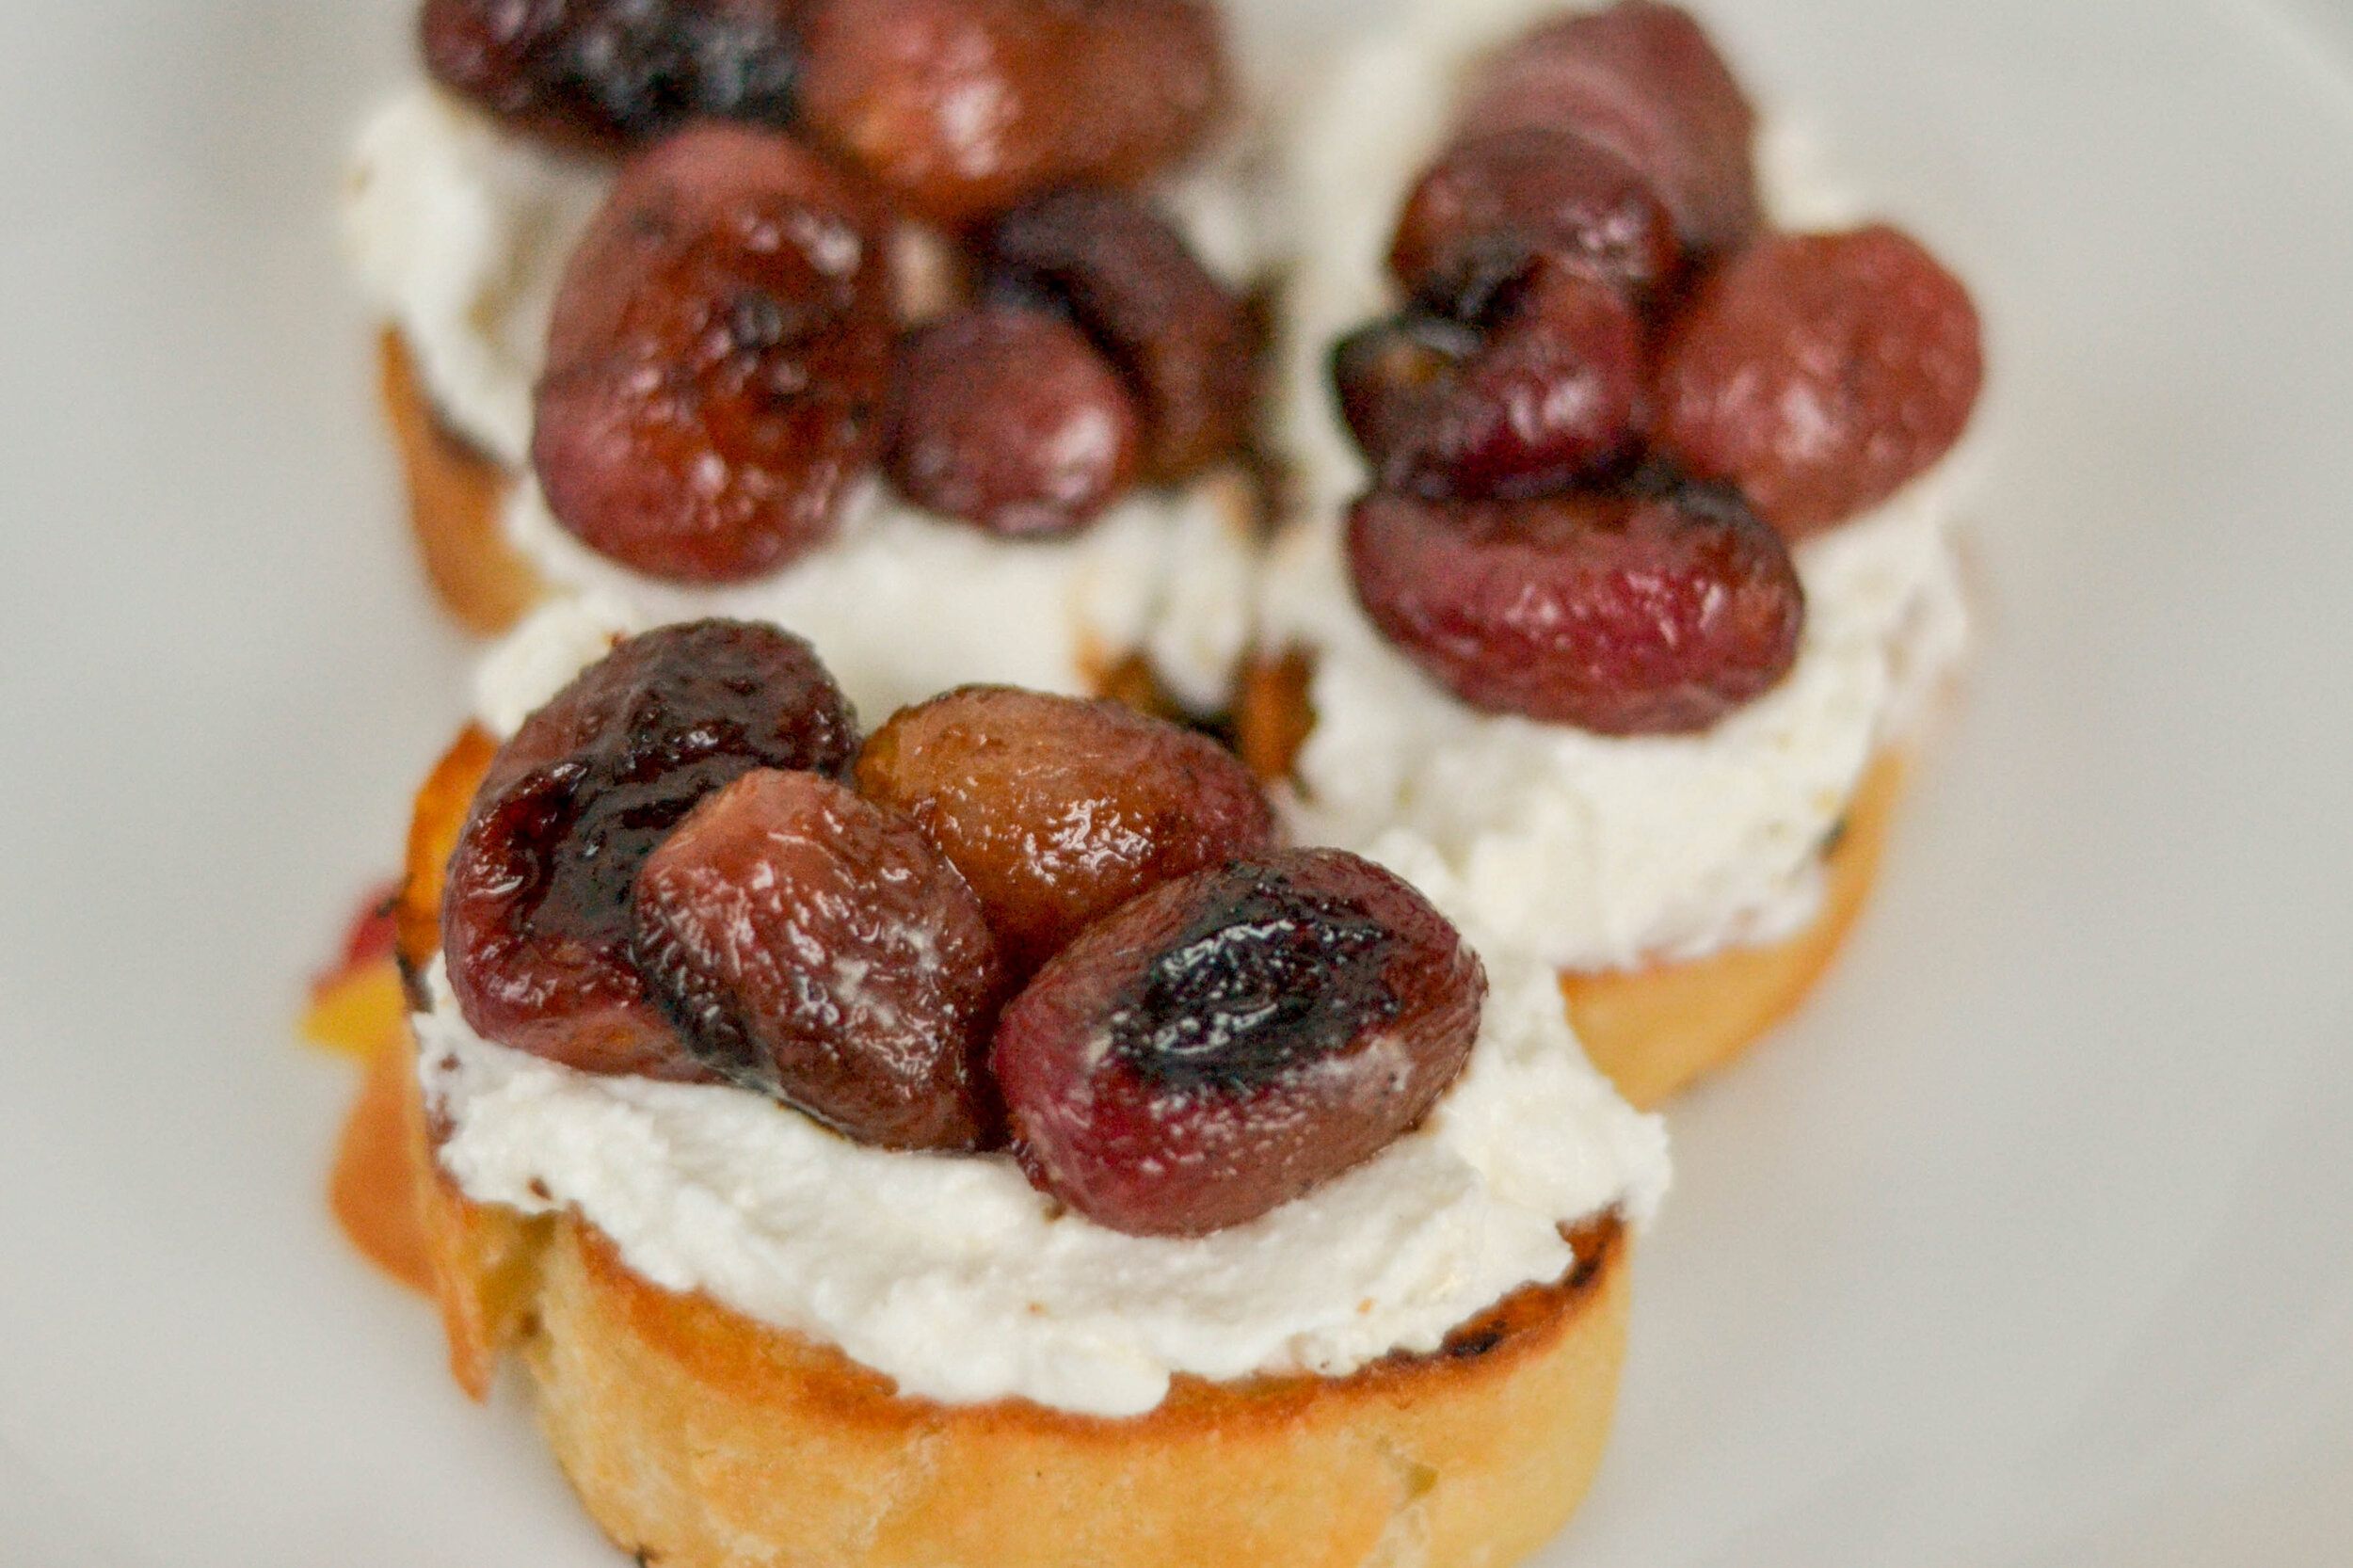
Sweet, velvety, and elegant. Roasted grapes are an easy to prepare and unexpected addition to a cheeseboard. Easy to prepare and so good you won't have any leftovers, these are a surefire way to impress friends and family this holiday season.
I love simple things. Simple clothing, simple math problems, simple recipes. This is just that. The name may be a little misleading and everyone I talk to does a double-take when I say “roasted grapes” but these apps are truly amazing. They are prepared with nothing more than a little olive oil, balsamic vinegar, and salt. A little char from the oven, some creamy ricotta cheese, and crusty bread and you’ve got yourself an appetizer that will surely impress any holiday crowd this year.
Ingredients
4 cups red grapes
2 tablespoons olive oil
1 tablespoon balsamic vinegar
pinch of kosher salt
Directions
Preheat the oven to 400.
In a large bowl, toss the grapes with olive oil, balsamic vinegar, and salt until evenly coated.
Spread the grapes on a large baking sheet in a single layer and bake for 25-30 minutes or until the grapes are wrinkled and slightly charred.
Serve the grapes with ricotta cheese and toasted crusty bread.

Honey Ricotta Bruschetta
Appetizers don’t get much easier than this. Perfectly toasted baguettes with creamy ricotta cheese, sweet local honey, crushed red pepper flakes, and a little salt are all you need to make these Honey Ricotta Bruschetta. If you’re in a pinch and need an appetizer for cocktail hour, Thanksgiving, or eating while you binge Netflix, this is it. In fact, this is such a simple recipe that it’s hardly a recipe at all, merely suggestions.
If you have access to local cheesemakers like I do here in Maine, go with that. The quality of the ricotta will be far superior to what you can buy in the store. If you don’t have a local creamery, don’t sweat it - nobody will be the wiser!

Ingredients
1 baguette, sliced 1-inch thick
olive oil
1lb ricotta
honey
pinch salt
pinch red pepper flakes
Directions
Preheat the broiler to high and position an oven rack in the upper half of the oven.
Arrange the sliced baguette on a cookie sheet in a single layer and brush generously with olive oil on both sides. Toast under the broiler until golden brown, flip and toast the other side. This will not take long so pay attention.
Remove the bread from the oven and allow it to cool slightly.
When the bread has cooled, smear about a tablespoon of ricotta on each toast, followed by a drizzle of honey, and a sprinkle of salt and red pepper flakes.
Note: You can prep the baguette earlier in the day or up to the night before, just seal it in an airtight container.

Artichoke-Caper Bruschetta
This time of year, nobody wants recipes that are ten million steps long or require special tools, equipment, or skills. Frankly, I think we should be like this all the time. Who wants to spend all their time in the kitchen when there is life to be lived?
This recipe, very similar to a few other bruschetta and crostini recipes I’ve posted lately, is so easy I can barely call them recipes. This took less than 10 minutes to prepare and can be made in advance so you don’t have to worry about a thing. Throw everything in a food processor, or simply chop it with a knife, stir, and you’re done. Easy as that. This recipe also lends itself well to embellishments like the addition of hot peppers or maybe even toasting it with some parmesan. Personally, I love having leftovers of this that I can toss with pasta, smear on a sandwich, or bake atop some chicken breasts.
Enjoy!

Ingredients
12oz jar marinated artichoke hearts
1 C green olives
1 Tablespoon capers
2 teaspoons minced garlic
1/2 teaspoon red pepper flakes
toasted rustic bread or baguette
Directions
Combine everything in a food processor and pulse until the artichokes and olives are roughly chopped. Stir to combine and spoon onto the toasted baguette.
Tip: Use the oil from the jar of artichokes when you toast the baguette, it will deepen the overall flavor of the dish.

Cranberry-Bourbon Meatballs
Make these cranberry-bourbon meatballs and win #friendsgiving. They are sweet, tangy, and SO easy to make! Simply dump it all into a crockpot and walk away for a couple of hours. The best part? You’ll probably need to buy a whole bottle of bourbon which means you’ll have leftovers! Cheers!
But seriously, these meatballs are SO easy and use ingredients you probably have in your house already. If you’re unfamiliar with sambal oelek, it is a red chili paste readily available in most grocer stores. I don’t find it overly spicy and all the other ingredients really mellow it out.
You’ll notice I used frozen premade meatballs for this and that’s because around the holidays, I try to keep things easy. Could you make your own? Of course! For some, however, the idea of making meatballs in addition to everything else this time of year brings is just too much, so grab your favorite bag of meatballs and let the crockpot do the work.

Ingredients
1 bag cranberries
1/2 c bourbon
1/4 c orange juice
1/2 c ketchup
1/4 c sambal oelek
1/4 teaspoon cinnamon
1 bag frozen meatballs
Directions
Combine everything but the meatballs in a crockpot set to high. Stir well and allow the sauce to cook for an hour before gently mashing the berries with a wooden spoon or potato masher.
Add the frozen meatballs and stir to coat evenly. If the sauce looks too thick, add a little liquid (water, broth, or bourbon). Cover and allow everything to cook for another hour or until the sauce has thickened and the meatballs are hot throughout. Serve immediately or keep warm.

Whipped Goat Cheese with Herbs and Lemon
Despite the doom and gloom about the coronavirus, it is beginning to look like spring in Maine. We are about a month behind the rest of the country so it is still a bit chilly up here but it is beautiful nonetheless. Anthony and I have been mending broken fences and starting early seeds like peas, carrots, beets, broccoli, and radish. As I’ve said before, I love radishes. Their fresh, peppery flavor is light and refreshing and they can play the lead or a supporting role in so many recipes. This recipe for toast with radishes and whipped goat cheese is a perfect bite of spring.

Since I’ve had so much free time lately, I’ve been tackling some cooking projects that have eluded me in the past. New pasta shapes, different ravioli fillings, and sourdough bread. I’ve tried sourdough in the past but have never had much luck. Despite my best efforts, the bread would turn out either way too dense and gummy or just a hardened shell filled with a few strands of bread and the rest, air. In fact, after my last round with baking bread, I gave up. I threw it all away, starter, loaf, and all. I told Anthony I was a failure and would never try again.
Then we were told to self-quarantine.
I’ve been working with Emma Christensen’s Beginner Sourdough Sandwich Bread from thekitchn.com and I think I’m a believer again. I have a starter on my counter I’ve affectionately named, Henry, and feed him every day. So far I’ve successfully made a sandwich loaf and a dozen small rolls and the texture was perfect. Crunchy on the outside and pillowy soft on the inside. Nothing tops the loaf I made on Thursday though. Maybe it is because the starter is getting older and a little funkier, maybe it is because I cooked it in a dutch oven rather than a loaf pan, I really don’t know. I am not a bread expert. Whatever I did, it worked because the bread has a beautiful, crunchy-chewy crust and a nice soft interior.
I did follow the recipe from Emma Christensen to a “T” up until it came time to actually bake the bread. Instead of dividing it in half and forming two small balls, I simply left it as a single piece of dough and shaped it into one larger ball and let it rise in a proofing basket but you could use a bowl. Next, I used an enameled dutch oven in lieu of the loaf pans. For this, I did some digging around online and learned that most recommend preheating the dutch oven before adding the dough, so I did. It was a little precarious getting the dough safely into the hot dutch oven but I made it without any injuries. I baked the bread with the lid on for 50 minutes and removed it for the remaining 5. The result was a beautiful loaf of bread big enough to feed a small army. It is tangy, salty, and oh so satisfying.
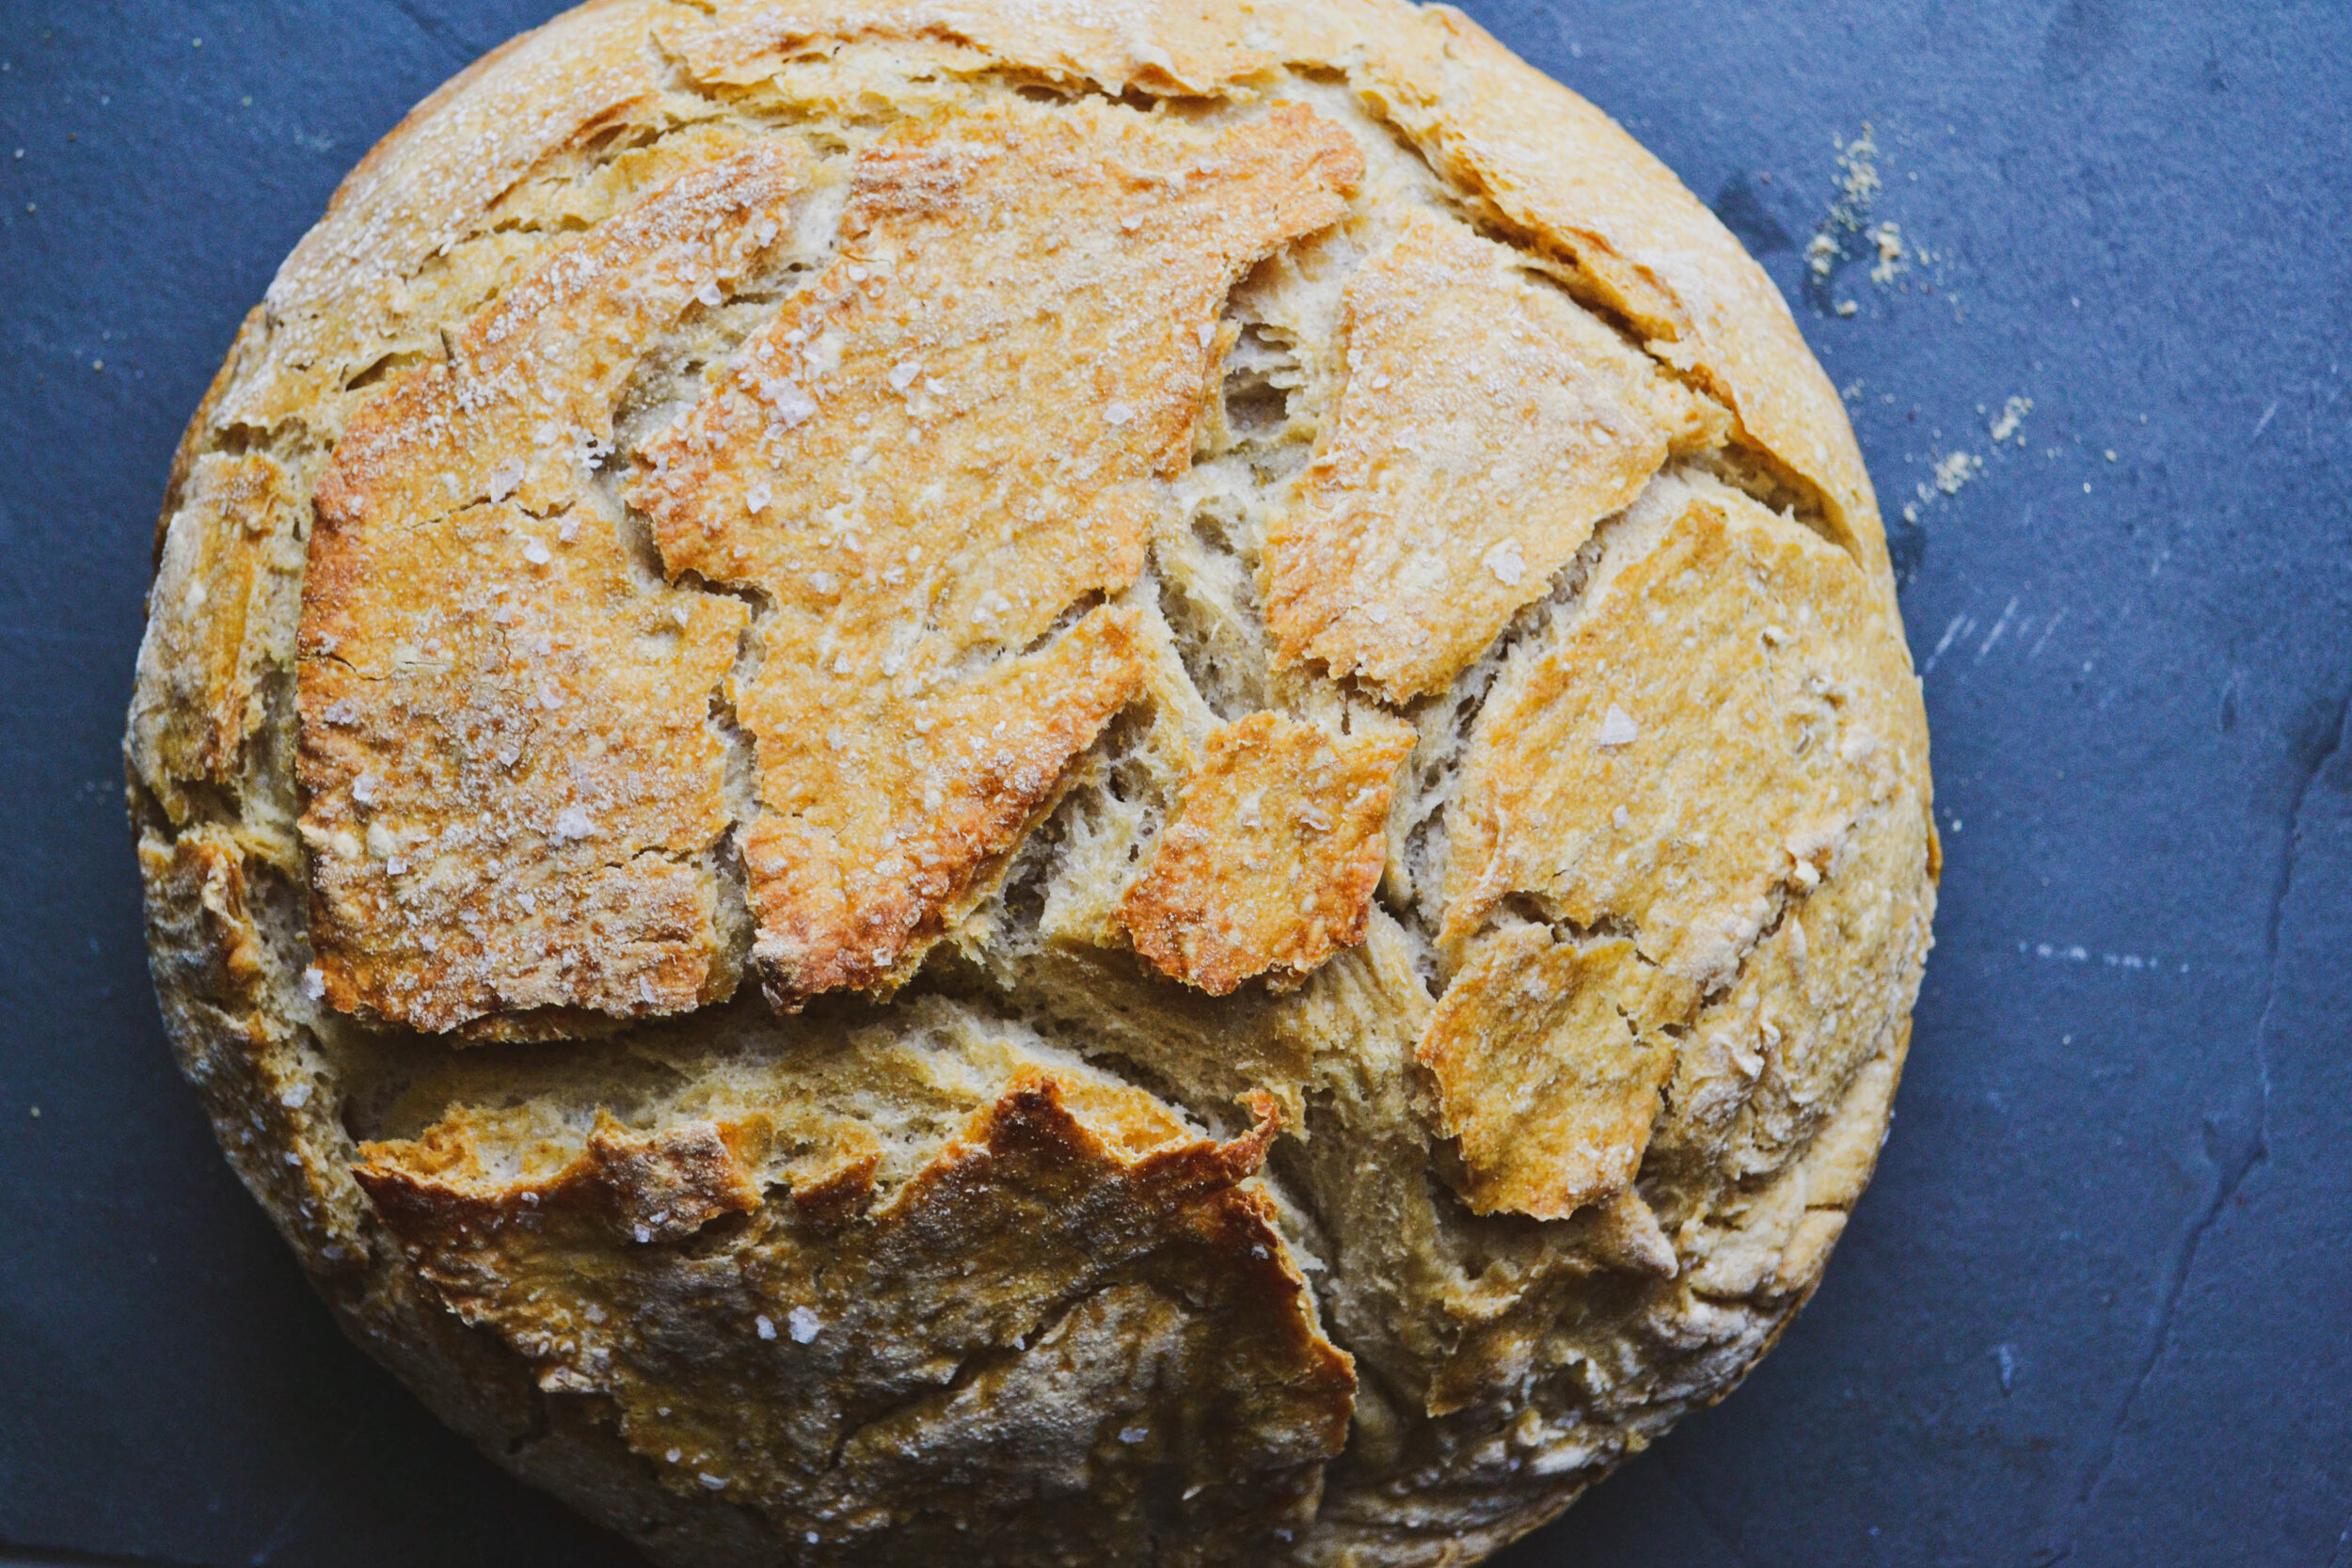
Just to recap:
Let your dough rise as described in the recipe from Emma Christensen.
Instead of dividing the dough in half, keep it as one large mass of dough and let it rise again in a large bowl or a proofing basket.
Preheat your dutch oven for an hour at 450 with the lid off.
Carefully transfer the dough to the dutch oven, slice with a serrated knife or a razor.
Bake the bread, covered and undisturbed for 50 minutes, remove it for the last 5-10.
I also learned in my research this week that the ideal temperature for a sourdough loaf is around 200 degrees and you can use a meat thermometer to check.

If you have time on your hands and are looking for something to keep you busy, I strongly suggest giving sourdough bread a shot. It is, without a doubt, a project recipe. It will take you a week from start to finish but the results are so worth it and you will walk away with an edible lesson.
To make things even better, I have been in the habit of making whipped goat cheese and herb spread for sandwiches now that Anthony and I are working from home. I have started putting this stuff on everything from bagels to breakfast sandwiches to grilled cheese. It has parsley, garlic, lemon, and goat cheese to give it a bright, tangy smack of flavor. If you don’t like goat cheese, I’ve also made a version of this with plain yogurt that is equally as delicious.
Here is Emma Christensen’s Beginner Sourdough Sandwich Loaf Recipe.

Whipped Goat Cheese Spread
Ingredients
4 slices sourdough bread
1 cup fresh parsley
1/4 cup fresh mint
2 cloves garlic
zest and juice from one lemon
4 oz goat cheese
2 oz cream cheese
1/2 teaspoon red pepper flakes
1 cup fresh radishes, thinly sliced
Directions
Toast the bread to your desired doneness.
In a food processor, combine the parsley, mint, garlic, and lemon zest. Pulse until it is all finely chopped.
Add the goat cheese, cream cheese, red pepper flakes, and lemon juice to the food processor and blend until it is smooth and light.
Smear the whipped cheese on the toast, top with sliced radishes, and season with salt and pepper.

Oysters with Mignonette
Maine has a burgeoning oyster scene. Given the cold waters of Maine and the many rivers, Maine, particularly Maine’s midcoast, are prime real estate for oyster farmers and harvesters.
I love oysters and have loved them for as long as I can remember. Raw oysters on the half shell, when fresh, have a clean, briny flavor to them that is just wonderful. Some people think I’m nuts and can’t stand the thought of eating something raw but those people don’t know what they are missing. In addition to being delicious, oysters are incredibly healthy and are quite possibly the most humble of warriors in the fight against climate change.
Health Benefits of Oysters
It pays to eat oysters. With a host of vitamins, minerals, and macronutrients, oysters are a nutrient-dense food.
Low in calories but high in protein
Not that I believe in counting calories but if I did, this would give me one more reason to love oysters. Coming in at a humble 40 calories, these little pups pack 5 grams of protein per oyster. 5 grams might not sound like much but considering the other nutrients found in oysters, its just one more reason to knock a few back.
Plenty of Zinc
Zinc is a critical mineral for a properly functioning body. From your immune system to your sense of taste and smell, zinc is involved in more bodily functions than any other mineral. It is theorized that low levels of zinc also inhibit male performance, hence the belief that oysters are an aphrodisiac.
Heart Healthy
Oysters have high levels of heart-healthy compounds like Omega 3 fatty acids, potassium, and magnesium, all of which are important nutrients for a healthy heart.
Great source of Vitamin D
Vitamin D is another vitamin group that is crucial to overall health. Vitamin D is necessary for everything from healthy bones to lessening the effects of Seasonal Affective Disorder to reducing your risk of developing chronic diseases including diabetes, dementia and some cancers.
More B12 than beef or lamb
Vitamin B12 is important for maintaining healthy red blood cells and a healthy metabolism. Most people think of beef and red meat when they think of B12 but oysters have almost 6 times the amount of b12 found in beef and lamb. The only cut of meat with more B12 than an oyster is beef liver and who wants to eat that?
Environmental Benefits of Oysters
The impact of climate change is becoming more and more dire as years of inaction go by. Water pollution, rising sea levels, and erosion are major issues for coastal communities. Fortunately, oysters offer a solution to some of the threats we face with climate change.
Water Purifiers
Nitrogen is one of the most common pollutants found in water. Often, the source of the nitrogen comes from farms upriver where fertilizer runoff ends up in groundwater and tributaries that make their way to our oceans and lakes. For those of us fortunate enough to live near the sea, oysters offer a great solution. Oysters thrive on nitrogen and are efficient at filtering that and other pollutants from the water.
Erosion Control
Along the coast, one of the biggest threats is coastal erosion during major weather events like hurricanes. As reefs die and harbors and bays are dredged, the seafloor and coast are becoming more and more susceptible to erosion. Fortunately, there is a solution that is a win for everyone. Oysters!
Oysters grow in huge clumps, forming natural reefs that help hold the seafloor and mudflats in place while the water above rages.

Oysters with Mignonette
This is a basic mignonette consisting of simple ingredients. It is fresh and tart, pairing well with fresh oysters. Get creative and experiment with different flavors such as citrus, ginger, spices or other vinegars.
Ingredients
1 dozen oysters
1 shallot finely minced
1 jalapeno, seeded and finely minced
1/2 cup red wine vinegar
1 teaspoon sugar
1 teaspoon ground black pepper
Directions
In a small bowl, combine everything but the oysters. Whisk until the sugar has dissolved, cover and chill for at least 30 minutes.
Shuck the oysters by carefully inserting an oyster knife in the hinge of the shells. Carefully wiggle the knife until it is securely between the shells. Twist the knife until the shells “pop” apart and run the knife along the edge of the shells. Detach the oyster from the shell by running the knife underneath the meat, being careful not to puncture the oyster.
Arrange the oysters on a plate of ice and serve with mignonette and lemon wedges.


Chocolate Dipped Pretzels
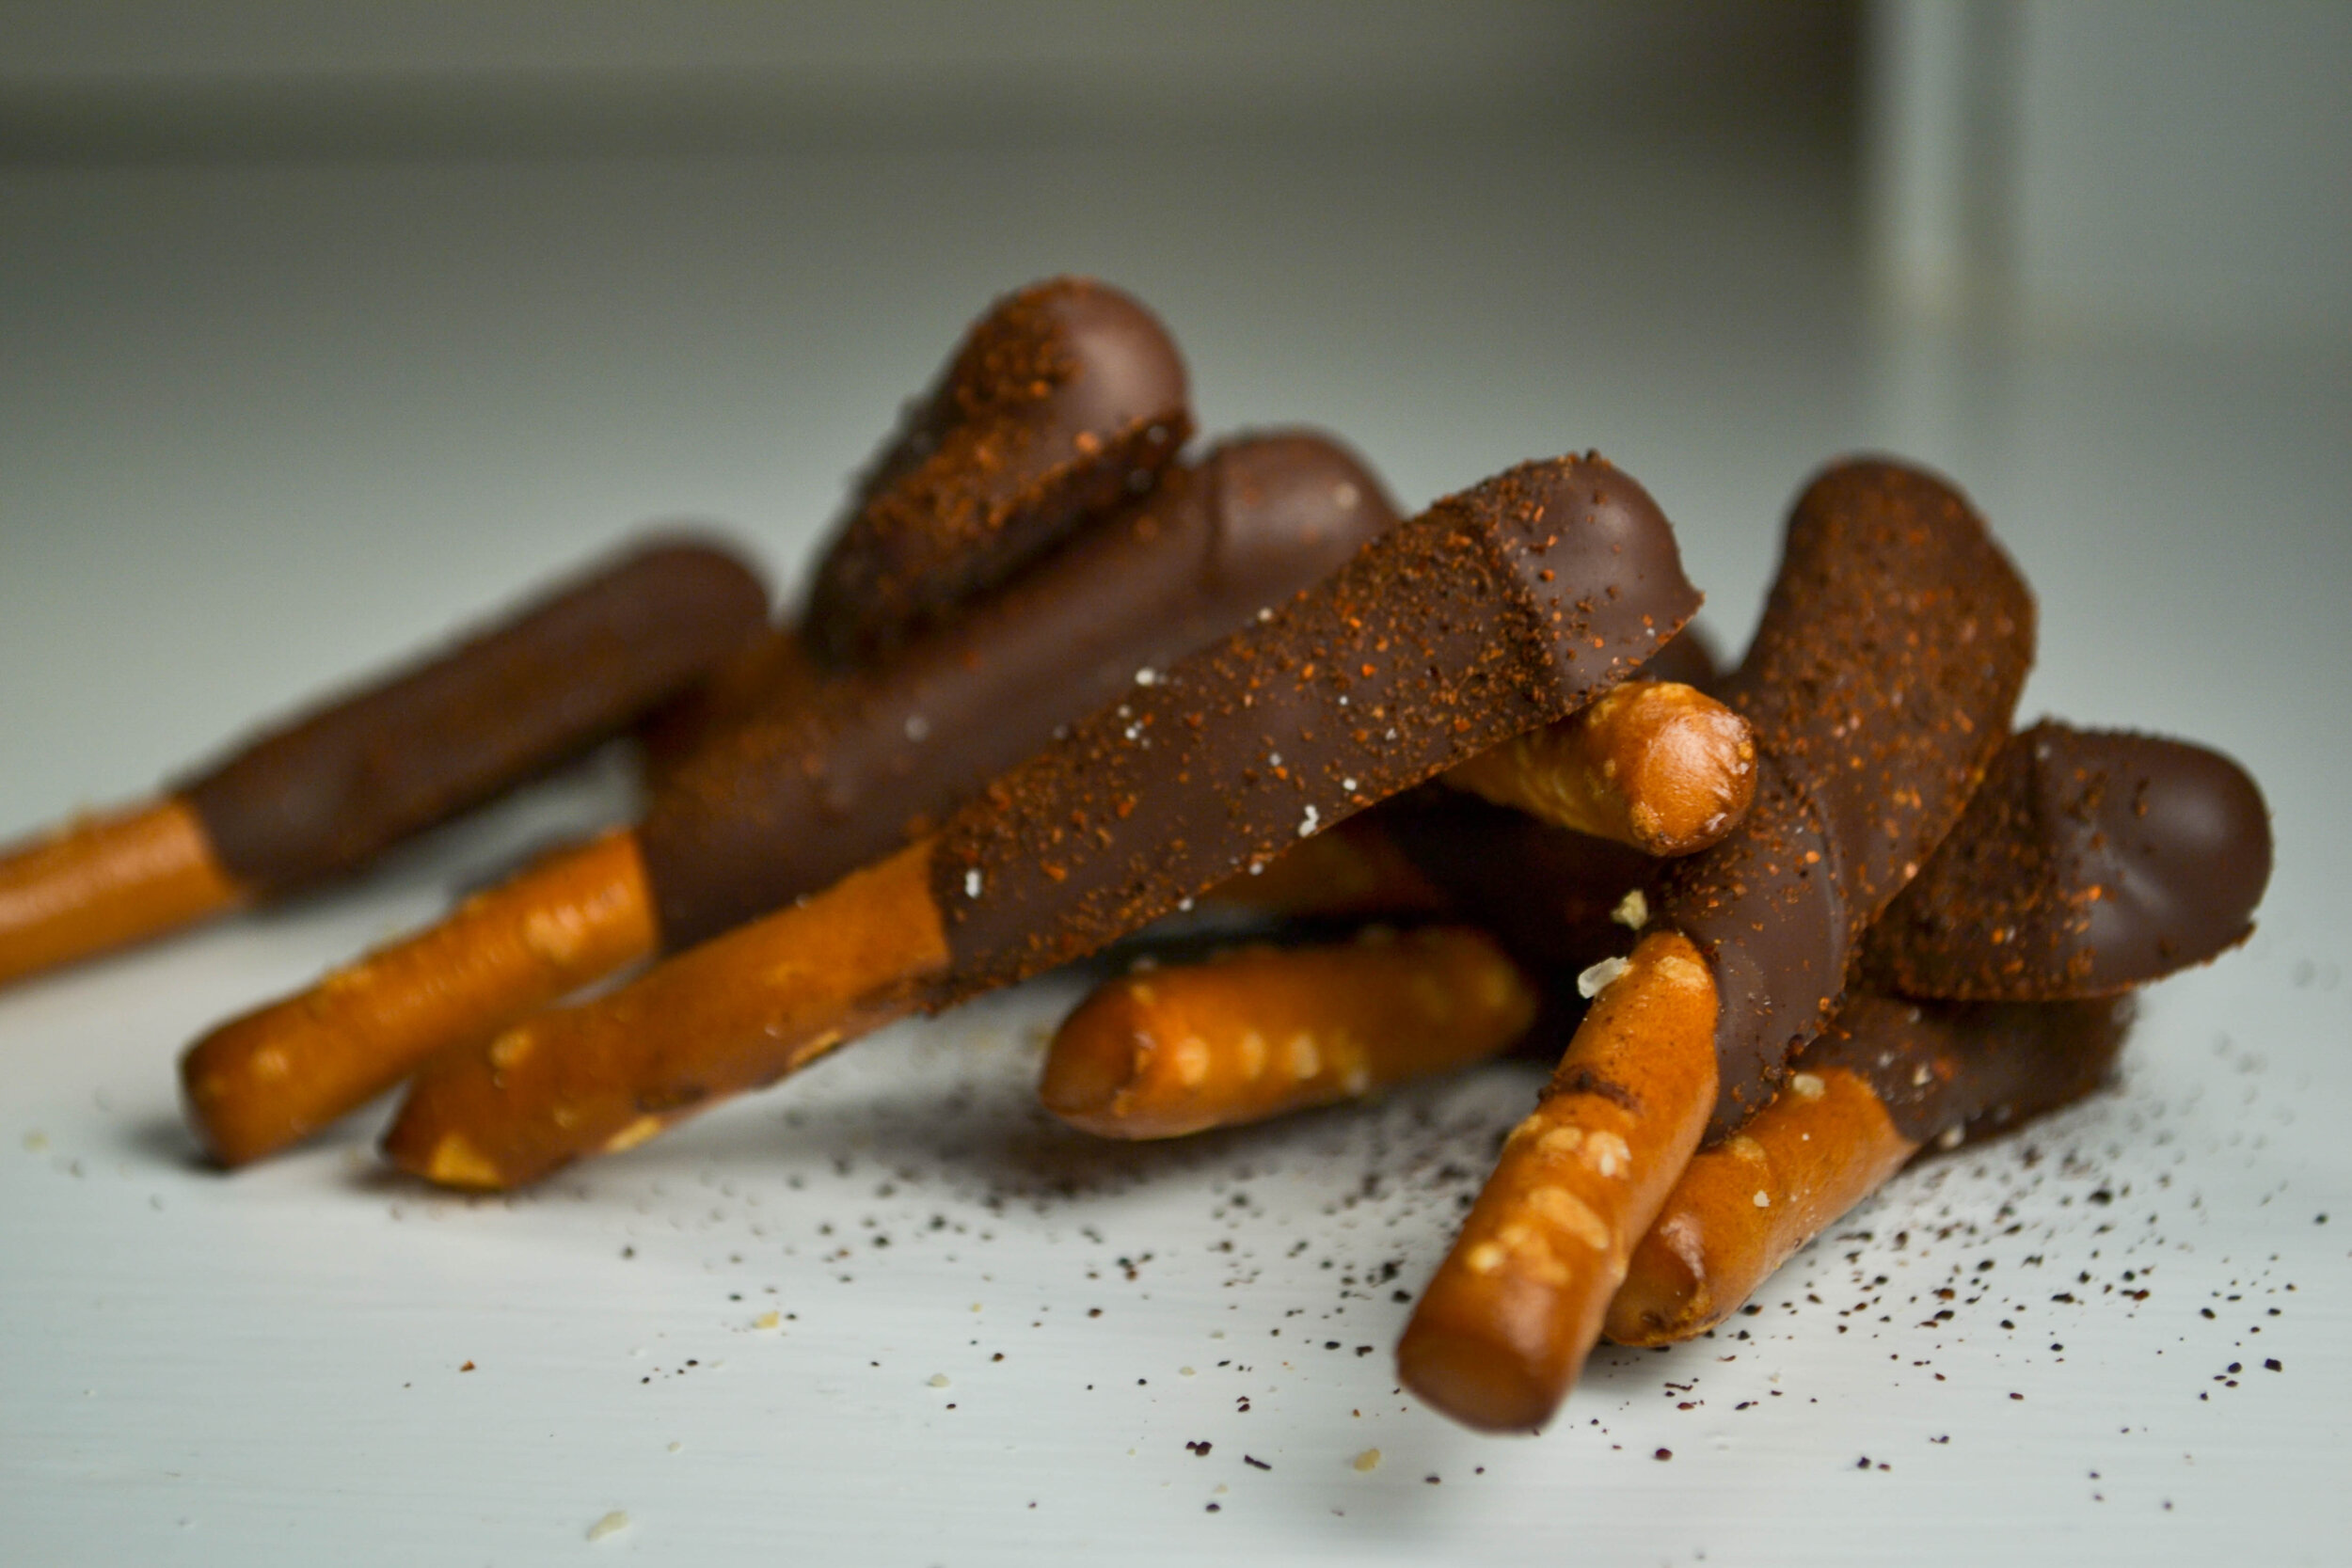
Chocolate covered pretzels are the ultimate canvas for fun snacks. Whether your craving something sweet and salty or looking for something fun to do with the family or on a date night, these are low pressure, easy and delicious!

Chocolate Dipped Pretzels
Ingredients
1 bag of chocolate chips
2-3 cups pretzel sticks
¼ cup chopped hazelnuts
1 tablespoon ancho-chili pepper
1 tablespoon of sea salt
Directions
Place a metal bowl over a pot of boiling water. Add the chocolate chips and stir constantly until the chocolate is melted and smooth. Remove from heat and make sure not to let the water touch the chocolate.
Working quickly, dip the pretzels into the chocolate and place on wax paper. Season with your topping of choice and allow the chocolate to harden on the counter for about 2 hours, you can put them in the freezer if you need to speed up the process.



Roasted Fingerling Potatoes with Romesco
One of my goals for 2020 and beyond is to change my relationship with food and how I think about nourishing my body. For me, this means cutting back on how much meat and dairy I eat and consuming more vegetables and plant-based foods. Much to Anthony’s chagrin, we’ve been on an 80/20 diet lately where 80% of the time, we eat plant-based foods while the other 20% we eat meat and dairy. I love it. I feel better, I’m just as satisfied with my meals as I am when I eat meat and I am spending less money.
Romesco has long been one of my favorite sauces. Not only does it have a totally unique flavor profile of nutty acidic goodness, but it is also super flexible and goes with so many wonderful things. Originally from Catalonia and served with fish, this sauce goes well with roasted vegetables, pasta, chicken and even meatballs. Admittedly, I love a good Italian red sauce that simmers all day with meatballs and sausage but this sauce gives all others a run for their money in my mind. The toasty flavor of the broiled vegetables and the fat from all those almonds give this sauce so much body that I literally lick the plate clean whenever I make it.
Romesco Sauce
Ingredients
1 lb Roma tomatoes, seeded and chopped
1 lb red bell peppers, seeded and chopped
2 Fresno chili peppers, chopped
5 garlic cloves, skinned
1 yellow onion, skinned and quartered
1 t paprika
1 t smoked paprika
2 tablespoons olive oil
Kosher salt and black pepper, to taste
½ cup almonds, toasted and ground
Directions
Preheat the broiler to high.
Toss everything but the almonds together in a large mixing bowl, being sure to coat everything evenly. Pour the mixture onto a large cookie sheet and arrange in a single layer. Broil, on high until everything starts to char
Remove from the oven and allow to cool.
Working in batches, carefully puree everything in a blender or food processor until smooth and saucy. If the sauce looks too thick, dilute it with some water or olive oil.
Roasted Fingerling Potatoes
Ingredients
1 lb fingerling potatoes, washed and halved lengthwise
2 tablespoons olive oil
1 teaspoon rosemary
2 cloves garlic, minced
salt and pepper to taste
Directions
Preheat the oven to 425
In a large bowl, toss all the ingredients until the potatoes are evenly coated.
Spread the potatoes out on a large cookie sheet in a single layer, cut side down.
Roast the potatoes 20-25 minutes, flipping the potatoes halfway through. Remove from oven and serve with parmesan, parsley, and romesco


Lobster Arancinni
It is true. Anthony and I are trying to be healthier in 2020 and beyond. We are currently 5 days into dry January and my latest obsession is gut health and eating more plants. I’m proud of all our endeavors but balance is the key to success so this week I grabbed a pack of frozen lobster, mixed it with some leftover rice and made these deep-fried cheesy babies.
Technically, arancini are made with arborio rice, a great way to use up leftover risotto. Unfortunately, I didn’t have any arborio rice to spare so I went with plain old jasmine rice that was a few days old and stale. I know what your thinking, stale rice? Hear me out. Day old, cold rice is ideal for things like arancini and fried rice because it is already cooked and the starches have had time to settle and solidify. This means that when you fry them up, the rice gets extra crispy and you get extra credit for making such crispy rice.
These balls are not for the faint of heart and should not be logged in to whatever calorie tracker you downloaded on New Year’s Day. These are treat-yourself snacks to be indulged in and shared. You don’t have to invite friends over when you make these but you would end up being the favorite in your group.
The gochujang aioli used here is also superb with eggs, on sandwiches, wraps, whatever, so double the recipe and have some extra for later in the week.

Lobster Arancini with Gochujang Aioli
Ingredients
1/2 cup mayonnaise
1/4 cup gochujang
1 cup chopped lobster meat (about 1lb, or two lobsters)
3 cups cooked jasmine rice
2 tablespoons minced cilantro
1/2 cup fontina, shredded
1/2 cup mozzarella, shredded
3 eggs
1 1/2 cup breadcrumbs, divided
1 cup flour
Directions
In a small mixing bowl whisk the mayonnaise and gochujang until pale orange in color and there aren’t any chunks of gochujang remaining. Set aside.
In a large bowl, combine the lobster meat, rice, cilantro, fontina, mozzarella, and two eggs. Add 2/3 cup of the breadcrumbs and form into 16 1 - 2-inch balls and set aside.
Whisk the remaining egg with a little water and pour into a wide shallow bowl. Place the flour and remaining breadcrumbs in a shallow separate shallow bowls as well.
Dredge the balls first in flour, then in egg and finally in the breadcrumbs. Set each finished ball on a parchment lined tray and allow them to cool for one hour before cooking.
Fill a large pot with 2 inches of oil and heat until a thermometer reads 350. Working in batches, fry each ball until golden brown, about 4 minutes. Remove from the oil with a slotted spoon and all to drain on paper towels. Season with flaky salt and serve.

Crack Crackers
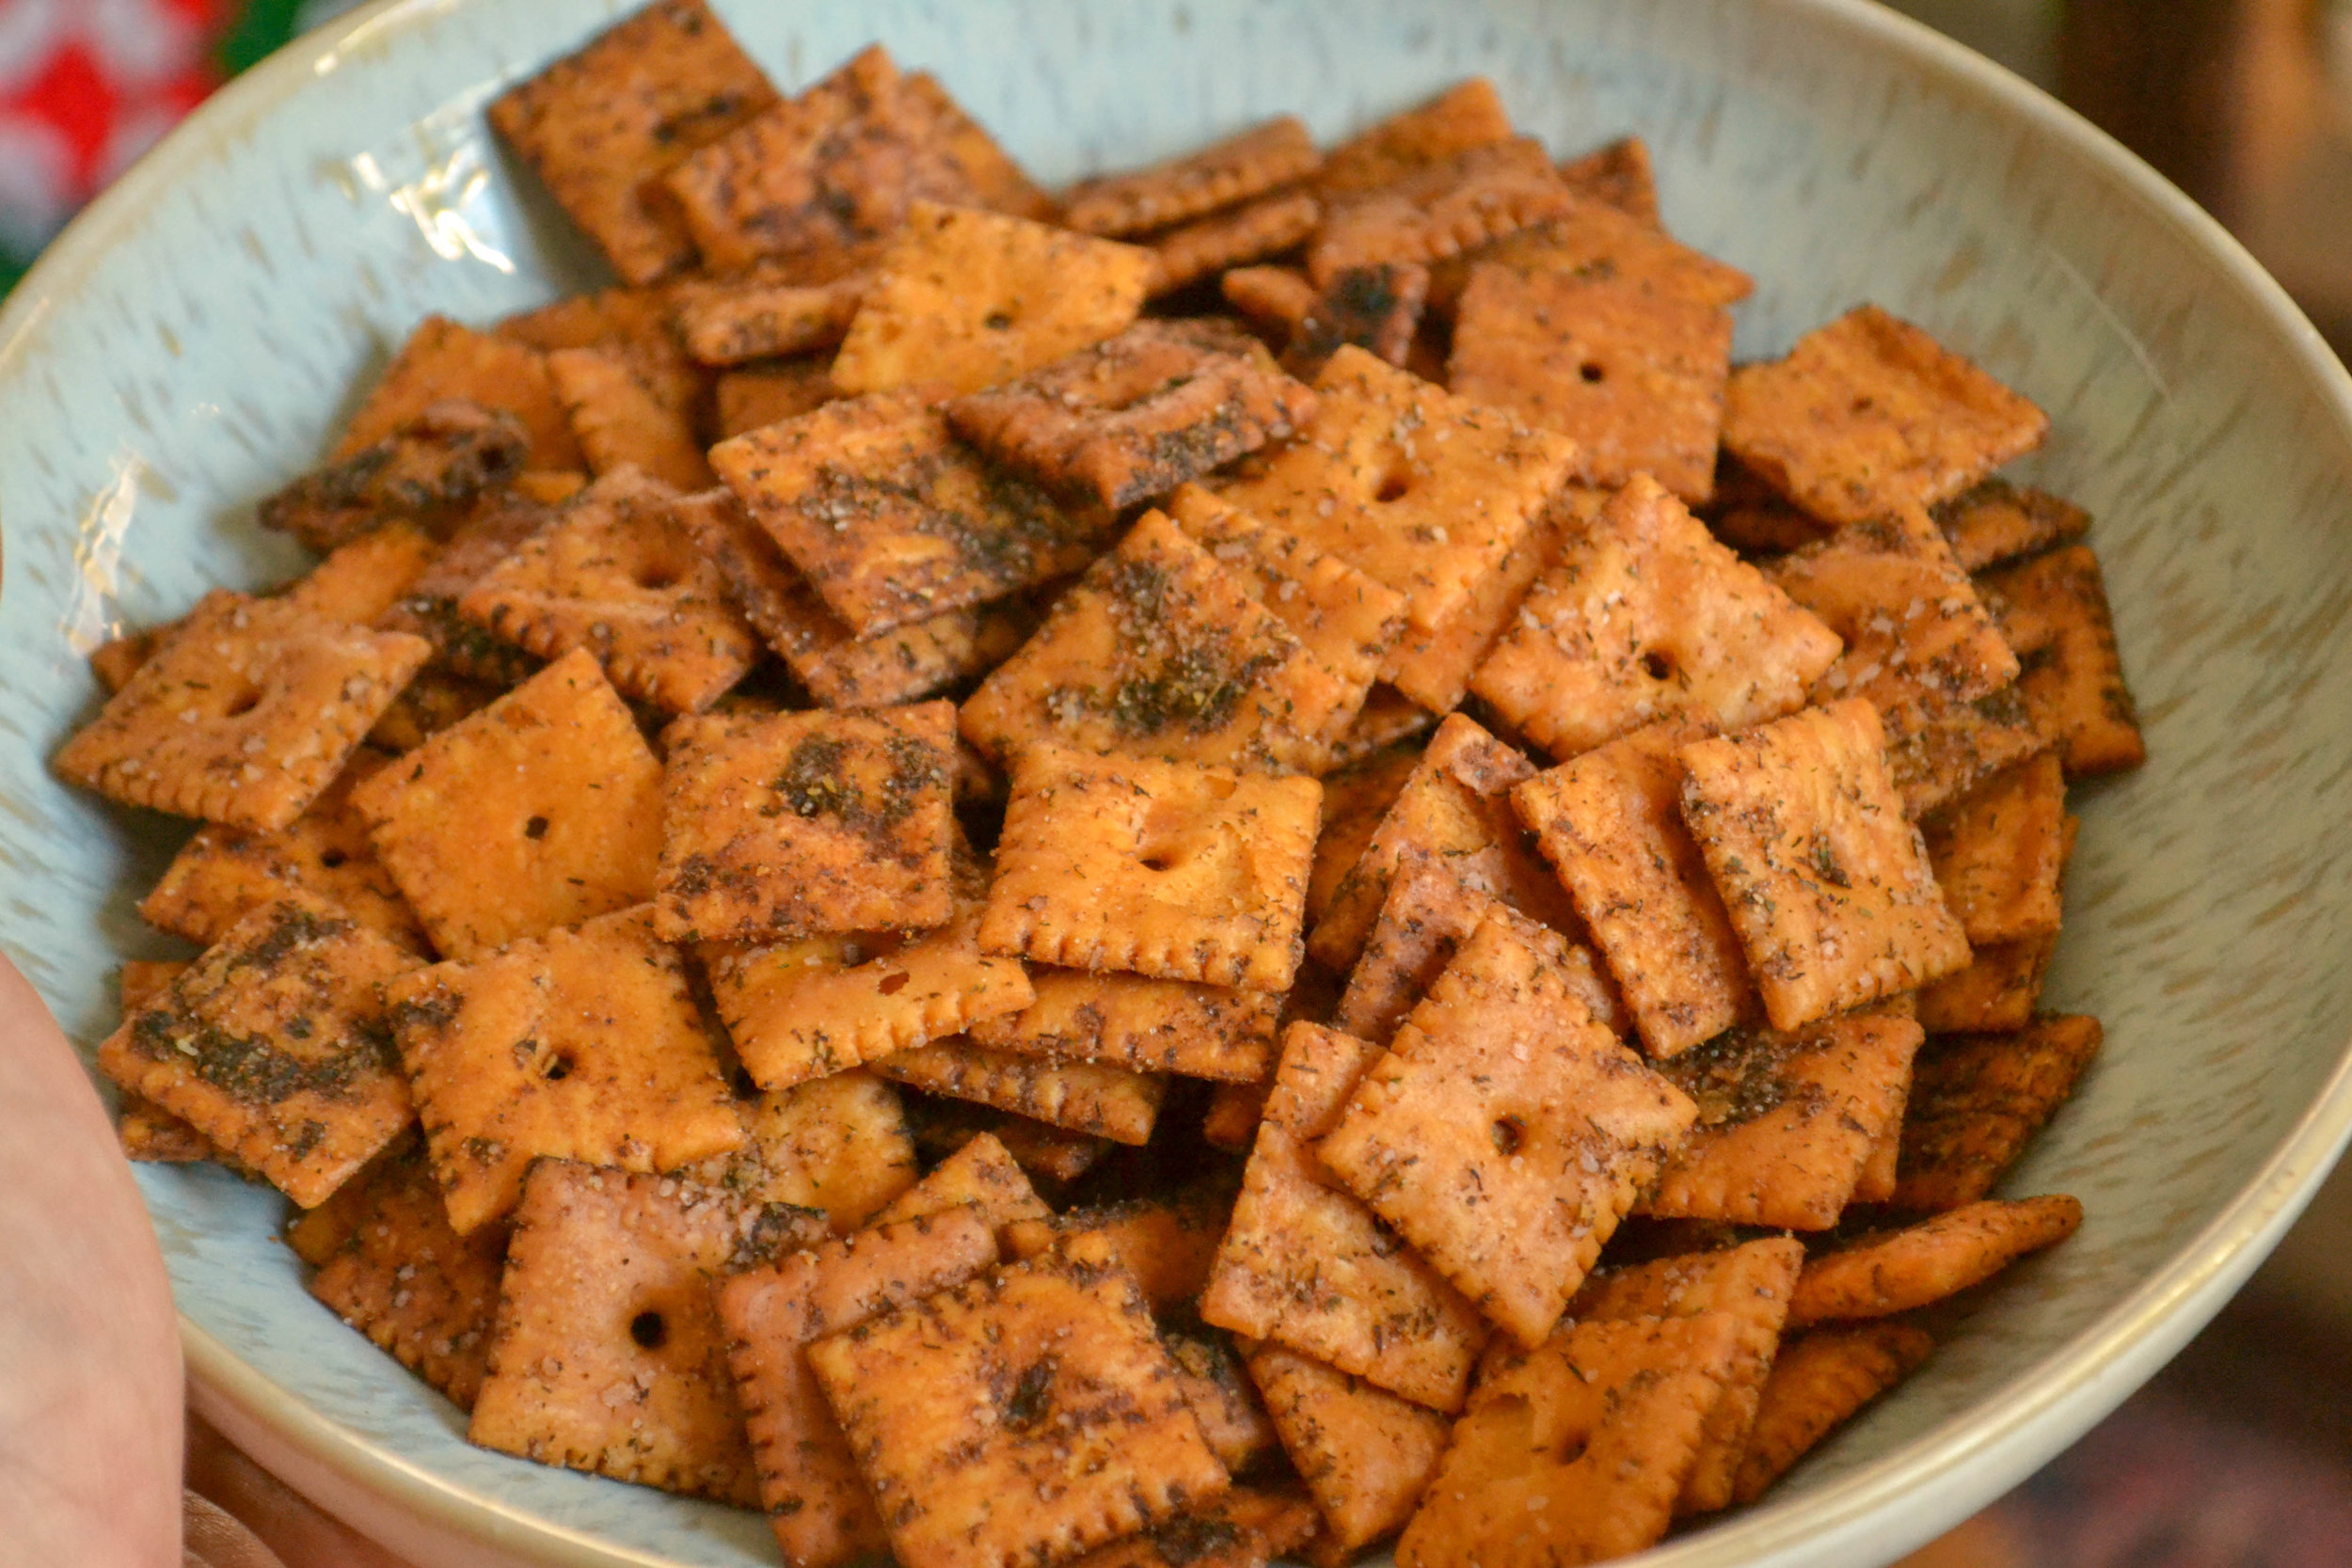
My mom makes these every year for Thanksgiving and Christmas and remind me of home with each bite. They are lovingly referred to as “crack crackers” because they are SO. ADDICITIVE.
Kathy’s Crack Crackers
Ingredients
1 package ranch dressing mix
1 tablespoon dill
1 tablespoon garlic powder
1/3 cup olive oil
2 16oz packages regular Cheeze-Its
Directions
1. Preheat the oven to 300
2. In a large mixing bowl, whisk the dressing mix, dill and garlic. Slowly whisk in the olive and and mix until evenly combined. Add the crackers and toss to coat.
3. Separate the crackers between two cookie sheets and bake for 30 minutes, stirring ever ten minutes.
4. When the crackers are browned but not burned remove from the oven and allow to cool on the cookie sheets.