Spiced Paprika Chicken
The weather in Maine is officially in fall mode. I went for a hike a few weeks ago and looked out from the top at the tapestry of color formed by all the changing leaves. Now that I am back from the island for the winter, I’ve settled back into my normal routine of writing, cooking, writing, cooking, and working on the house. Earlier this fall, my parents and I started scraping the exterior of the house and preparing it for a fresh coat of paint.


Painting the house has been a series of negotiations between Anthony and me. When we bought the house a few years ago, it was and remains light green with a red foundation, and white trim. It is not that I don’t like green exterior houses or that I am afraid of color. In fact, I actually like the color of the house. I wanted a change however and change is what we have settled on. After, literally years, we have agreed to paint the house flannel gray with dark charcoal (almost black) foundation. The detached garage will be a different color but we don’t know what quite yet. It should be quite sharp, hopefully. It could also look a little drab, you never know.
House projects aside, I am excited to be back in the kitchen coming up with new recipes and tweaking old. I have a lot of fresh ideas that I can’t wait to share. I will also be posting a series of recipes and articles dedicated to the upcoming holidays.
This week, we have Spiced Paprika Chicken. Anthony and I had dinner at a new restaurant in Cape Porpoise this summer and I’ve been thinking about it ever since. We shared this grilled chicken that was AMAZING. Cooked over a wood fire and covered in spices, it was juicy, tender, and full of flavor. This recipe isn’t exactly the same but the combination of smoked paprika, chili powder, and cinnamon really delivers a mouthful of flavor. A little lemon juice at the end brightens things up and pulls out even more flavor. The best part, this came together in less than an hour, uses simple ingredients, and is flavorful without being overly spicy.
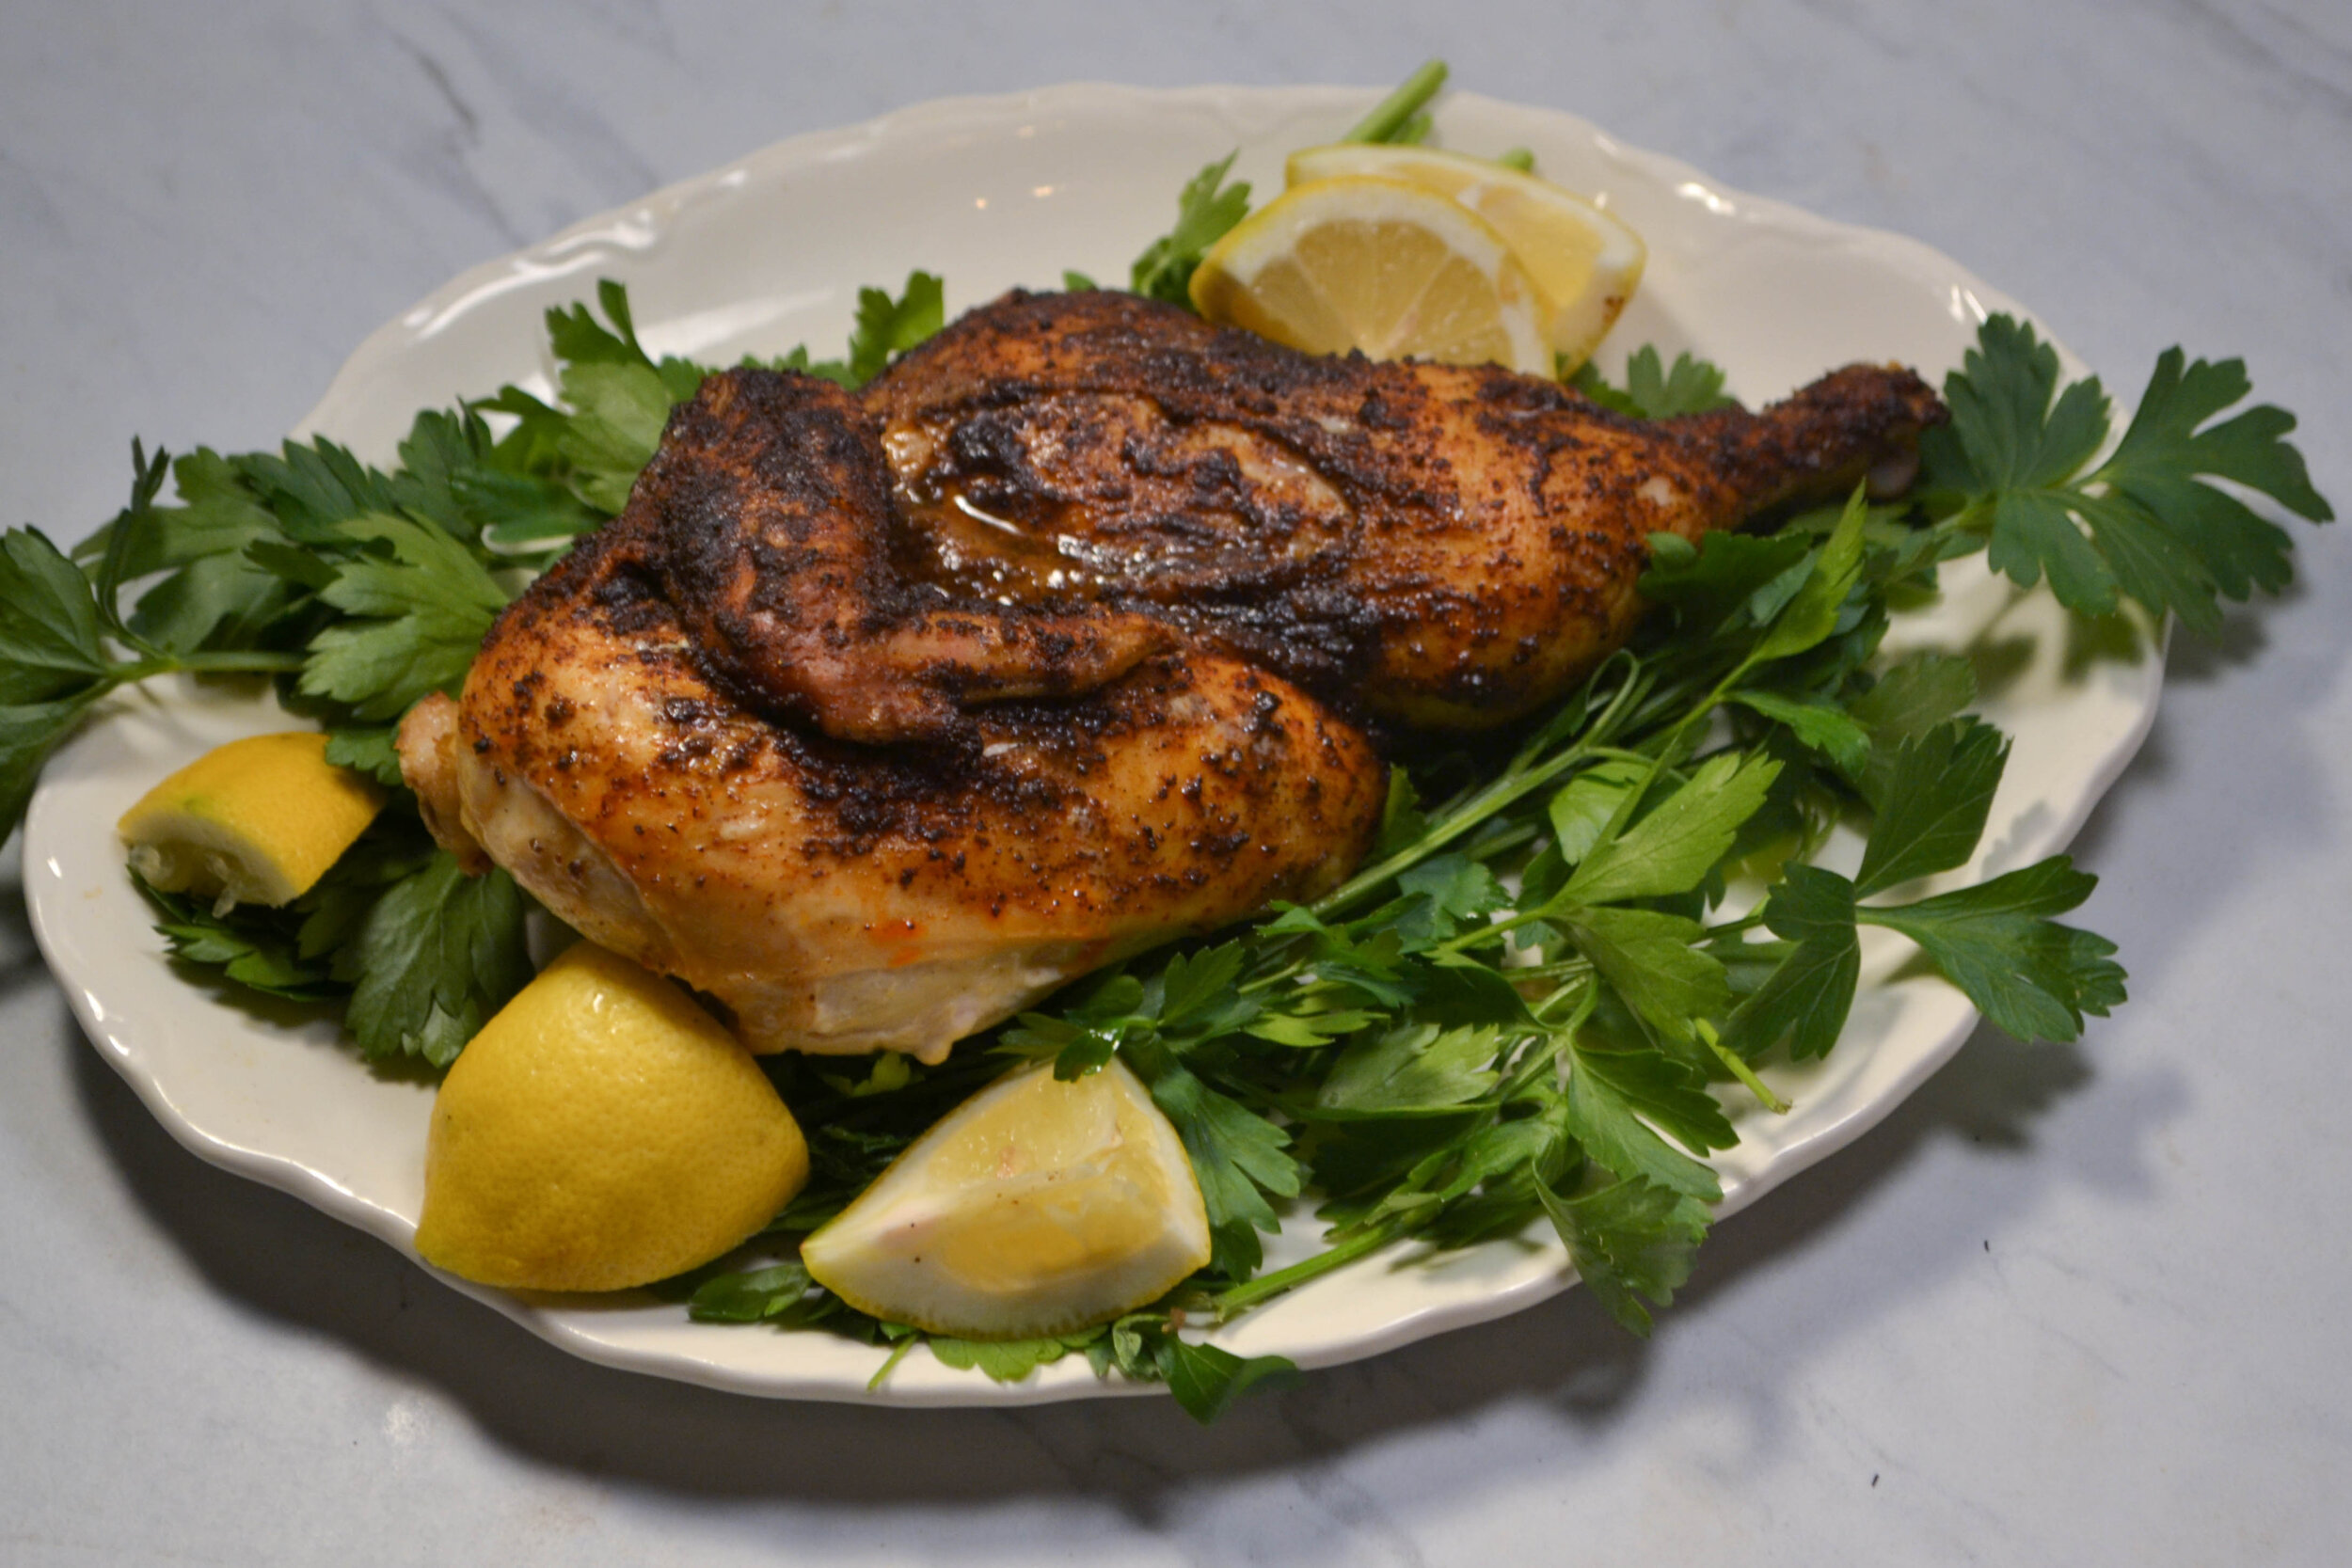
Spiced Paprika Chicken
Ingredients
2 chicken halves
2 teaspoons smoked paprika
1/2 teaspoon chili powder
1/2 teaspoon cinnamon
1/4 teaspoon salt
1/4 teaspoon black pepper
1 Tablespoon olive oil
Directions
Preheat the oven to 425 and pat the chicken dry with paper towels and poke the skin with a sharp knife or a fork.
Mix the spices and oil together in a small bowl to create a paste. Using either your hands or a basting brush, coat the chicken on all sides with the spice paste and set aside to rest.
Place a wire rack on a cookie sheet and place the chicken on top of the rack. Roast the chicken for 45 minutes or until a thermometer reads 165. Remove from the oven and allow to rest. Serve with lemon wedges.

Grilled Steak and Cucumber Salad
One of my favorite ways to dress up a cheaper cut of steak is to marinate it in this marinade. The sauce is a little spicy, a little sweet, salty, and has a little funk thanks to the fish sauce. It is a versatile marinade and suitable for everything from chicken and steak to vegetables. The sugar in the recipe gives whatever you grill and nice char, adding to the depth of flavor.
This recipe calls for Sambal Oleek, a chili paste that has become pretty ubiquitous in grocery stores. It is typically in the Asian food aisle near the sriracha. I love it because it packs enough heat to be worthwhile but not so much that you’re going to burn someone’s head off. When I’m cooking for the whole family I have to make considerations like heat and spice tolerance but this little paste seems to please all palates.

The last month has been absolutely insane. When I took over managing the family business last year, I never imagined I would face a challenge like the one we are in now. I have spent the last three months consumed by all things COVID as we operate our restaurant safely.
Fortunately, Anthony and our animals have been with me while I get through everything from painting boats and hiring staff, to navigating our COVID policies. It’s been a very challenging and daunting time but having my little family here has helped ease my nerves.



One last thing before I share the recipe. I feel it would be wrong not to express my deepest grief and anguish at all the pain in the country right now. From those frightened by the corona-virus pandemic to those bravely fighting and demanding social justice, I see you, I respect you, and you are valid in my eyes. I have a tremendous amount of privilege and it is my sincere intent to use it to lift others up. As a white gay man, I have directly benefited from the bravery and grit shown by black trans women and so many others. Without brave people like Marsha P Johnson, it is likely that Anthony and I would not be married and we would still be living in a society that forces people like us to hide who we are. I have spent time reflecting and questioning my own perceptions and continue to educate myself.
With that, here’s the beef:
Grilled Steak and Cucumber Salad
Ingredients
For the Steak
1/4 c fish sauce
zest and juice of 1 lime
2 T brown sugar
1 T sambal oleek
1/4 c soy sauce
2-inch nub of ginger, grated
2 garlic cloves, minced
2lbs steak
For the Cucumbers
Juice and zest of 1 lime
1 T fish sauce
1 T soy sauce
1 T gochujang
1 large seedless cucumber, sliced 1/2 inch
1 shallot, finely minced
1/2 teaspoon salt
Directions
Combine all the ingredients for the marinade in a bowl and whisk until the sugar dissolves. Pour everything into a large ziplock bag and add the meat. Place the bag in the refrigerator and allow it to marinate for at least two hours but preferably overnight.
For the cucumbers, combine the lime zest and juice, fish sauce, soy sauce, and gochujang in a large bowl and whisk until everything is evenly combined. Toss with the cucumbers and usually and season to taste with salt. Cover and refrigerate.
To cook the meat, remove the bag from the refrigerator and allow it to rest about 20 minutes at room temperature. Meanwhile, light the grill.
Grill the steak to desired doneness, I prefer to cook my steak to medium rare so it doesn’t dry out.
Slice the steak against the grain and serve with the cucumbers over steamed rice.

Whole Wheat Spaghetti with Parsley, Almonds, and Chickpeas
It’s been two weeks since Anthony and I moved out to the island and we’re so happy to be together during this time. In a normal year, we would be separated at this point, I would be alone on the island while Anthony stays at our home, tending to the lawn, gardens, and house. One blessing that came from the coronavirus pandemic is Anthony’s ability to work remotely. Now Anthony is able to go back and forth from our house to the island as needed and the whole family can be together.

Since moving out here, we’ve been busy trying to get everything ready for the upcoming season. COVID19 will undoubtedly have an impact on our business, and in many ways it already has. Despite all this, I am hopeful that we will be able to open and operate in a modified manner. I have been working diligently to create a risk mitigation plan and develop employee training protocols to keep our guests, team, and family safe.
Training and COVID related plans aside, we’re moving forward with all the annual projects; cleaning and weeding gardens, painting buildings, and picnic tables, and getting our ferry, Bennie Alice, ready for the season. Anthony and I have even had time to talk about starting our family and are so excited to begin the process!
With so much to do this spring, I’ve had less time to spend in the kitchen and I’m actually OK with this. Food is my passion and love language but sometimes a break is nice. I love this recipe because it is fast, easy, and fresh. It uses inexpensive pantry staples and is easy to customize. Sometimes we throw in olives, sometimes we throw in red pepper flakes. Either way, the end result is a delicious, meatless dish that comes together easily so Anthony and I can spend less time in the kitchen and more time enjoying our slice of heaven.

Whole Wheat Spaghetti with Parsley, Almonds, and Chickpeas
Ingredients
1 box whole-wheat spaghetti
1 cup slivered almonds
1 tablespoon olive oil
1 onion, sliced
1 tablespoon garlic, minced
1 can chickpeas, drained and rinsed
1 cup chopped parsley
1 tablespoon lemon juice
parmesan cheese, for garnish
Directions
Bring a large pot of salted water to a boil and cook the pasta according to the instructions on the package. Reserve one cup of the water before straining the pasta.
In a large skillet, toast the almonds until they are browned and aromatic, about 60 seconds, set aside.
Return the skillet to the stove and add the olive oil. Heat over medium-high heat and add the onions and cook until softened, about 3 minutes. Add the chickpeas, season with salt and pepper, and continue cooking for 3 more minutes. Finally, add the garlic and cook until aromatic, about 30 seconds.
Toss the onions and chickpeas with the parsley, almonds, and pasta. Add the reserved pasta water and lemon juice, cook until most of the liquid is absorbed, 2 minutes.
Garnish with more parsley and parmesan cheese.

Grilled Chicken Sandwich with Almond Tabbouleh
Happy Memorial Day Weekend! Hopefully we are all able to get out and be together in some capacity this weekend and see the ones we love. Now, more than ever, it feels so important that we share feelings of gratitude and community. In the face of what has been, and continues to be, a wild and uncertain time, thanking those who sacrificed and put themselves in harm’s way for our freedoms and rights is the least we can do.
You’re likely heading to or hosting a gathering at some point this weekend. We still can’t have gatherings of more than 10 people in Maine but the family is moving to the island this weekend so we will all be together there. Since there’s so much to do to get ready for Clambake season, we’re taking turns cooking dinner this weekend. Anthony and I are working on a menu and testing recipes like this one. This recipe is straight forward and a nice change up from the typical memorial day menu of burgers and hot dogs.
For the uninitiated, shawarma is a middle eastern dish of chicken piled on a spit with tons of seasonings and fat and then slowly cooked. The result is succulent meat that is crunchy on the outside and insanely flavorful. I love it and it goes well with hot weather and fresh herbs.
The marinade in this recipe is very thick due to the yogurt but trust me, its a good thing. The enzymes in the yogurt and lemon juice will slowly work their magic overnight, breaking down the meat until it is tender. The spices and flavors will seep in too, creating a well-rounded mouthful with each bite.
Perhaps the true star of this sandwich though is the condiment. Tabbouleh is one of my favorite foods because of its versatility. You can eat it as a dip, put it on a sandwich, or toss it with just about anything. The bright flavors really sing when paired with grilled foods. Traditionally, tabbouleh is made with bulgar, a wheat product. We didn’t have any so II dug through the pantry and came out with some whole roasted almonds. I popped them in a cast-iron skillet to toast and then into the food processor with everything else. Press go and walk away. It’s as easy as that. Get wild!
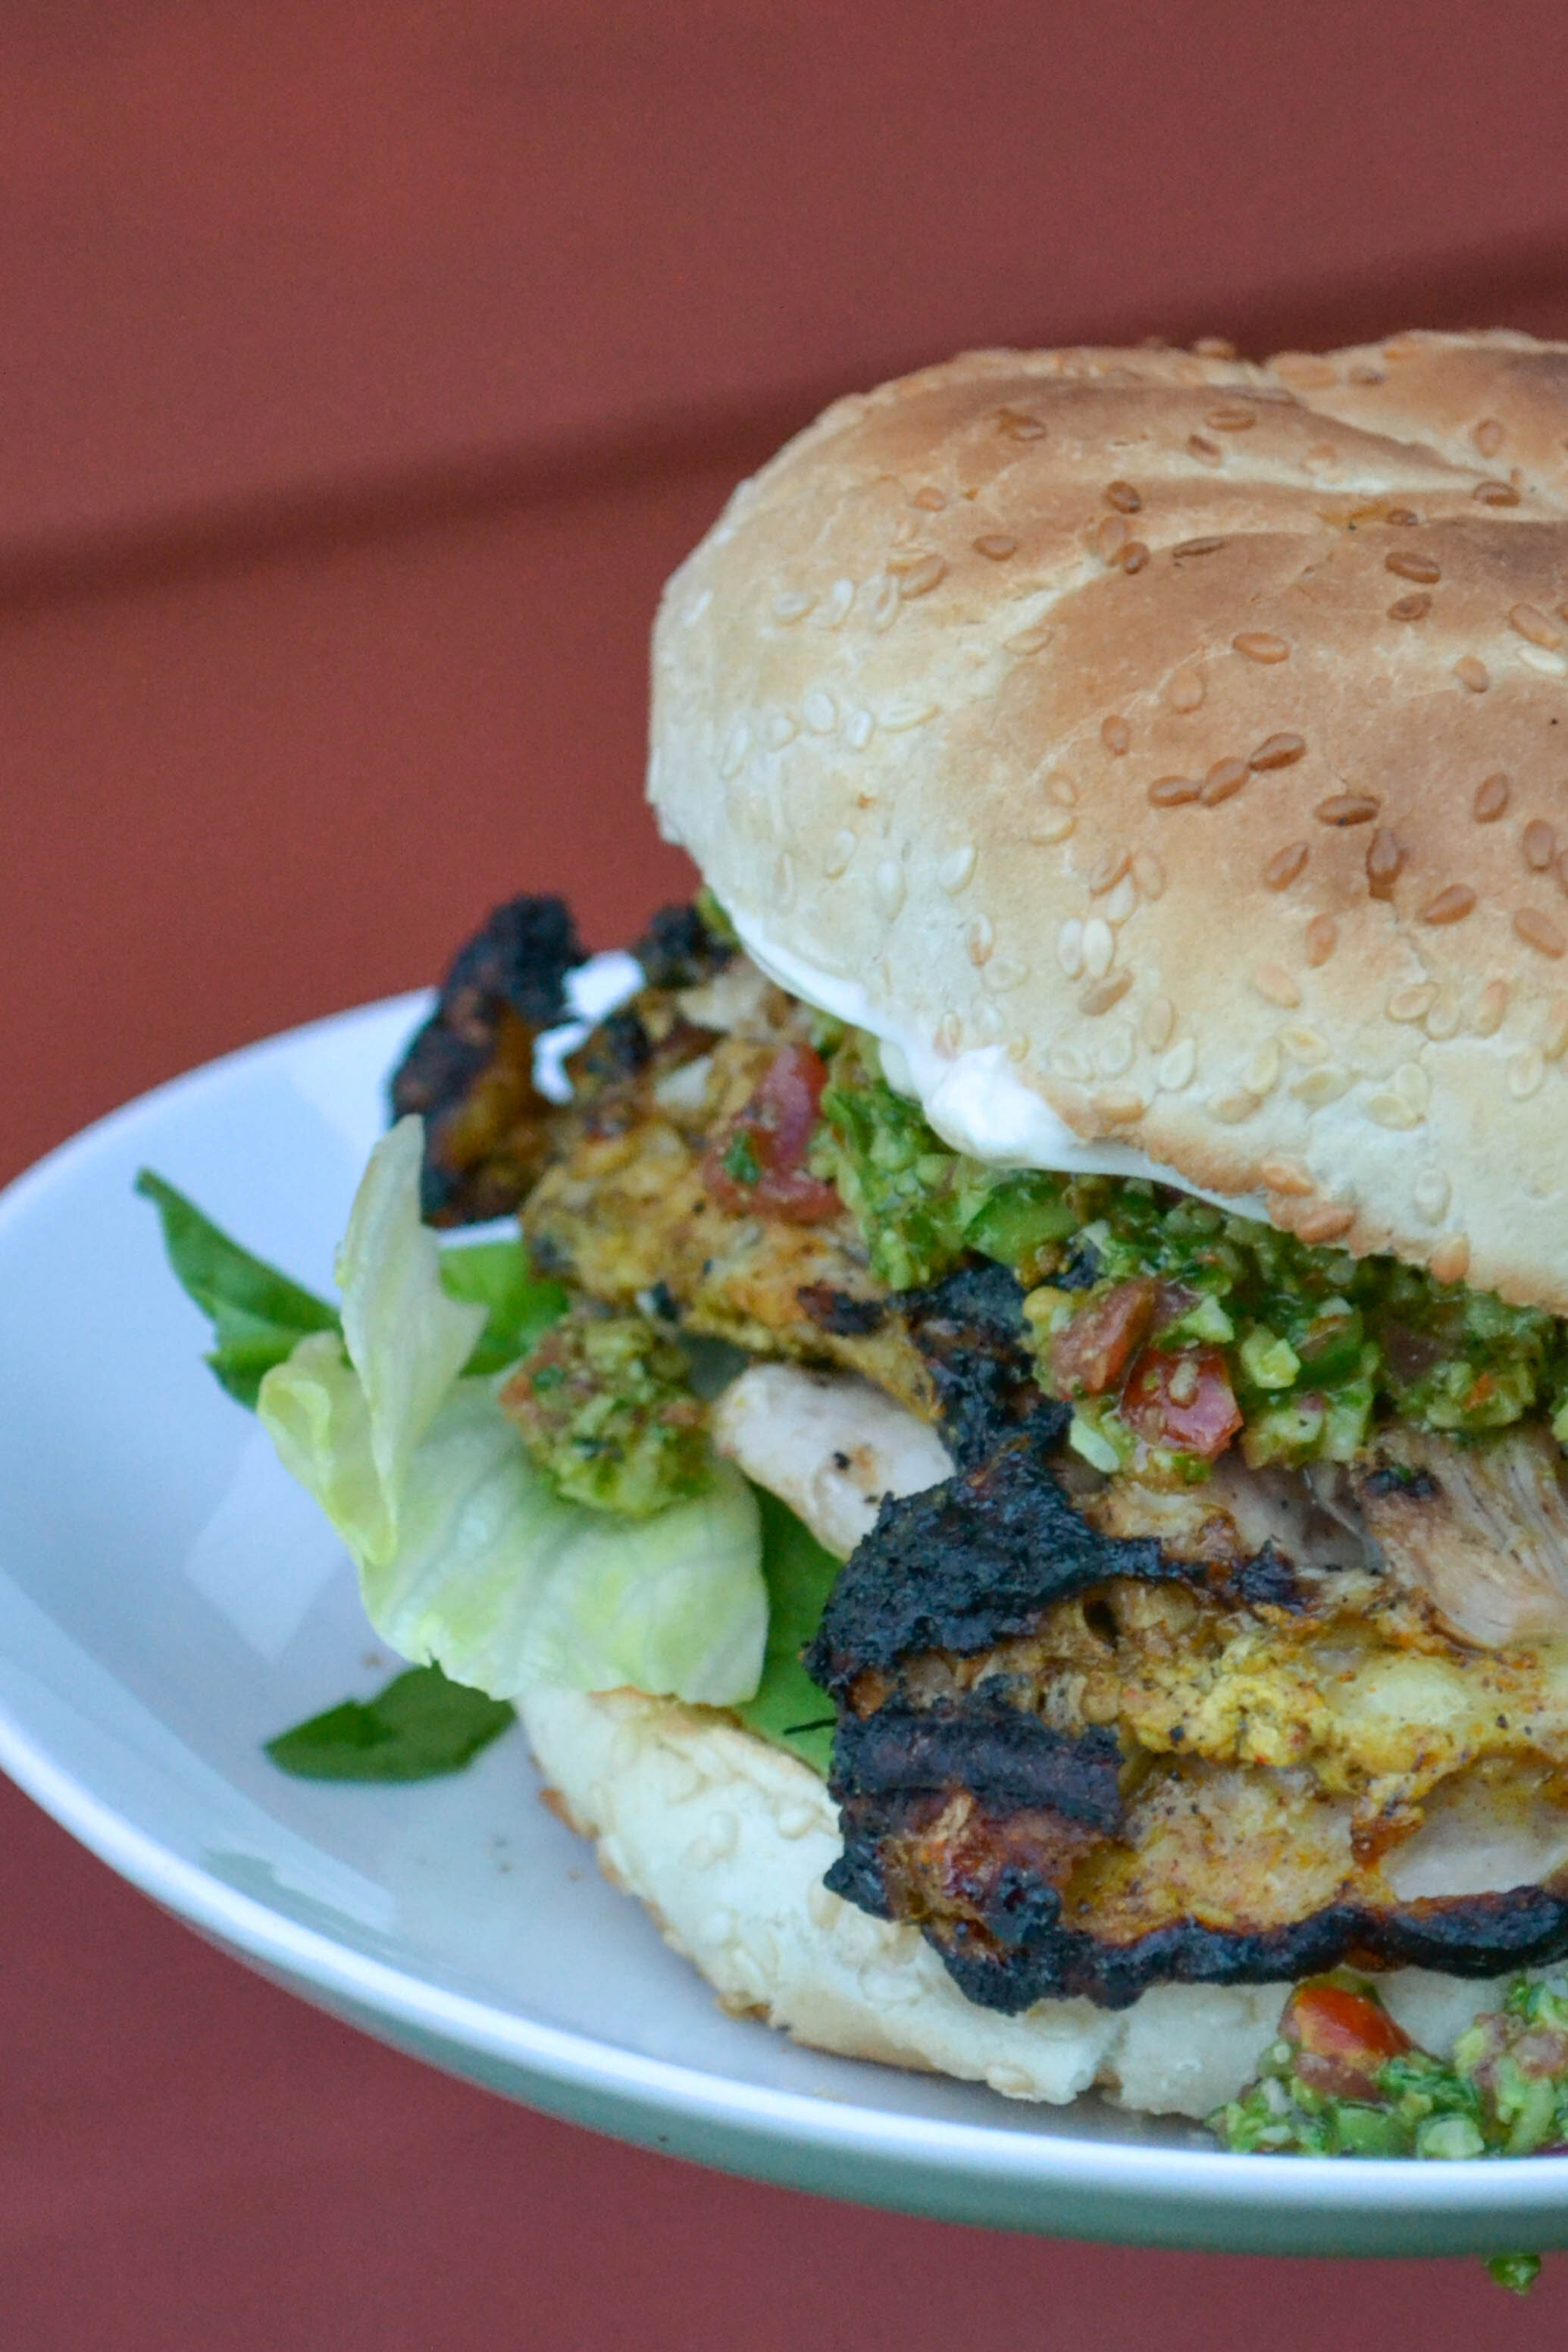
Grilled Chicken Sandwich with Almond Tabbouleh
Ingredients
For the chicken
1 Tablespoon Garam Masala
1 Tablespoon curry powder
¼ teaspoon cayenne
1 T lemon juice
2 cups plain yogurt
½ cup olive oil
½ teaspoon salt
½ teaspoon black pepper
For the almond Tabbouleh
½ cup almonds, toasted
1 cup parsley
1 cup cilantro
1 fresno chili, seeded and chopped
1 tablespoon minced garlic
½ cup radishes, chopped
1 cup chopped cucumber
½ cup cherry tomatoes
½ cup olive oil
¼ cup lemon juice
Directions
Marinate the chicken.
Stir the garam masala, curry powder, cayenne, lemon juice, yogurt, olive oil, salt, and pepper in a large mixing bowl.
Transfer the yogurt mixture to a large ziplock bag and add the chicken thighs, making sure the meat is evenly coated. Refrigerate and allow to marinate at least 30 minutes but preferably overnight.
Make the almond tabbouleh.
Toast the almonds over low heat in a skillet until browned and aromatic, about 2 minutes. Transfer to a food processor and pulse until roughly chopped.
Add the remaining ingredients except for the olive oil and lemon juice and blend until smooth. Add the lemon juice and pulse three times. With the processor on low, slowly add the olive oil and process until the mixture is smooth. Season with salt and pepper to taste and allow to chill before serving.
Cook and Assemble.
Grill the chicken over low heat on a greased and preheated grill until cooked through, about 4 minutes per side. Remove from heat and allow to rest.
Toast the buns and enjoy with the tabouleh and other toppings!

Penne Pasta alla Kathy
Everyone thinks their mother is the best mother in the world, myself included. While I’m not getting into a fight with anyone over their mother’s qualities versus mine, I am here to say that my mother is the best mother in the world, for me.
My mom grew up in Southern Ohio in a small house next to the high school in a small town. She had the quintessential childhood of a babyboomer in the midwest. She was a girl scout, rode horses, was part of 4H, and was a cheerleader. In her college years, she attended The Ohio State University and was in the dorms during the Vietnam War protests and on campus when the National Guard came, fortunately for her things ended peacefully unlike at Kent State University.

“When you look into your mother’s eyes, you know that is the purest love you can find on this earth.” - Mitch Albom
By the time my sister and I came around, our parents had opened their own businesses in Virginia and Ohio. Roots & Shoots was my parents’ flower shop in Newark, Ohio where we spent countless days and nights as a family. From the time I was an infant to now, my parent’s store has been a central part of my life and my identity. I have enough memories of the store and many characters that frequented it to fill a library.
Owning her own store meant my mom worked all the time. Around the holidays, Mom was at the design table in the early hours of dawn until well into the night preparing for the next day. It wasn’t until I got older that I realized how much work and sacrifice went into that flower shop.
Those long hours and days often meant my mom didn’t have time to stand over a hot stove at the end of the day. She needed a recipe that was fast, could fee a crowd and was kid-friendly. That’s where recipes like this one came in handy. Penne Pasta came from the back of a box of pasta and has evolved over time with my family. The original recipe called for a can of tomatoes, a bag of frozen broccoli, and a box of pasta. Low frills, high nutritional density. Over the years we’ve made it our own through embellishment; adding mushrooms, bell peppers, sausage, and seasonings.
This is the dish I make when I miss my mom. I think about her, and the shop, and how hard she and my dad worked to provide a comfortable and safe life for my sister and me. I am so very fortunate to have a mom who knew how important it was to teach her children the value of things like hard work, manners, and to keep showing up, even when it’s hard.
I look back on that time often - reflecting on my mom’s ability to get up and go every day, year after year, pouring her heart and soul into her shop. By watching my parents all those years, I learned that success is a mix of passion, diligence, and grit. There are many things the two of them could have done with their talent they stuck with the store and never looked back. They often joke that being an entrepreneur is a sickness one never overcomes; I’m not sure that’s a bad thing.
These days, my mom runs another small business with my sister, in the same building where her flower shop once was. I feel an immense sense of joy, pride, and admiration when I think of the two of them, working there together where it all began.
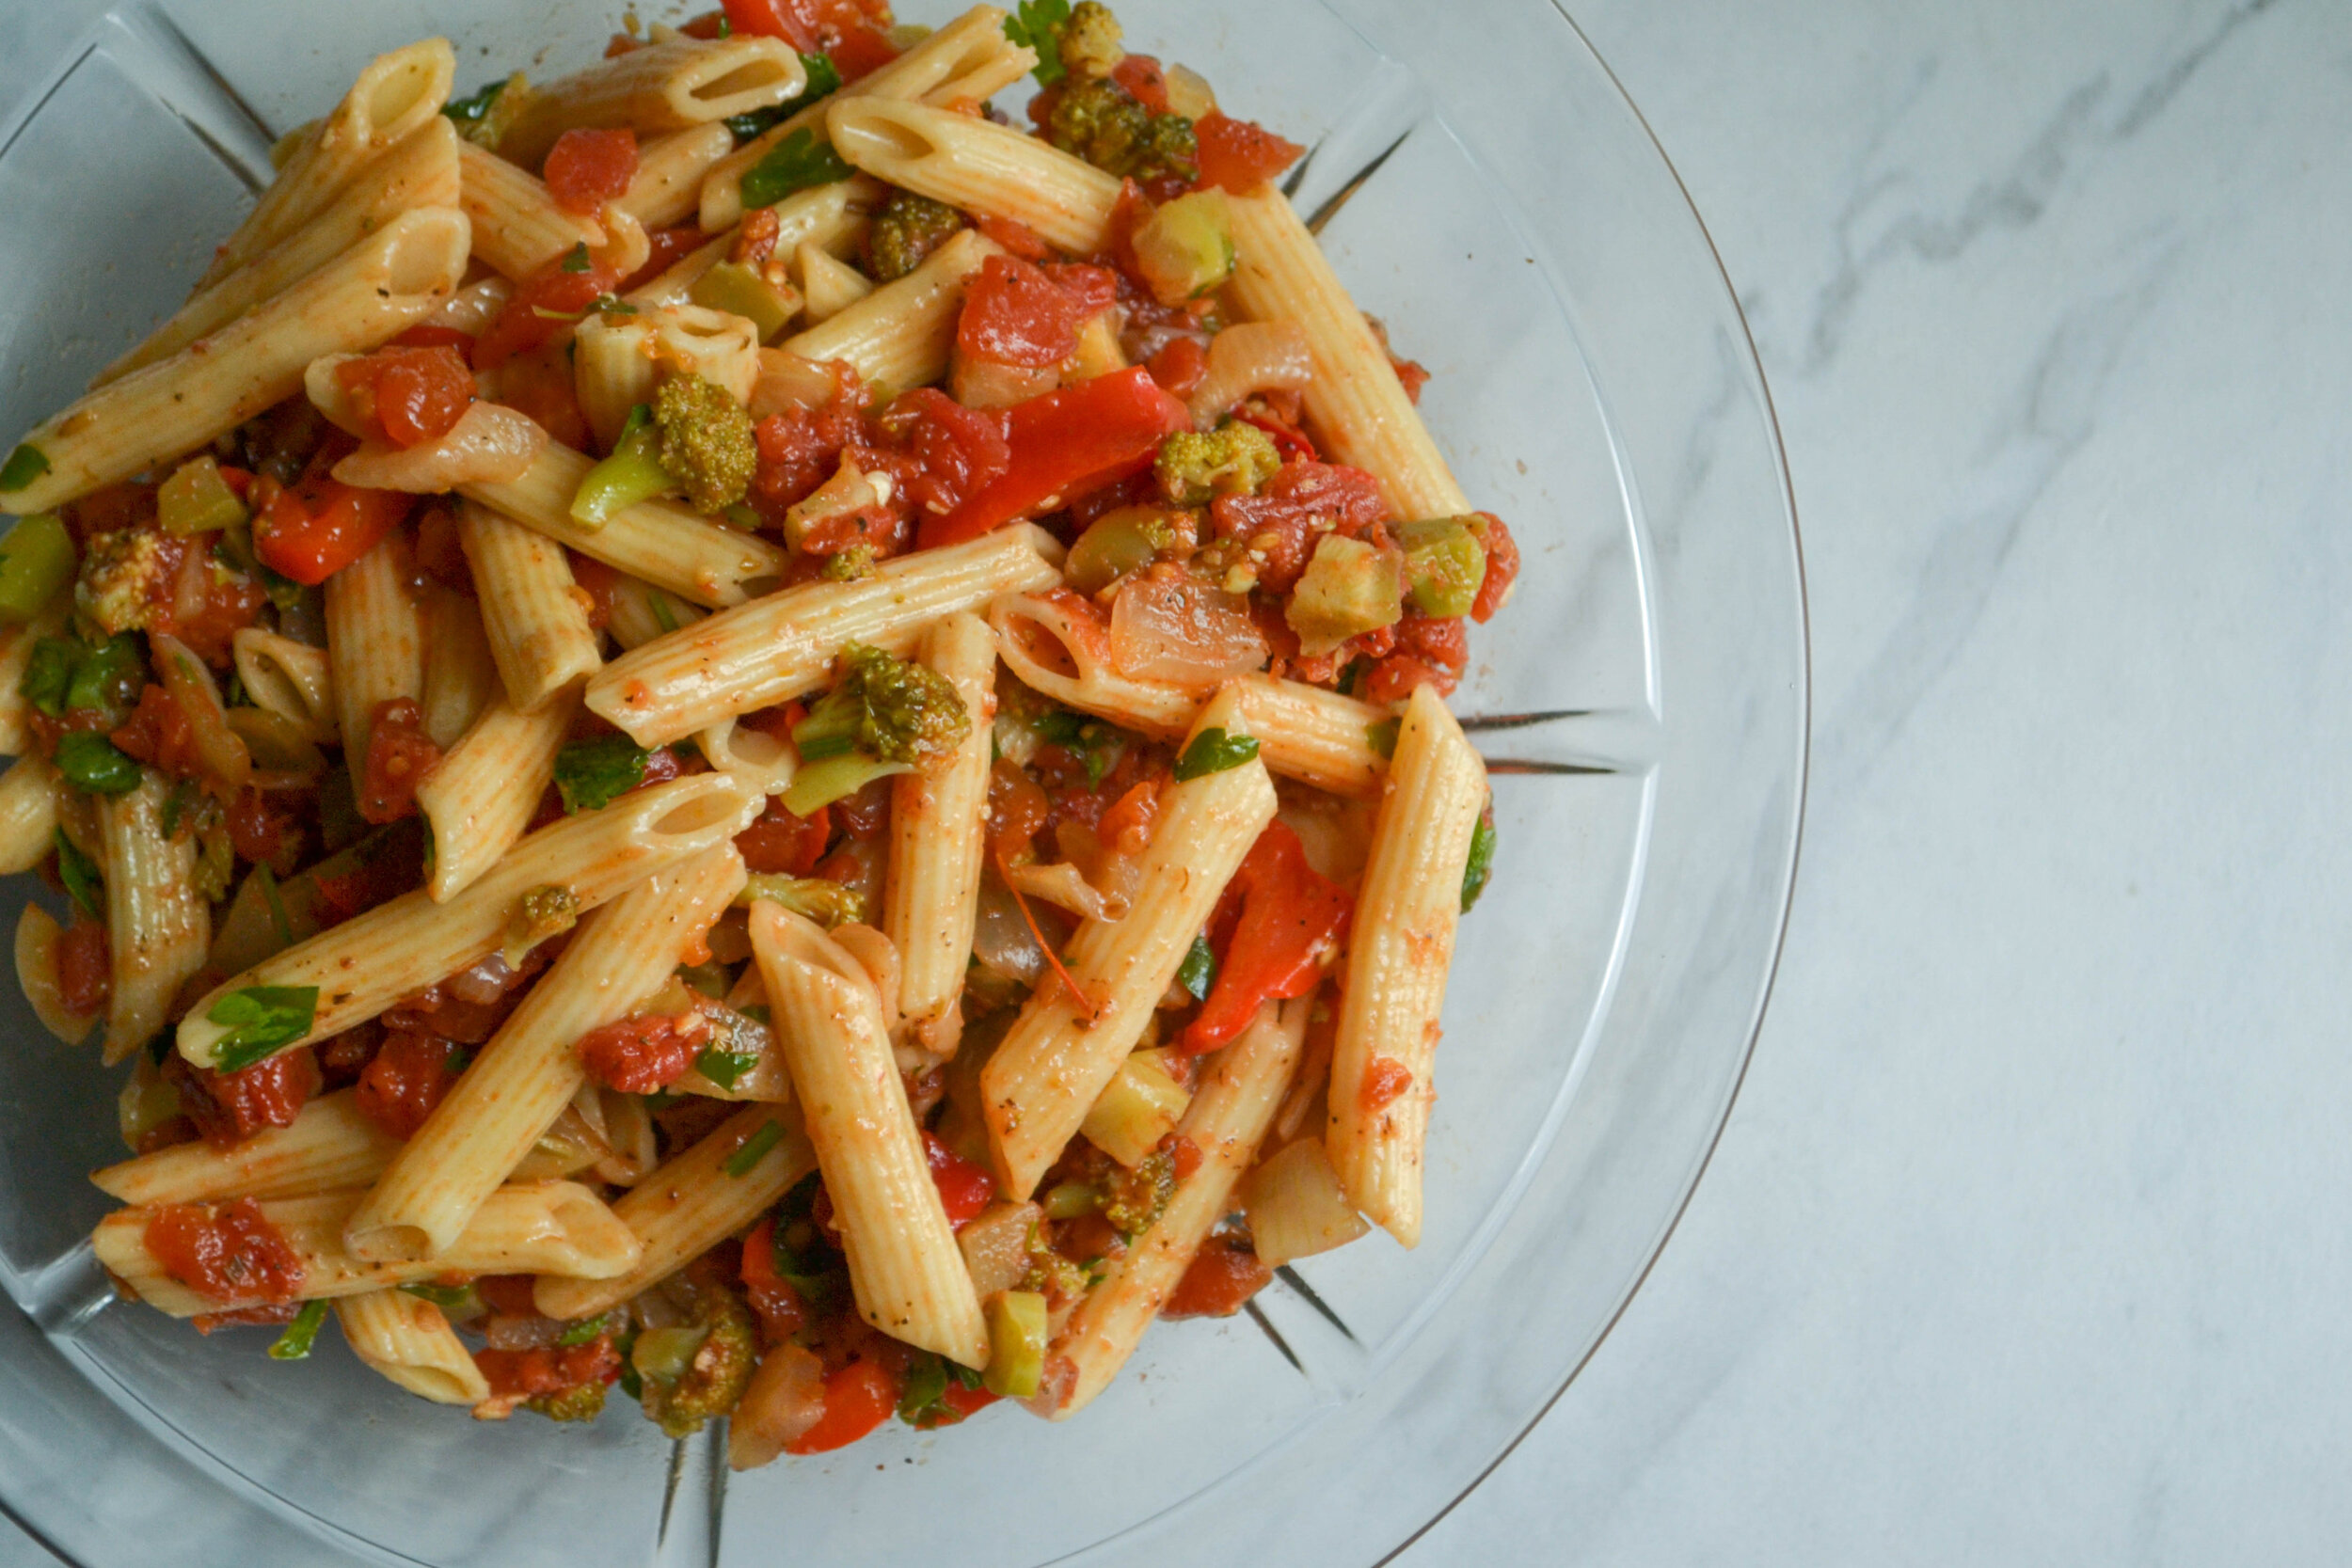
Penne Pasta alla Kathy
Ingredients
1 Box Penne Pasta
1 bunch broccoli, trimmed and chopped
1 tablespoon olive oil
1 large onion, chopped
1 bell pepper, chopped
1 tablespoon garlic
1 teaspoon oregano
1/2 teaspoon red pepper flakes
1/2 teaspoon crushed fennel seeds
28oz can diced tomatoes
Directions
Bring a large pot of salted water to a boil and add the pasta. Add the broccoli for the last 5 minutes of cooking. Strain and set aside.
Heat the olive oil in a large skillet over medium heat. Add the onion, bell pepper, and mushrooms. Season to taste with salt and pepper. Saute until softened, about 5 minutes.
Add the garlic, oregano, red pepper flakes, and fennel. Cook until the garlic is aromatic, about 1 minute.
Add the diced tomatoes and bring to a simmer. Add the pasta and broccoli and heat thoroughly.
Garnish with parsley and serve with fresh parmesan.

Asian Braised Short Ribs
Comfort food still reigns supreme in our home. Despite my best efforts and New Year’s Resolutions (HA remember those?!) rice, pasta, and other comfort foods have been flooding my kitchen table for weeks now. I try to eat a salad a day for lunch but when dinner comes around, I want soft, comforting food that tastes like a hug from my mom.
These short ribs do just that. These may not have been in my mom’s rotation as a kid but soft, tender meat that’s been simmered for hours is comfort food at its finest. Anything with a liberal amount of fat, starch, and salt will do for me, just don’t tell my doctor.
As the middle of May gets closer, I’m feeling a sense of urgency to savor every moment I have left with Anthony before I leave for the summer. Running the family business is something I wouldn’t trade for anything but it comes with a unique set of challenges like being away from your spouse and home for almost half the year. Sure, he comes up and visits when he can but for the most part, our life together is put on the hold for months.
One thing that does help with the impending separation is savoring each moment. We’ve been spending a lot of time taking walks together in the woods, working on projects around the house, and just enjoying the little moments we take for granted - waking up together in our own home, snuggling on the couch, sitting by the fire in our back yard.

What makes short ribs so delicious is the marbled fat they sport. Coaxing the flavor out of these over the course of several hours yields meat that is addictively tender and succulent. The liquid that the ribs braise in is equally as delicious. The combination of soy, sugar, lime juice, and broth results in a liquid that is sweet, salt, sour, and spicy all at once, and as the meat breaks down, the fat from the ribs gives the liquid a full-bodied presence that is fulfilling and velvety.
I use Chinese Five Spice Powder in this recipe but if you don’t have any in your spice drawer, make some using cinnamon, cloves, ginger, fennel, and star anise. It is basically apple pie spice with a kick and works really well with all the other flavors in this dish.

Asian Braised Short Ribs
Ingredients
2lbs Short Ribs
3/4 cup flour
2 teaspoons five-spice powder
1 teaspoon black pepper
1 teaspoon salt
1 tablespoon olive oil
2 onions, chopped
1 tablespoon minced garlic
2-inch ginger nub, grated
1/2 cup soy sauce
2 tablespoons sriracha
1/3 cup brown sugar
3 cups broth
Directions
Preheat the oven to 350
Combine the flour, salt, pepper, and five-spice powder in a bowl and stir to combine. Dredge the short ribs in the flour mixture so they are evenly coated, tapping them to discard any excess.
In a large, oven-safe pot, heat the olive oil over medium-high heat. Once it is hot and shimmering, brown the short ribs on all sides, about 1 or 2 minutes per side. Work in batches if necessary, do not crowd the pan or the ribs won’t brown!
Remove the ribs from the pot and add the onions and saute until they are soft. Add the garlic and ginger and cook until fragrant - 30 seconds to one minute.
In a mixing bowl, whisk the soy sauce, sriracha, brown sugar, and brown sugar. Add the mixture to the onions and bring to a simmer.
Add the ribs back to the pot and cover. Move everything to the oven and bake for 2 1/2 hours or until the meat is tender and easily releases from the bone.
Garnish with sesame seeds and cilantro and serve with steamed rice.

Pesto Chicken and Artichoke Pizza
Just like so many others these days, I’ve been scrounging around my kitchen for something to cook for dinner. Anthony and I are extremely fortunate to live close to the grocery store that is mostly stocked (except for flour, of course).
This week while digging through the pantry, I had a craving for pizza. I didn’t want to go to the store so I dug through our freezer, pantry, and refrigerator to find ingredients. I ended up with a can of artichoke hearts, a frozen tub of pesto, and a lonely chicken breast from a few nights prior. I whipped up some dough and boom, dinner was born.

Pesto Chicken and Artichoke Pizza
Ingredients
1 1/4 teaspoons active yeast
1 cup warm water
1 teaspoon honey or sugar
3 1/2 cups flour
2 teaspoons salt
2 tablespoons olive oil, divided
1 chicken breast, thinly sliced
1/2 cup pesto
1 can quartered artichoke hearts
1 - 2 cups shredded mozzarella cheese
Directions
In the bowl of a stand mixer, combine the yeast, water, and honey. Stir and allow it to rest for about 5 minutes until it becomes bubbly.
In a large bowl, mix the flour and salt and add it to the bowl with the water and yeast. Add one tablespoon of olive oil and mix, using a dough hook attachment, until the dough forms a ball that isn’t too sticky.
Grease a bowl with cooking spray or olive oil. Form the dough into a ball and place it in the greased bowl, rolling it around a bit to coat the surface with oil. Cover the bowl and set it somewhere warm to rise until it is doubled in bulk - about 1 hour.
Preheat the oven to 500 while the dough rises. IF you’re using a pizza stone, preheat it now as well.
Heat the remaining olive oil over medium-high heat in a large skillet. Season the chicken with salt and pepper to taste and sear on each side until the chicken gets a nice golden color. If the chicken isn’t cooked all the way through, that’s OK.
When the dough has risen, transfer it to a lightly floured surface and stretch it to the size of whatever you’re cooking on - pizza stone, cookie sheet, etc. carefully transfer the dough to your cooking vessel.
Spread the pesto over the entire crust, then the chicken, artichokes, and top with shredded cheese. Place the pizza in the oven and reduce the heat to 450. Bake for about 15 minutes or until the crust is golden brown.

Charred Chicken with Chimichurri
I’ve been thinking about condiments a lot lately. At this time, I have 6 different types of mustard, countless jars of olives and pickles, a handful of different jellies, hot sauce galore and concoctions I’ve been mixing. Condiments are often unsung heroes of dishes. They can be supporting characters or stars that tie an entire meal together. A good condiment can transcend dishes too. I made a sauce with pan drippings from a roasted chicken, caramelized onions, sherry, and pitted dates this week and served with chicken thighs one night and then again with goat cheese and crostini a few nights later. When it comes to sauces for grilled meats, however, Chimichurri reigns supreme.
Not only is chimichurri delicious, but it is SO easy to make and goes with just about everything. Chicken? Chimichurri! Beef? Chimichurri! Scrambled eggs? You guessed it, chimichurri.
Some people feel like once they’ve made the effort of grilling or roasting something that making a sauce or condiment to go with it is just too much work but hear me out! The beauty of chimichurri is that it uses up all those scraps from earlier in the week that would have otherwise gone in the trash. The recipe list is minimal and sooooo easy to riff on. Sometimes I don’t have cilantro so I don’t use it, no biggie. Sometimes I’m feeling adventurous and through in an extra hot pepper or some ginger or a little fish sauce. Go wild! If you have a food processor and can spare 60 seconds, you too can make a chimichurri that will go the extra mile and delight everyone at the table.
When I was working on this specific recipe, I knew it would become a little controversial because of how the chicken turned out. I marinated it in olive oil and seasonings. When I threw it on the grill, the oil caught on fire and the result is a charred exterior. This was my intension. I cooked the chicken on a grill, low and slow until the meat was tender and cooked through. The result was tender and smokey meat. I loved it. Anthony loved it. It was a winner.
The chimichurri recipe in this post will likely leave you with leftovers. Try tossing it with some roasted potatoes or carrots, serve it with crostini and goat cheese, or keep it for the next time you grill. This will keep in your refrigerator for 2 -3 weeks in your refrigerator.

Charred Chicken with Chimichurri
Ingredients
For the chicken
1 whole chicken, cut up
1/4 cup olive oil
1/4 cup red wine vinegar
2 tablespoons minced garlic
1 teaspoon dried oregano
1 teaspoon fennel seeds
1 teaspoon crushed red pepper flakes
salt and pepper to taste
For the chimichurri
1 shallot
4 garlic cloves
1 freshno chili or jalapeno
1/2 cup parsley
1/2 cup cilantro
1/4 cup mint
1 tablespoon oregano
1 teaspoon salt
1 teaspoon black pepper
1/2 cup red wine vinegar
1 cup olive oil
Directions
Make the marinade. Combine everything for the chicken except the meat itself in a small mixing bowl. Whisk until it all comes together and then pour everything into a large ziplock bag.
Prep the chicken. Remove the chicken from the packaging and rinse under cold running water. Pat the chicken dry and add to the ziplock bag. Swish everything around to evenly coat and allow the meat to marinate for 30 minutes.
Make the chimichurri. While the chicken marinates, combine everything for the chimichurri in a food processor except for the olive oil. Pulse the mixture until everything is finely minced. Slowly add the olive oil to the mixture with the processor running. Taste and adjust the flavor with salt and pepper to taste.
Grill the chicken. Preheat the grill and spray with cooking spray. Grill the chicken over low heat until cooked through, about 15 minutes. Coat the chicken with the excess marinade, being mindful of the flames that will pop up. The internal temperature should read 165 in the thickest piece of meat when it is cooked through.
Serve. Allow the meat to rest for 10 minutes prior to serving. Garnish with a few lemon wedges and serve with the chimichurri.

Roasted Broccoli and Potato Soup
April has been a cold, wet, and dreary month so far and despite the respite this weekend, I’m still cold. A storm came through a few nights ago and left almost a foot of snow in some parts of the state, knocking out power for thousands. While it did make for some great photos down in my part of Maine, cold weather is getting old and I’m getting restless.
Maine is under a stay-at-home order for the next month, just like the rest of the country. Anthony and I are taking it very seriously by limiting our trips to the grocery store and not venturing out too often. We do, however, still go for walks and hikes and bike rides. I have to get out of the house once a day so I’ve been taking a daily drive along the coast.
Despite all this, Anthony and I are keeping our spirits up. We celebrated a friend’s birthday yesterday in a drive-by parade, took a sunset walk through the woods, and have been finding joy in the little things. Whether videos or our niece and nephew, little pots of flowers on our steps, or the time to just sit together and be mindful, we are finding ways to keep ourselves together and positive.



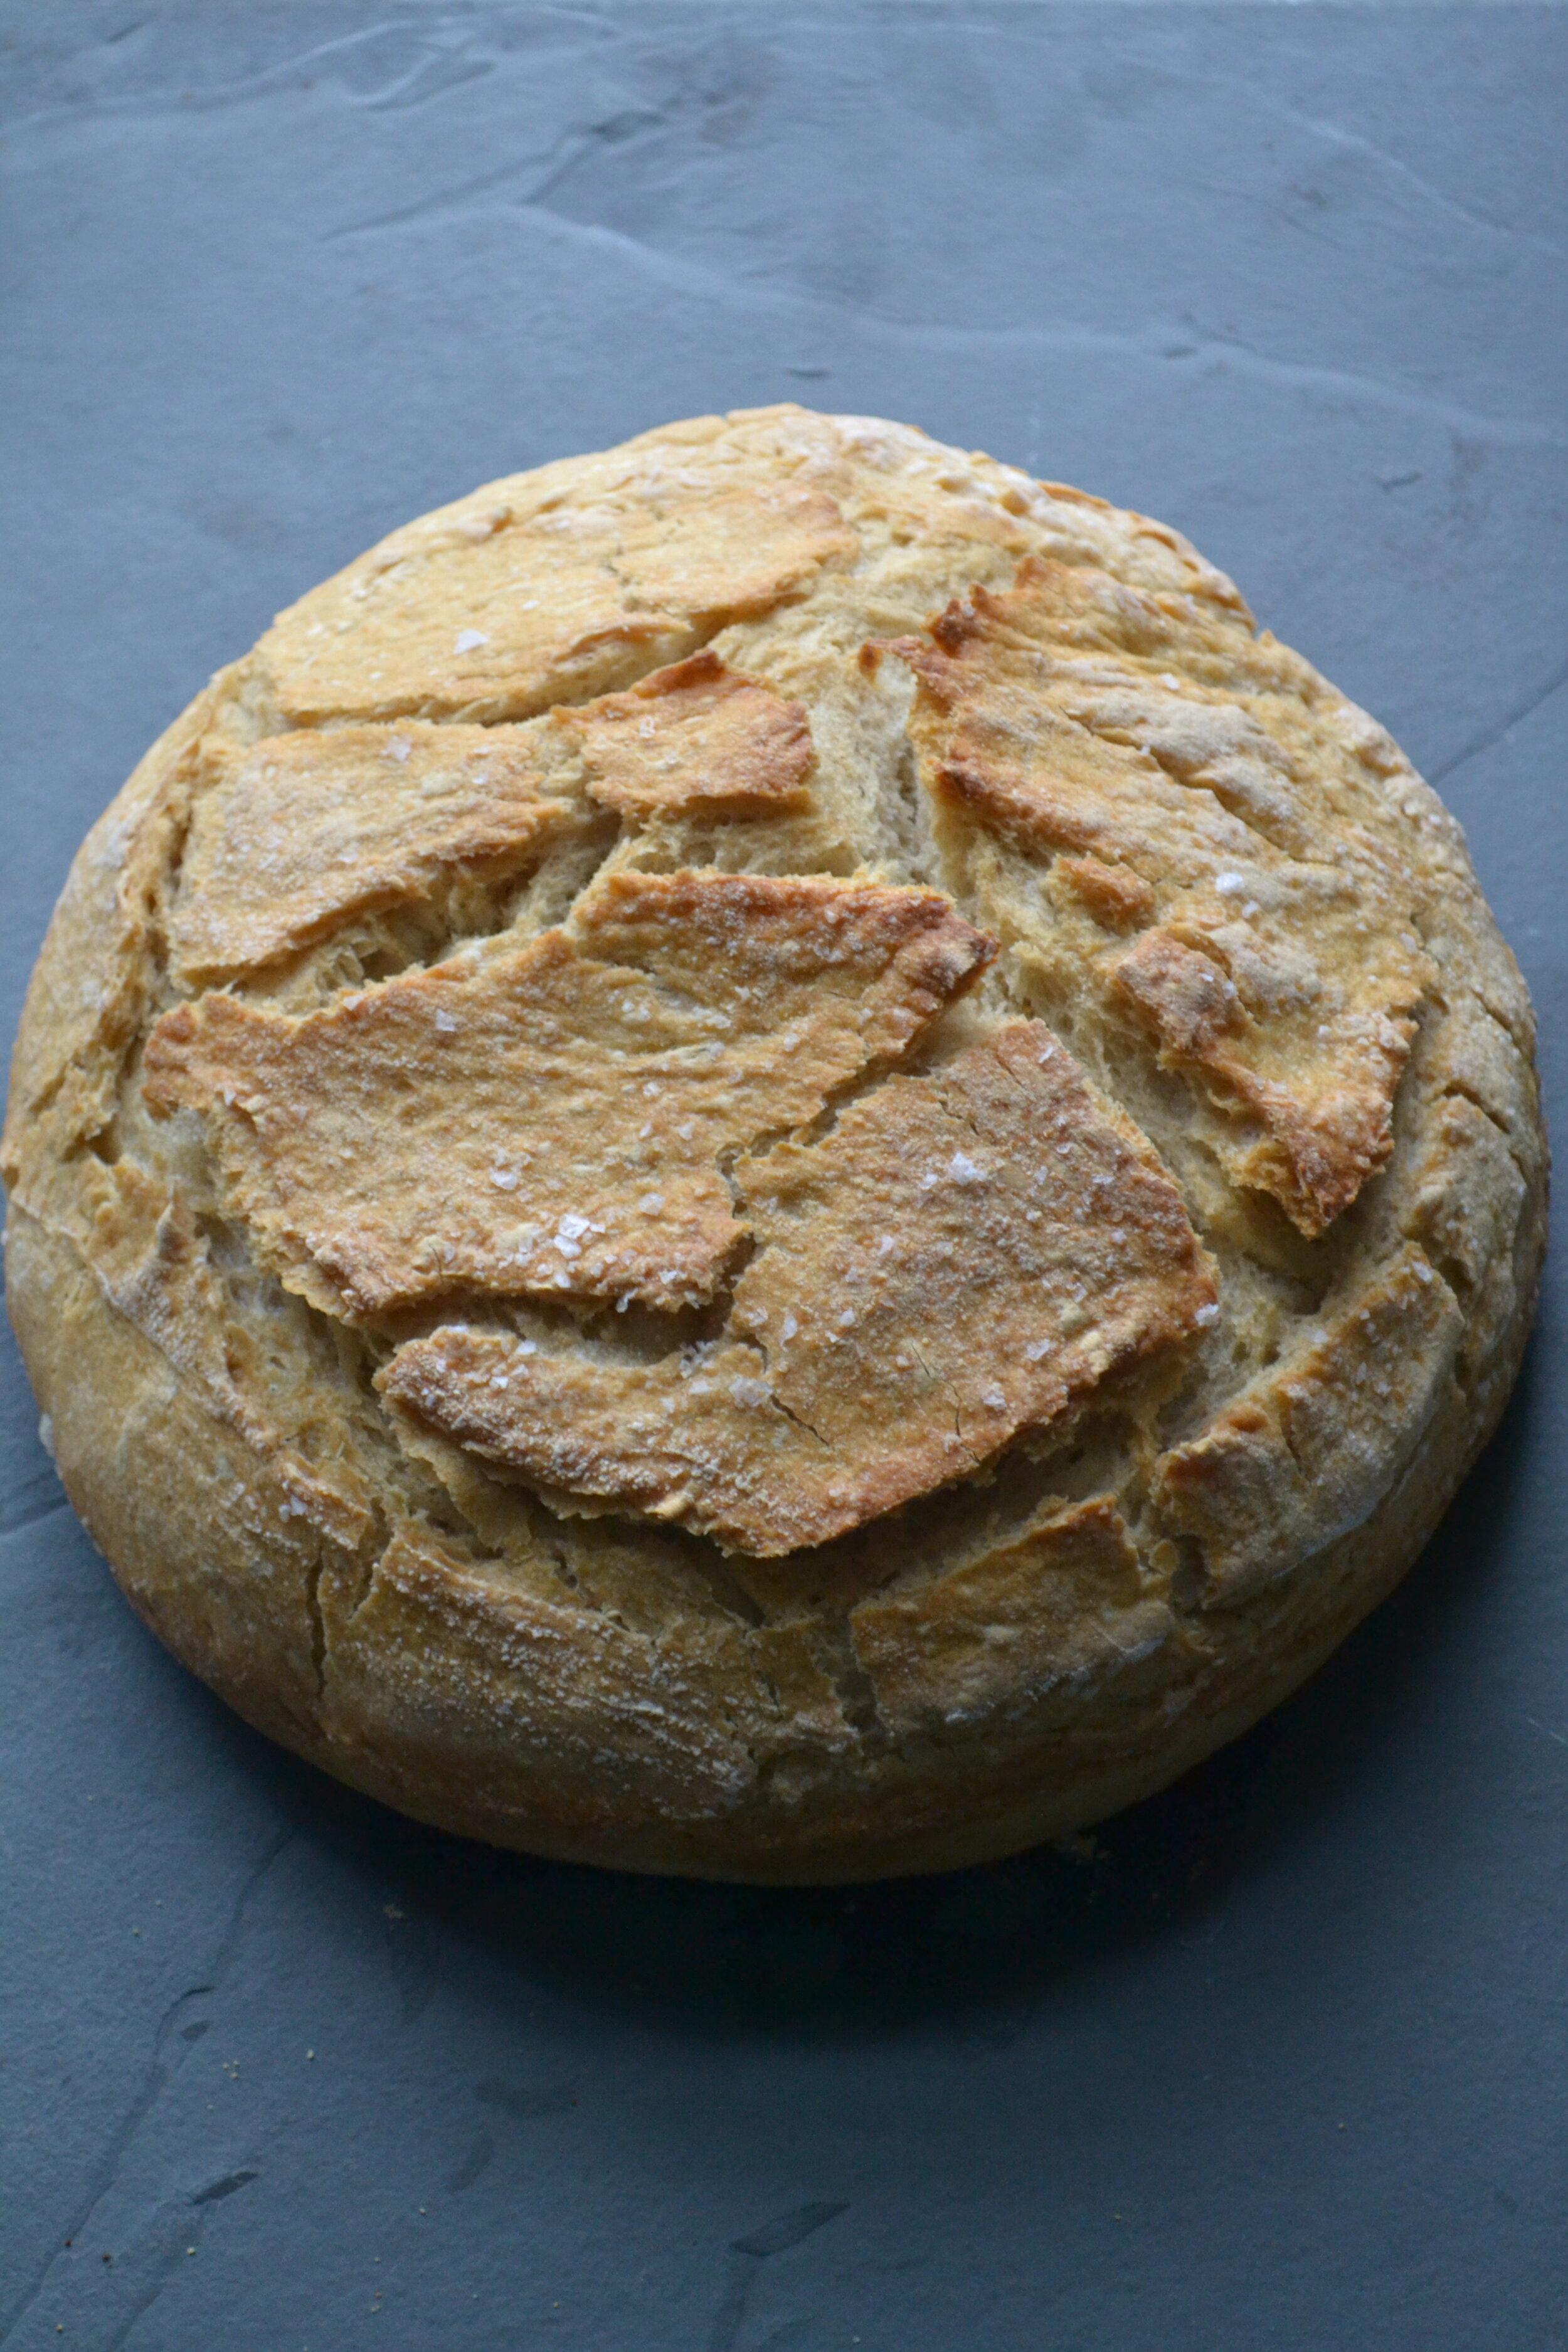
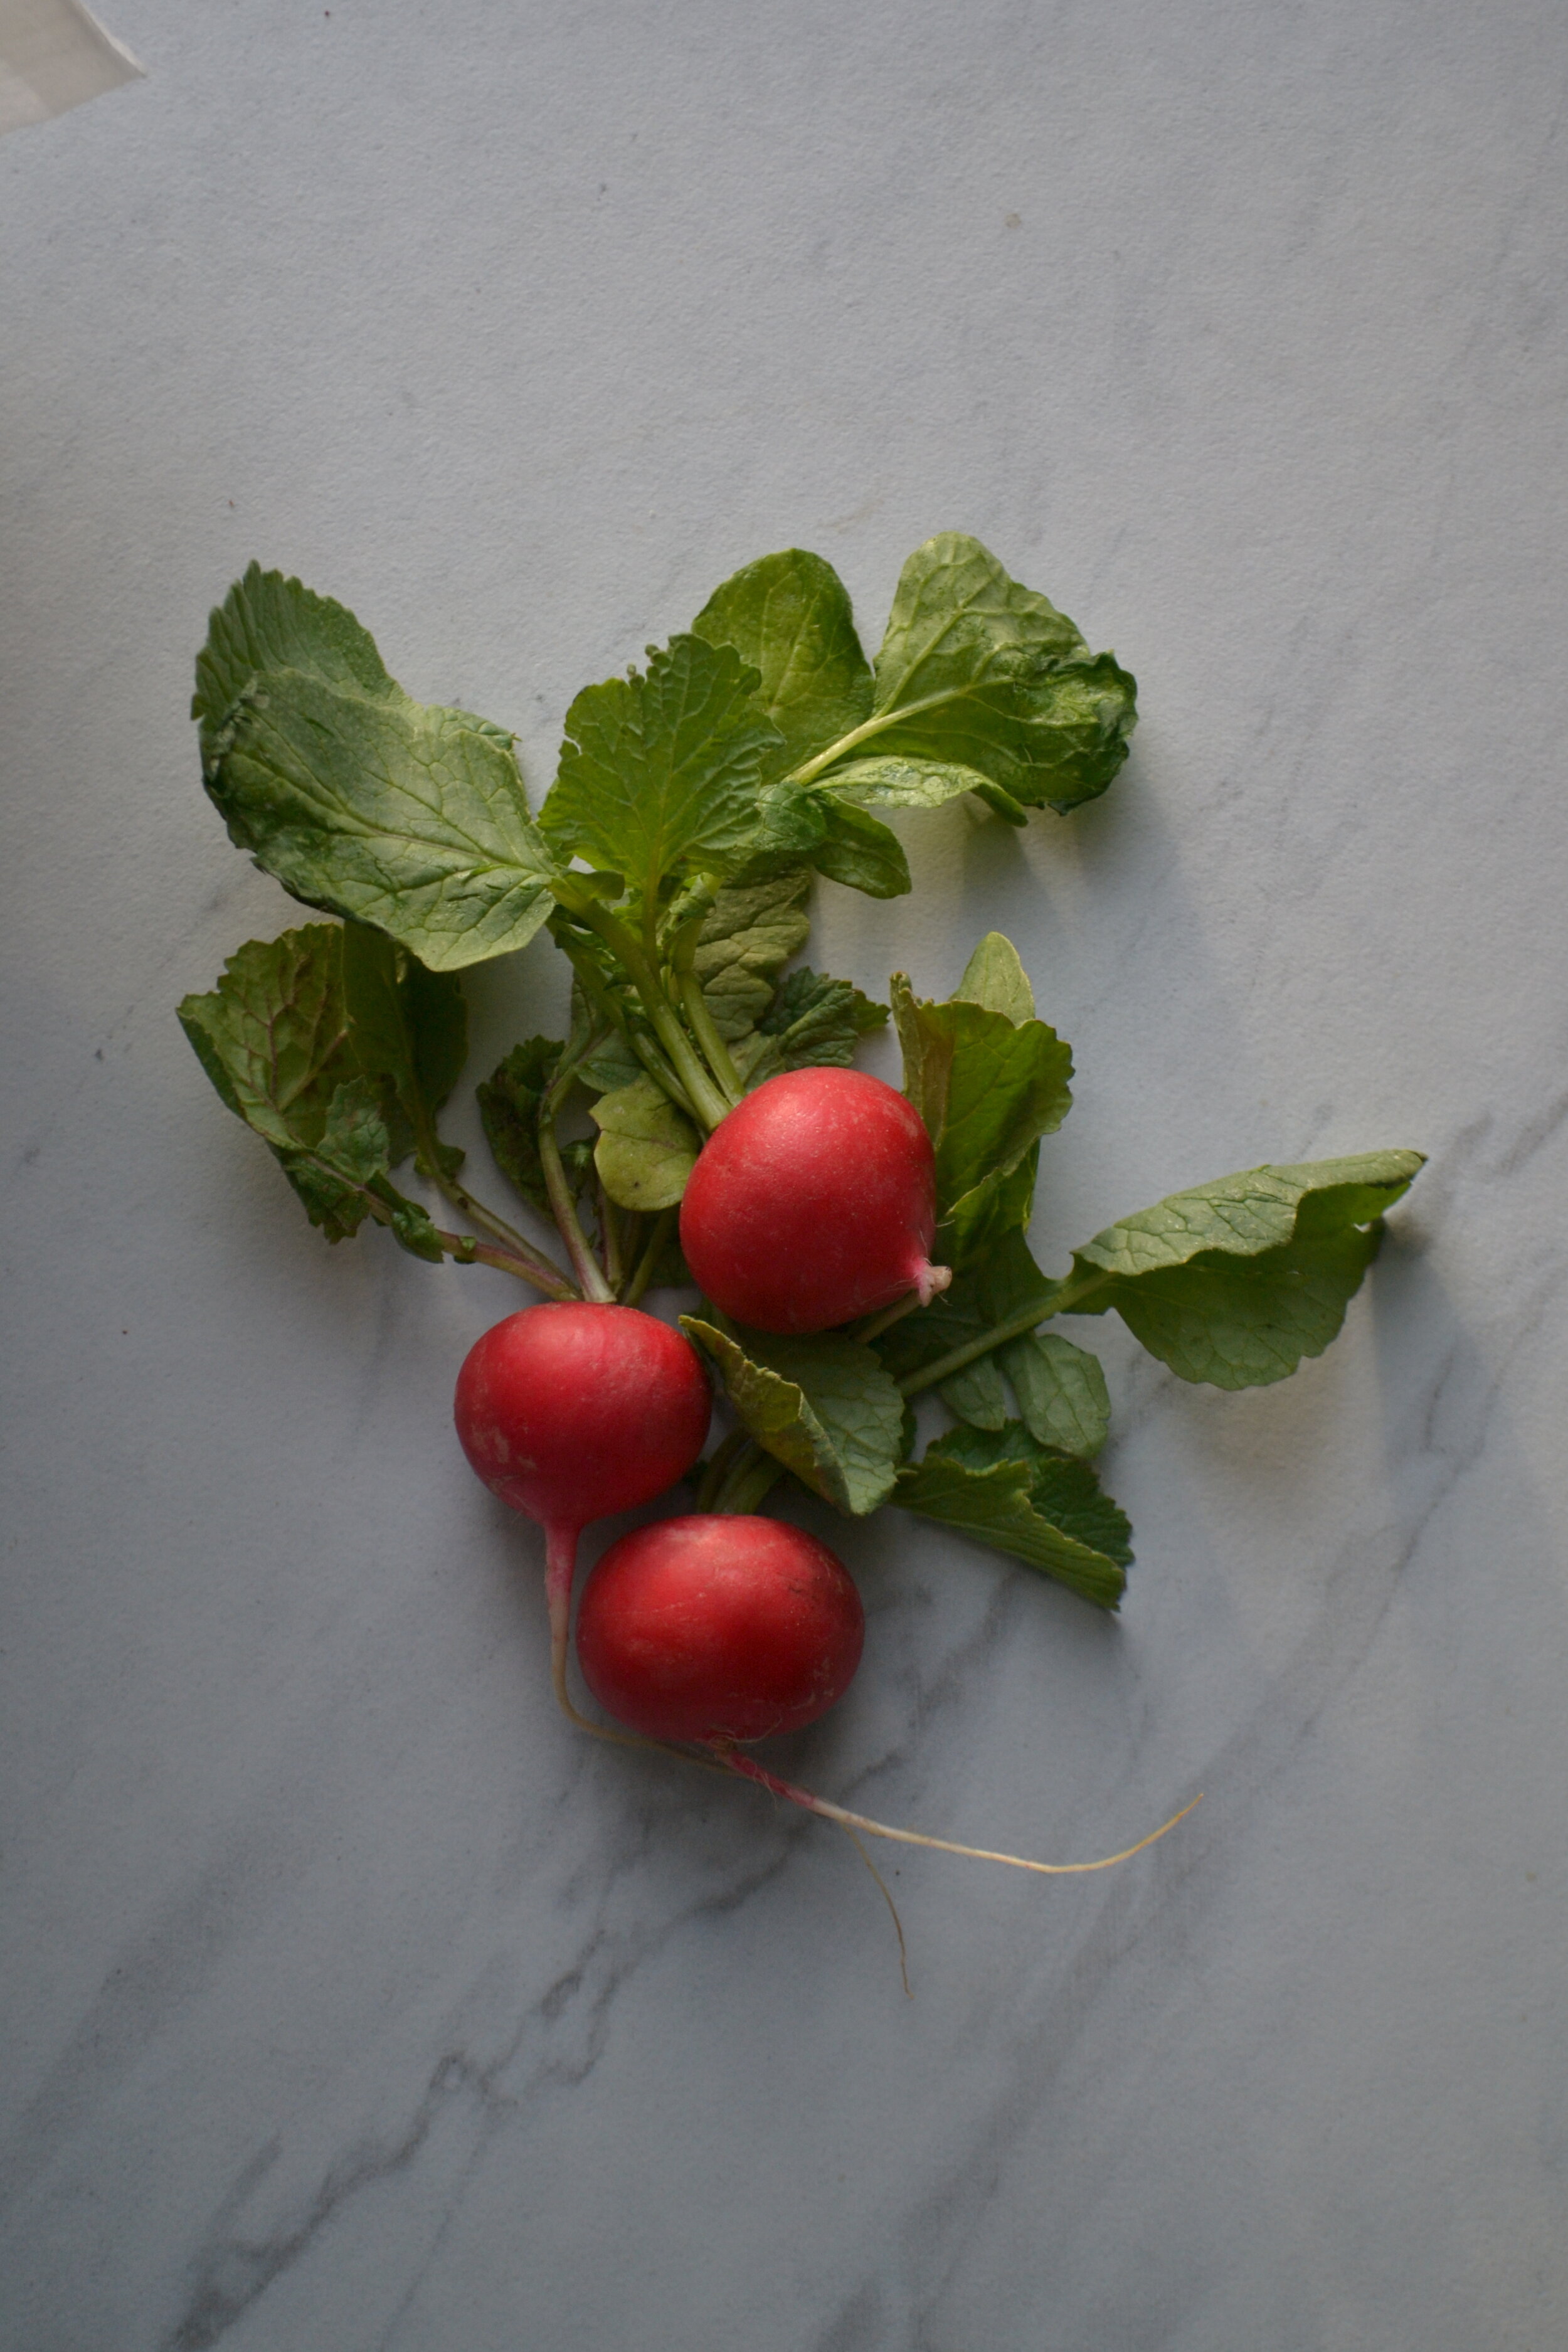
One thing I am grateful for in this cold weather is this soup. It is my attempt at recreating a broccoli-potato soup we had many years ago at a restaurant that is now gone. I’ve dreamed of this soup since we had it and I think I’ve come as close I can at recreating it. The best part? It takes just 30 minutes from start to finish and is so easy. The roasted broccoli gives the soup some added depth of flavor that is hard to beat. I love it and froze half of this batch for another rainy day.
Roasted Broccoli and Potato Soup
Ingredients
4 cups chopped broccoli
3 cups chopped potatoes
2 tablespoons olive oil, divided
2 onions, chopped
2 large carrots, peeled and chopped
2 celery stalks, chopped
4 cloves garlic
1 bunch parsley, roughly chopped
3 cups chicken stock
1 teaspoon thyme
1/2 cup heavy cream
1/2 cup greek yogurt
Directions
Preheat the oven to 400.
Toss the broccoli and potatoes with two tablespoons of olive oil, salt, and pepper and roast 20 - 25 minutes or until tender.
While the broccoli and potatoes cook, heat the remaining olive oil over medium heat in a large pot. Add the onions, carrot, celery, and garlic. Add a pinch of salt and cook until tender, about 10-12 minutes. Add the chicken stock, broccoli, potatoes, parsley, and thyme and stir.
Working in batches, blend the soup until it is smooth. Pour the soup back into the pot and stir in the heavy cream and yogurt. Bring to a gentle simmer and serve with crusty bread and freshly grated parmesan cheese.

Whipped Goat Cheese with Herbs and Lemon
Despite the doom and gloom about the coronavirus, it is beginning to look like spring in Maine. We are about a month behind the rest of the country so it is still a bit chilly up here but it is beautiful nonetheless. Anthony and I have been mending broken fences and starting early seeds like peas, carrots, beets, broccoli, and radish. As I’ve said before, I love radishes. Their fresh, peppery flavor is light and refreshing and they can play the lead or a supporting role in so many recipes. This recipe for toast with radishes and whipped goat cheese is a perfect bite of spring.

Since I’ve had so much free time lately, I’ve been tackling some cooking projects that have eluded me in the past. New pasta shapes, different ravioli fillings, and sourdough bread. I’ve tried sourdough in the past but have never had much luck. Despite my best efforts, the bread would turn out either way too dense and gummy or just a hardened shell filled with a few strands of bread and the rest, air. In fact, after my last round with baking bread, I gave up. I threw it all away, starter, loaf, and all. I told Anthony I was a failure and would never try again.
Then we were told to self-quarantine.
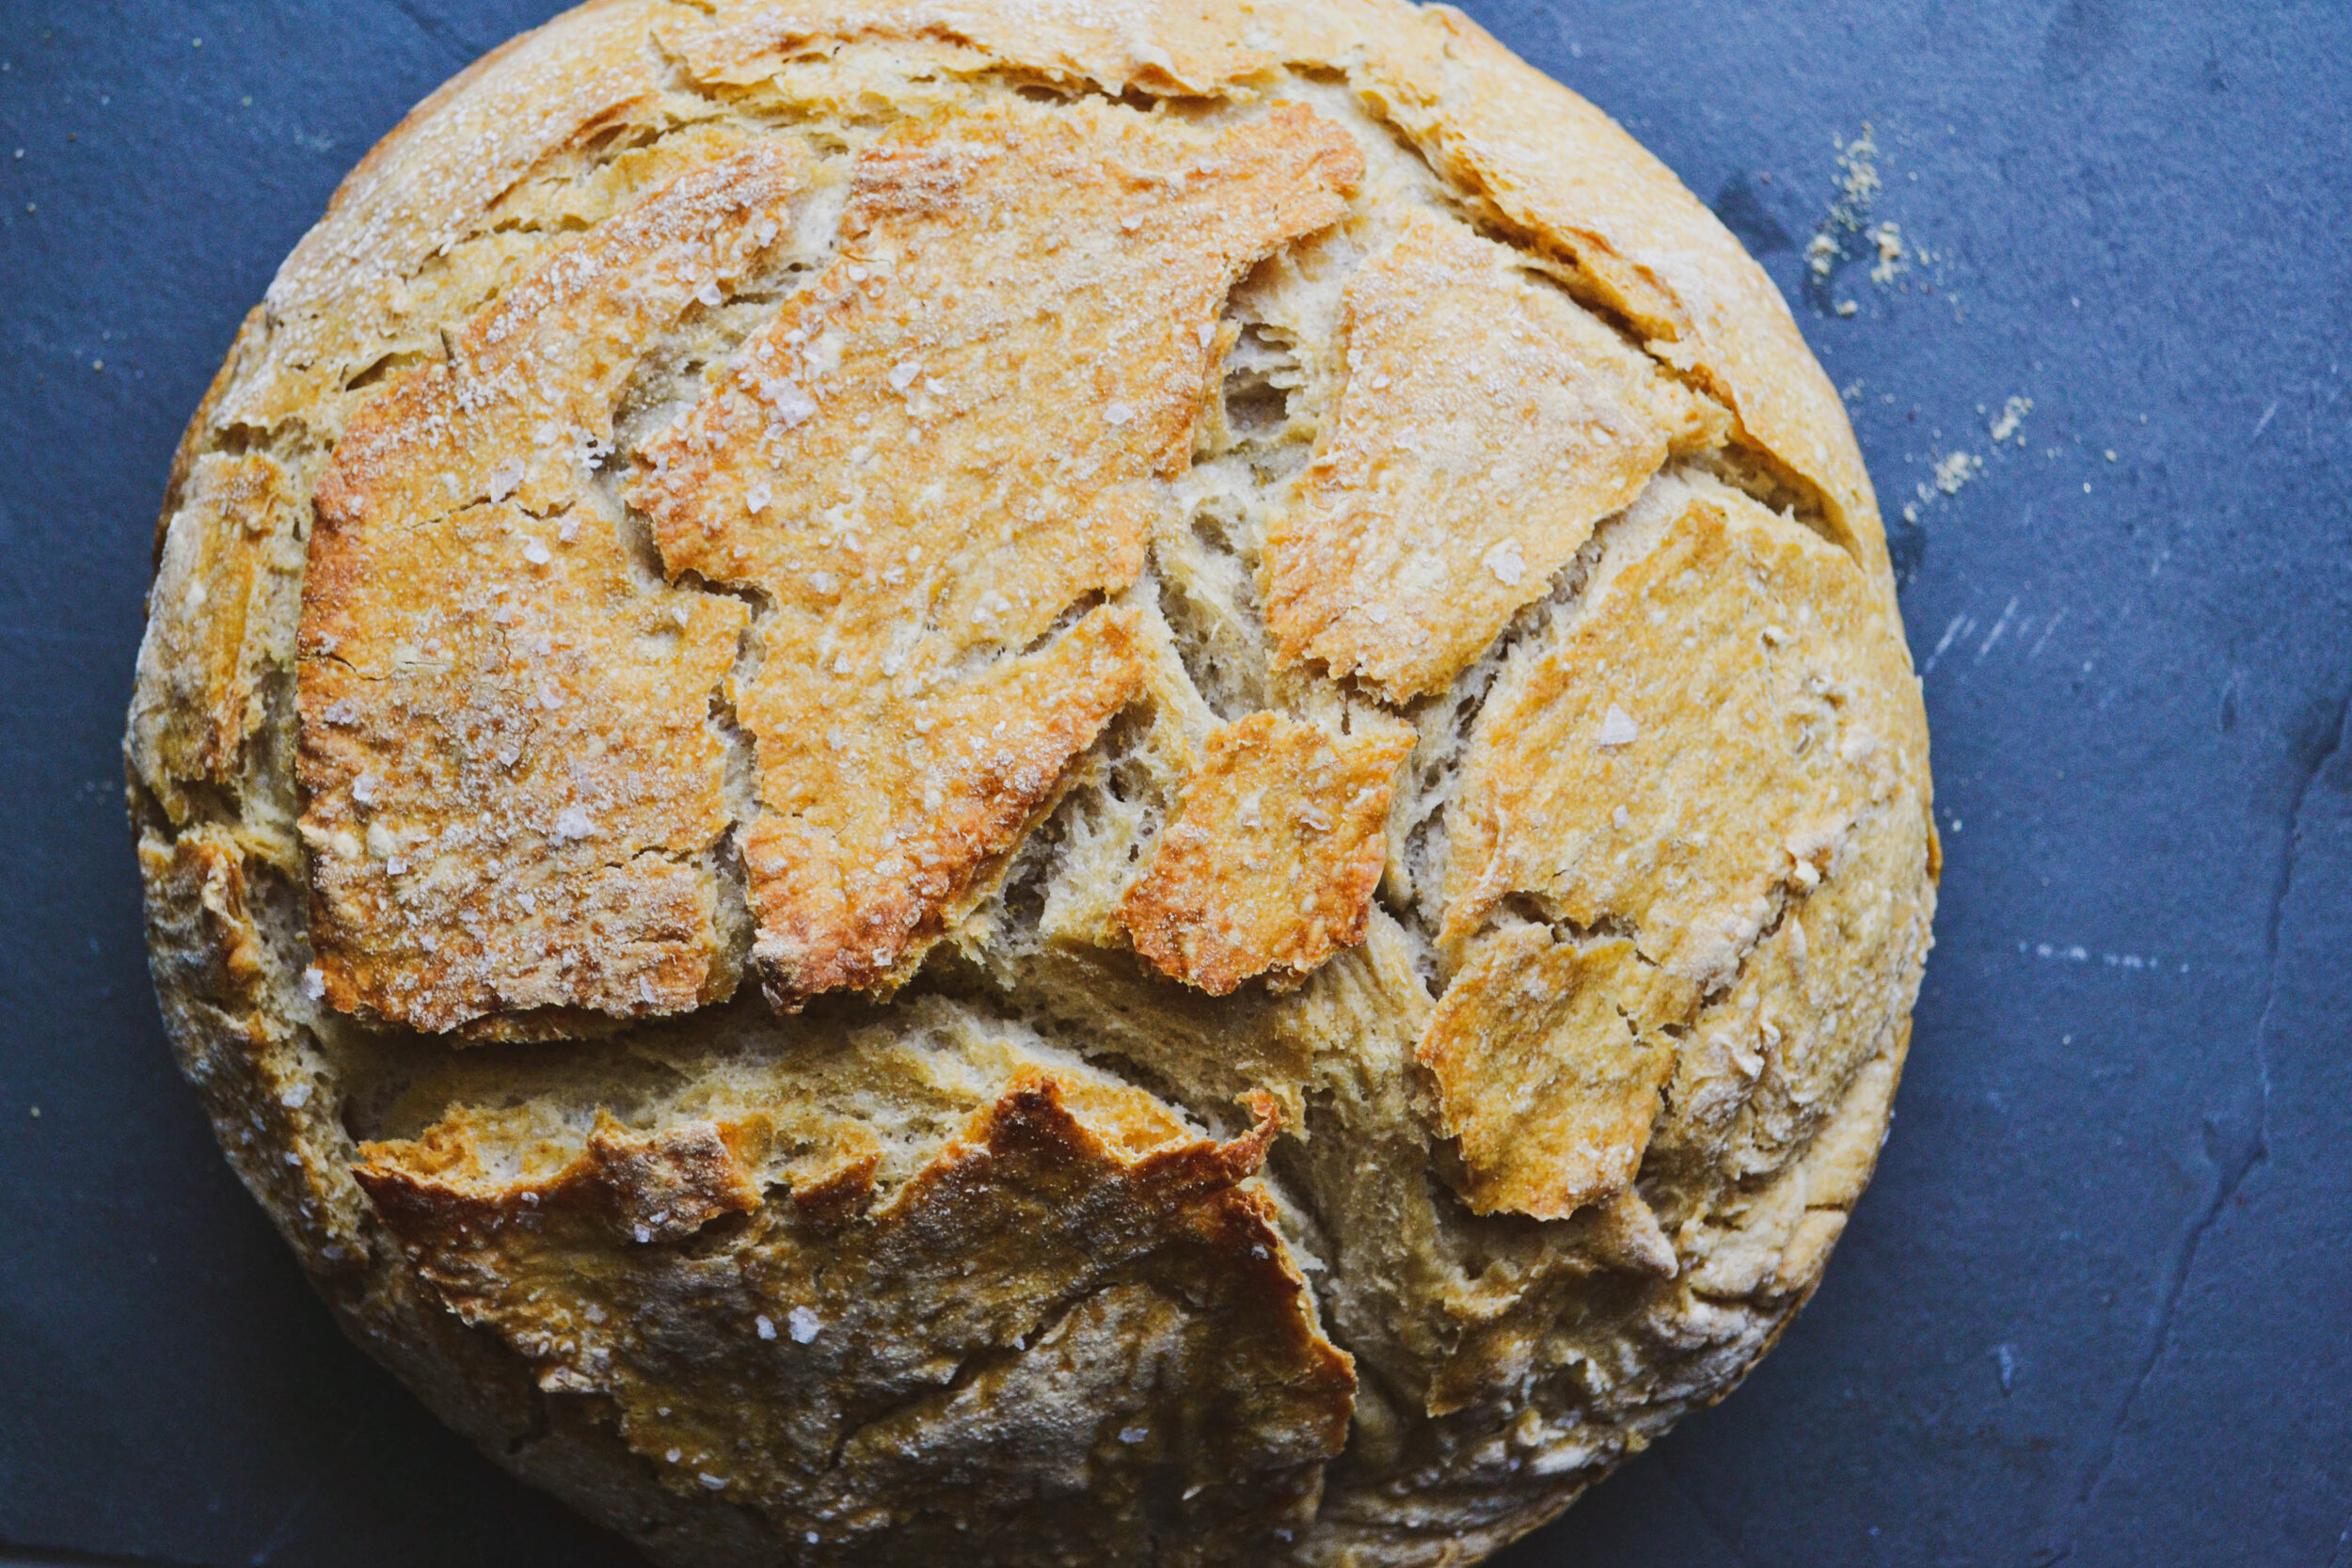
I’ve been working with Emma Christensen’s Beginner Sourdough Sandwich Bread from thekitchn.com and I think I’m a believer again. I have a starter on my counter I’ve affectionately named, Henry, and feed him every day. So far I’ve successfully made a sandwich loaf and a dozen small rolls and the texture was perfect. Crunchy on the outside and pillowy soft on the inside. Nothing tops the loaf I made on Thursday though. Maybe it is because the starter is getting older and a little funkier, maybe it is because I cooked it in a dutch oven rather than a loaf pan, I really don’t know. I am not a bread expert. Whatever I did, it worked because the bread has a beautiful, crunchy-chewy crust and a nice soft interior.
I did follow the recipe from Emma Christensen to a “T” up until it came time to actually bake the bread. Instead of dividing it in half and forming two small balls, I simply left it as a single piece of dough and shaped it into one larger ball and let it rise in a proofing basket but you could use a bowl. Next, I used an enameled dutch oven in lieu of the loaf pans. For this, I did some digging around online and learned that most recommend preheating the dutch oven before adding the dough, so I did. It was a little precarious getting the dough safely into the hot dutch oven but I made it without any injuries. I baked the bread with the lid on for 50 minutes and removed it for the remaining 5. The result was a beautiful loaf of bread big enough to feed a small army. It is tangy, salty, and oh so satisfying.
Just to recap:
Let your dough rise as described in the recipe from Emma Christensen.
Instead of dividing the dough in half, keep it as one large mass of dough and let it rise again in a large bowl or a proofing basket.
Preheat your dutch oven for an hour at 450 with the lid off.
Carefully transfer the dough to the dutch oven, slice with a serrated knife or a razor.
Bake the bread, covered and undisturbed for 50 minutes, remove it for the last 5-10.
I also learned in my research this week that the ideal temperature for a sourdough loaf is around 200 degrees and you can use a meat thermometer to check.

If you have time on your hands and are looking for something to keep you busy, I strongly suggest giving sourdough bread a shot. It is, without a doubt, a project recipe. It will take you a week from start to finish but the results are so worth it and you will walk away with an edible lesson.
To make things even better, I have been in the habit of making whipped goat cheese and herb spread for sandwiches now that Anthony and I are working from home. I have started putting this stuff on everything from bagels to breakfast sandwiches to grilled cheese. It has parsley, garlic, lemon, and goat cheese to give it a bright, tangy smack of flavor. If you don’t like goat cheese, I’ve also made a version of this with plain yogurt that is equally as delicious.
Here is Emma Christensen’s Beginner Sourdough Sandwich Loaf Recipe.

Whipped Goat Cheese Spread
Ingredients
4 slices sourdough bread
1 cup fresh parsley
1/4 cup fresh mint
2 cloves garlic
zest and juice from one lemon
4 oz goat cheese
2 oz cream cheese
1/2 teaspoon red pepper flakes
1 cup fresh radishes, thinly sliced
Directions
Toast the bread to your desired doneness.
In a food processor, combine the parsley, mint, garlic, and lemon zest. Pulse until it is all finely chopped.
Add the goat cheese, cream cheese, red pepper flakes, and lemon juice to the food processor and blend until it is smooth and light.
Smear the whipped cheese on the toast, top with sliced radishes, and season with salt and pepper.

Spicy Fresh Sesame Chicken

Korean barbeque has been growing in popularity for years now, and for good reason. The combination of ingredients yields sauces that are bright, sweet, spicy and tangy. Most recipes call for a grated pear of some kind, typically an Asian pear. Asian Pears are round, soft and extremely juicy. I love them but they are often difficult to find. You can substitute any pear, or even apples, and get the same result.
I’ve been stress eating comfort food for weeks now and I’m finally reaching my peak. I love mashed potatoes, mac and cheese, and pasta in all forms but I cannot live on carbs alone. This chicken is fresh, bright, a little spicy and, a little sweet. It has many of the basics of a Korean barbeque sauce including fresh pear, ginger, and gochujang. Ultimately, the result is a fast, easy, fresh recipe that beats take out and is quick enough for any night, even when we’re not in the middle of a pandemic.


Spicy Fresh Sesame Chicken
Ingredients
1 onion, chopped
4 garlic cloves,
1 jalapeno or Fresno chile
2” chunk of ginger
1 ripe pear
1/4 cup plus two tablespoons soy sauce
1/4 cup mirin
1/4 cup toasted sesame oil
2 tablespoons gochujang
2 tablespoons fish sauce
1 tablespoon honey
2lbs chicken tenders
Directions
Combine all the ingredients except the chicken tenders in a food processor or blender and process until well blended and smooth.
Toss the chicken tenders with most of the sauce, reserve a little for dipping and serving. Marinate the chicken for about 25-30 minutes.
Spray a heavy griddle with cooking spray and heat over medium-high. Working in batches, cook the chicken 4 minutes on each side or until the juices run clear.
Serve with steamed rice, remaining sauce, and toasted sesame seeds.
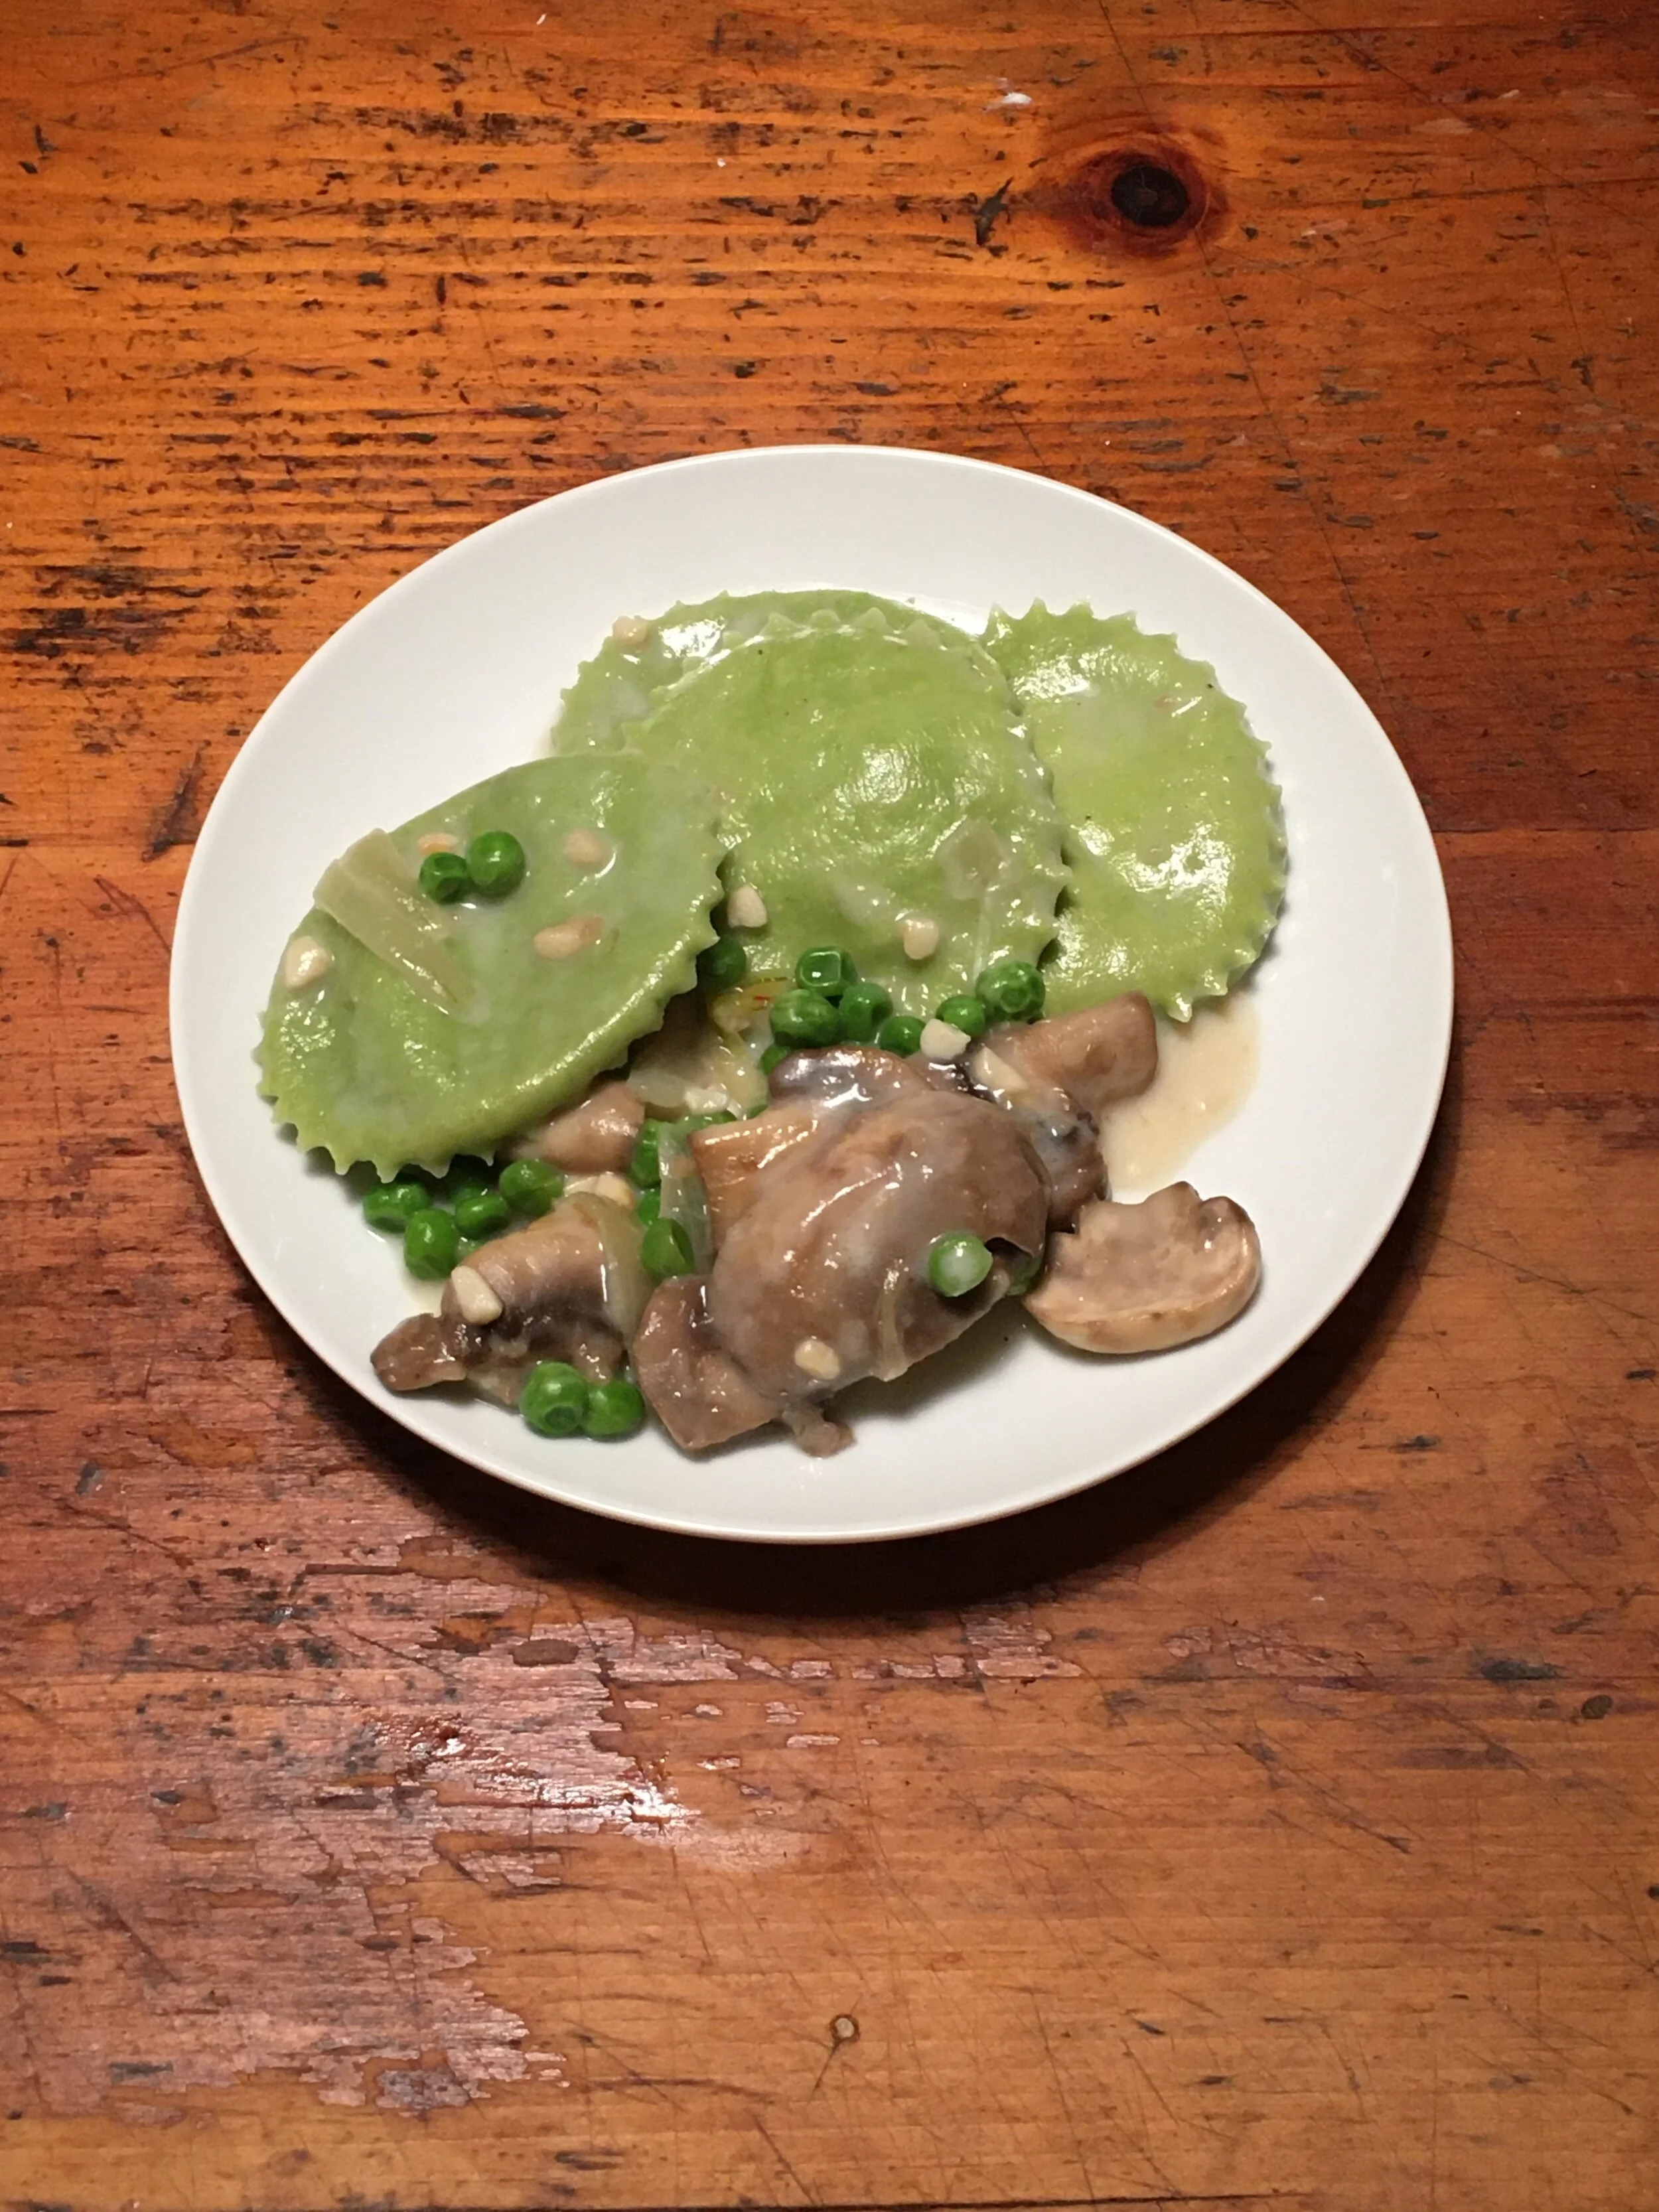
Pea and Ricotta Anolini with Mushrooms and Alfredo
I went to the grocery store last night to pick up some vitals - flour, butter, eggs, and several bottles of wine. Despite living with chronic anxiety, I have been relatively level headed through this whole thing. I’m not as calm, cool, and collected as usual but I’m also not a puddle on the floor or hoarding toilet paper. Still, I can feel our collective unease wherever I look. There is a sensation of something bubbling just below the surface. It’s in the eyes of the cashiers, the rushed pace of people at the grocery store, and all over social media. We’re all scared.
I am not afraid of catching COVID-19. I am young, relatively healthy, and should recover without complications should I contact the virus. Sadly, I’ve been avoiding the older people in my life to prevent spreading the virus to them, should I happen to contact it. What is really scary to me however is the mass hysteria that has swept so many people up. The strangers stocking up on pasta, beans, and toilet paper. The people who are going out and buying guns and body armor. Some seem to think we are on the brink of societal collapse and I can say is, only if you behave that way. It is unnerving to see the worst in society come out in a time like this. Hoarding will not solve this problem. Neither will shaming those people who are scared. The only way to get through this is to keep marching forward, together.

To soothe my soul and avoid the chaos, I turned to the activities that keep me calm. I’ve been cooking more than usual, playing the piano, drawing, and started learning a cello-piano duet with Anthony. I’ve begun to wrestle with the reality that the pasta workshop I’ve been planning all winter will likely be canceled and as much as it breaks my heart, I know it will be for the best.
I don’t know when COVID-19 will pass and I don’t know what we will learn from this experience if anything. What I hope we learn though, is that in times of great turmoil and strife, we have the capacity to care for each other and not retreat into the fearful and dangerous parts of our collective psyche. I know people are scared, I’m scared. Being scared and anxious right now is a natural reaction and if you’re feeling that, know that you’re not alone. Do what you need to do to keep yourself together and try to retain whatever routine you need.
Long story short, if you’re worried about COVID-19, get educated. Learn what you can and understand that some anxiety is OK and warranted, these are critical times we are living in. Just remember, we are all a little scared and uneasy. Be nice to each other. Stop mocking those who are worried and scared. Find peace, find comfort, eat pasta.
Notes about the recipe.
As I’ve mentioned before, if you can’t find eggs at the store, feel free to use water instead. Start with a cup and adjust from there.
I used fresh spinach to color the pasta dough but you can use whatever greens you have on hand. Swiss chard, kale, parsley, whatever you can get your hands on will be just fine.
To make the spinach puree, take a handful of spinach, place it in a food processor or blender with 1/2 cup of water and puree until its smooth. You can run it through a fine-mesh sieve if you want, otherwise, just mix it in with the eggs and get to kneading.

Pea and Ricotta Ravioli with Mushrooms and Cream
Ingredients
2 tablespoons pureed spinach
1 whole egg
4 egg yolks
2 tablespoons olive oil
hefty pinch of salt
2½ cups flour
2 cups ricotta
2 oz soft goat cheese
2 cups frozen peas, separated
1 cup parsley
pinch of salt
1 lb sliced mushrooms
1 onion, thinly sliced
1 tablespoon minced garlic
4 tablespoons butter
2 tablespoons flour
1/2 cup milk
Directions
Make the pasta dough. In the bowl of a stand mixer, combine the pureed spinach, eggs, and oil. Stir until everything is evenly mixed. Slowly incorporate the salt and flour and mix with a dough hook until a firm ball is formed. Dump the dough out onto a lightly floured surface and knead until the dough is firm. Wrap the ball in plastic wrap and chill while you make the filling.
Make the filling. Toss the parsley, 1 cup of peas, goat cheese, and ricotta in a blender and pulse until everything is smooth. You may need to scrape down the sides of the mixer as you work. The result should be smooth and bright green without any lumps or rogue parsley stems and leaves.
Roll the Dough. Take the dough out of the refrigerator and cut it into 8 even pieces (think of it as pie pieces). Grab to wedges to work with and cover the remaining dough with plastic to keep it moist. Roll one piece of dough until it is 1/8 inch thick either with a rolling pin or pasta machine, set this aside and do the same with the next piece.
Spread the filling. Using a spoon, gently spread the filling over the dough in an even layer, about 1/2 inch thick. Take the second rolled sheet and place it over the filling. Gently press the pasta dough into the filling, working from the center out to the edges, and press any air pockets out.
Stamp out the anolini. Using a pasta stamp, pastry cutter or simply a knife, stamp or cut the pasta to the shape you desire - I prefer to keep them 1 -2 inches in diameter max but you do you.
Cook the onions and mushrooms. Heat 1 tablespoon of olive oil in a skillet until it shimmers. Add the onions and saute over medium-high heat until they are soft about 5-6 minutes. Add the mushrooms and a pinch of salt. Cook until the mushrooms release their liquid and soften, another 5 minutes or so. Add the peas and cook until they are soft, about 3 minutes and then add the minced garlic and cook until it is aromatic about 1 minute. Transfer everything to a bowl and return the skillet to the stove.
Make the sauce. Melt the butter in a skillet over medium-high heat. Add the flour and stir constantly while it cooks - this is a roux. Once the roux is golden brown, about 3 minutes. Remove from heat and add a splash of milk. Stir vigorously while you add the rest of the milk, stirring to incorporate. Season with salt and pepper and add the mushrooms and onions back to the pan. Stir to coat everything evenly.
Cook the pasta. Bring a big pot of water to a rapid boil and add a hefty pinch of salt. Add the ravioli, working in batches if necessary, and cook until they float. Remove with a slotted spoon and add to the mushrooms and sauce. Reserve 1 cup of the cooking liquid before dumping it out.
Toss it all together and serve. If the sauce has thickened, add some of the reserved pasta water and stir to incorporate. Serve with parmesan cheese and garnish with parsley.

Corned Beef and Kimchi Sandwiches
It is amazing how quickly life can change. While I was working on this recipe over the weekend, Anthony questioned whether or not people would know where to buy kimchi. I laughed and told him every grocery store in America carries kimchi and that these ingredients would be SO simple to find. Fast forward to last night at the grocery store and it is an image all too familiar in America; empty shelves, panicked shoppers, stressed-out parents, and wide-eyed clerks.
In light of all the scary things that are happening in the world, life does move on and we adapt. Some friends from college and I spent two hours last night on a zoom call, we dubbed it our “digital happy hour”. It was the first time we had all been together since my wedding in 2018 and I didn’t realize it at the time but I really needed it, even if I did drink too much.
In the spirit of progress, I’m sharing this recipe. If you have everything at your house, awesome. If you don’t please just save this for our post-pandemic life. Don’t leave your house unless you really need to. The kimchi cuts through the fattiness of the corned beef with hits of heat and funk. I had a little leftover corned beef this morning so I made this again. It was a weird breakfast but tasted so good and I’d like to think that the punch of probiotics is keeping me healthy.

Corned Beef and Kimchi Panini
Ingredients
4 Rye Bread
Mayonaise
4 slices Swiss Cheese
Leftover Corned Beef, shredded
Kimchi
Directions
Heat a skillet over medium-high and spread some mayonnaise on one side of each piece of bread.
TO build the sandwich, place a piece of bread in the skillet, greased side down. Lay cheese, corned beef, kimchi, cheese, bread. place a piece of foil over the sandwich a place another heavy skillet on top of it to compressed the sandwich. Toast until each side is golden brown.
Transfer the sandwich to a plate and allow it to rest for one minute. slice and serve.

Fresh Pasta Dough

In light of authorities telling everyone to remain calm, the grocery store is again looking like a war zone. I went shopping last night for the essentials - eggs, butter, wine, and cheese - when I noticed that not only is all the toilet paper gone but so are the boxes of pasta that once lined the shelves. Rather than panic purchase more pasta, I turned to my own kitchen and made a batch of spinach dough. Its easy, affordable and the perfect activity for when you’re social distancing but want those noods.
The recipe is for a basic dough and if you don’t have a pasta roller, do not despair or impulse buy one. You can make fresh pasta without a rolling machine just as easily. If this is you, go with a shape like cavatelli. Below is a quick video on how to make cavatelli at home.
EDIT: If, like me, you get to the store to find that all the eggs are gone, know that you can still make pasta without the eggs. Substitute the eggs for 3/4 cup of water and follow the rest of the instructions below!
Fresh Pasta Dough
Ingredients
2 whole eggs
4 egg yolks
2 tablespoons olive oil
hefty pinch of salt
2½ cups flour
Directions
In a large bowl, stir the eggs, yolks, olive oil and salt until evenly mixed. Add the flour and stir with a rubber spatula until the dough comes together into a sticky ball.
Turn the dough out onto a lightly floured surface. With floured hands, kneed the dough until a firm, smooth ball is formed. About 8 minutes. Wrap the dough in plastic wrap and chill for at least 30 minutes.
Cut the dough into eighths and toss lightly with flour. Press each wedge flat and roll with a rolling pin, shaping into small discs. Feed the dough discs through the pasta roller. Start at the widest setting and roll until the dough is thin but still sturdy, “5” on most machines.
Trim the edges of the dough so you are working with a uniform rectangle. Fold the dough in half twice and cut into 1/2 inch ribbons. Dust the noodles with cornmeal and set aside.
Spinach Pasta Dough
To make spinach pasta dough, use the recipe above but substitute 2 tablespoons pureed spinach for 1 whole egg. Follow the rest of the directions, adding more flour as necessary.

Better Corned Beef and Cabbage
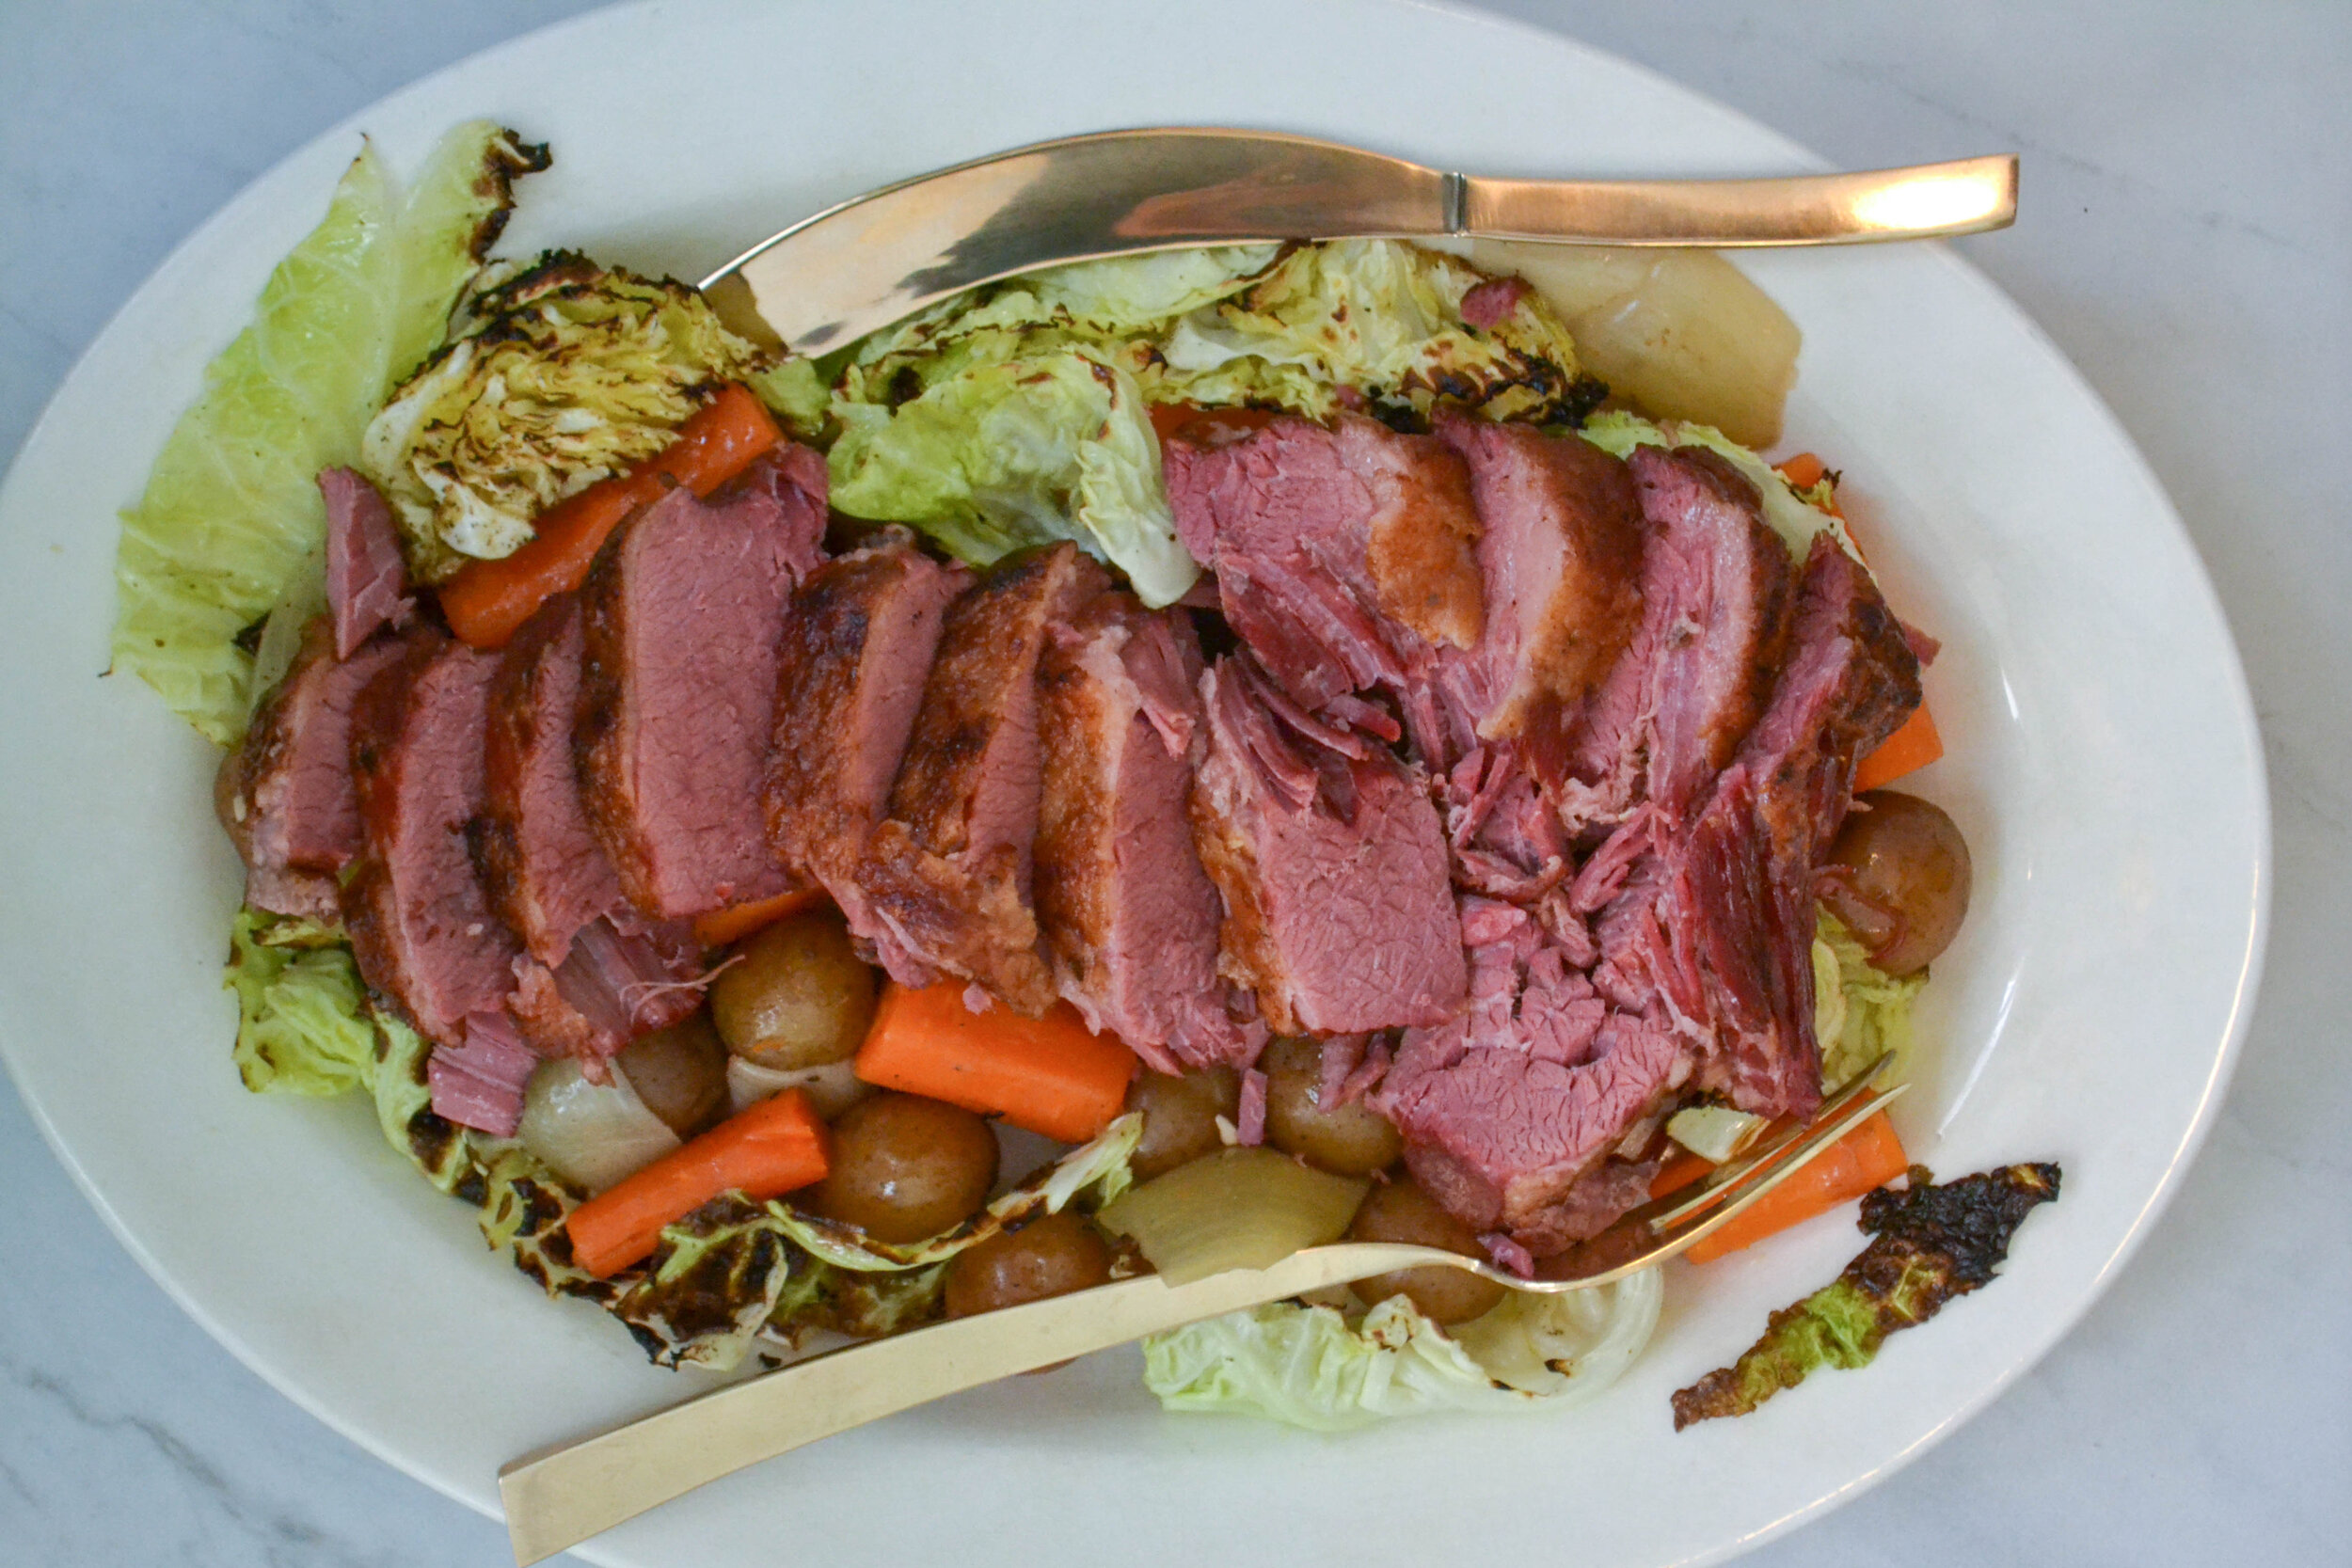
The last time I checked, there are close to 20 million results for “corned beef and cabbage” on Google. With so many options out there, does the world really need another recipe for this iconic dish? Probably not. Instead of reinventing the wheel, I’ve taken some time to reflect on some of my favorite methods and pulled techniques together to make, what I believe, is a better-corned beef and cabbage dinner.
First, use your slow cooker. I know, everyone has an InstantPot these days and they are awesome. Hear me out, your slow cooker was made for this recipe. It has been waiting, patiently, to braise this salty, cured, tough cut of meat its whole life. Not only is it the best tool for the job, but it also means you can leave your house while it is doing most of the work for you.
Second, this is purely a personal choice and you do not have to follow it but, use a flat-cut piece of meat rather than a tip. This can be a thorny issue as I’ve seen online and both cuts have their merits but in my opinion, the leaner, flat cut beef is far superior. One of the things I dislike about corned beef is that the fat is always slimy and gelatinous and it just grosses me out.
Third, use your broiler! When I make steak inside, I use the reverse sear method - cook it in the oven and then sear it on the stove before serving. You can use the same method with corned beef and your broiler. This will give the beef a crispy exterior and maintain that tender, juicy interior.
Finally, while you’re more than welcome to stick with tradition and boil everything together, take a chance and be different. I opted for roasted my cabbage but kept the potatoes and carrots in the braising liquid. Why? Because I love how soft and pillowy the root vegetables get and roasted cabbage gives the humble vegetable a totally different flavor and texture. Of course, you can boil that too. Remember, there are no rules, merely suggestions!
A couple more tips
Bloom your spices before you start braising. This is a trick I learned while making Vietnamese and Thai food. Toss your spices in a skillet and gently toast them until they are aromatic - about 1 minute.
Don’t forget to rest! Rest the corned beef for at least 10 minutes before slicing it. This will give the meat time to cool and for the juices to really soak in. You’ve already waited all day for this moment, what’s another 10 minutes?
Hopefully, we can all enjoy St Patty’s Day in light of the recent coronavirus outbreak. In times of great need and calamity, sometimes you just need soft comforting food. Enjoy and wash your hands.
Better Corned Beef and Cabbage
Ingredients
2 1/2 lb corned beef brisket
4 carrots, chopped
1 onion, chopped, quartered
2 cloves garlic, smashed
4 bay leaves
1 tablespoon mustard seeds
1 teaspoon fennel seeds
1 teaspoon crushed red pepper
2 T peppercorns
2 T coriander seeds
6 oz beer
1 lb baby potatoes, washed and halved
4 tablespoons olive oil, divided
1 head cabbage, cored and quartered
Directions
Bloom the spices by tossing them in a dry skillet and toast until aromatic, about 1 minute.
Place the corned beef, spices, potatoes, turnips, and carrots in a slow cooker. Add the beer and enough water to barely cover the meat. Don’t worry if the vegetables float on top. Set the slow cooker to low and cook 8 hours or until the beef is tender.
About an hour before the beef is ready, preheat the oven to 400 and arrange the cabbage in a roasting pan, drizzle with olive oil, salt, and pepper. Roast 30 minutes, flipping halfway through.
When the beef is done, take it out of the liquid and transfer to a sheet pan with the fatty side up. Turn the broiler to high. Broil the beef until the top is crispy, about 3 minutes.
Slice the corned beef against the grain and serve with vegetables and mustard.

Asparagus and Radish Salad
It is almost spring and for the first time since I moved to Maine, I CAN SEE GRASS ON MARCH 1. To those in warmer parts of the country, this may not seem noteworthy but Maine springs are notoriously wet and we are often covered in snow until April - sometimes even into May. Anthony is a little bummed we won’t get to go snowshoeing again but personally, I’m thrilled. I love spring and in Ohio, spring is long, warm and glorious.

Weather patterns aside, I’m also excited its spring because that means some of my favorite produce will be returning to the farmer’s market. Radishes, peas, asparagus, onions, fiddle heads and more will soon be gracing the stands at the Portland Farmer’s Market and my plate. This means I’ll be whipping up all kinds of fresh new recipes from salads to ravioli.
One dish I am so excited to make is this salad. Asparagus and radish are two of my favorite vegetables and the first things to come up in the garden on the island every year. The nice thing about spring crops is that they are almost always tender, meaning you don’t have to cook anything in this recipe. That is a concept I can fully support and get behind. Not only does it cut down on dishes but it means I’m that much closer to a delicious meal. The best part? You can make this salad the night before and the flavors will blend together beautifully.
There are a few little tricks I’ve picked up that make this salad even better. First, use fresh asparagus on the thinner side. If all you can find is thicker stalks, that’s fine, just be sure to slice it into thin pieces. Second, stop cutting your asparagus and start snapping it like you do green beans. The stalk will snap where it is tender, discard the rest. Lastly, the olive bar at my grocery store always has a great selection that are reasonably priced. I prefer to use the kind marinating in oil rather than brine but you do you.
If you really wanted to, you could add some cheese to this salad but I love it just the way it is. The peppery radish, fresh lemon and tender asparagus team up for a crunchy, refreshing salad that will be a star on any table this spring.

Asparagus and Radish Salad
1 bunch asparagus, washed and snapped
1 lb radishes, thinly sliced
1/2 cup marinated olives
1 shallot, thinly sliced
2 tablespoons lemon juice
4 tablespoons olive oil
1 teaspoon kosher salt
1 teaspoon ground pepper
1 teaspoon oregano
Chop the asparagus into 1-inch pieces. If the asparagus is thick, slice the asparagus pieces in half.
In a mixing bowl, whisk together the lemon juice, salt, pepper, and oregano. Slowly add the olive oil while whisking until the sauce is emulsified and golden.
Toss all the vegetables with the dressing and cover. Chill at least 30 minutes before serving.

Seared Scallops with Creamy Linguini
I’m typically not a creamy pasta kind of guy. Its not that I don’t like it but I just never seem to crave it like I do other pasta sauces. That is, until I do crave it. Once that craving sets in, buckle up. I’m not going to settle for some off-the-shelf alfredo, nor am I going to settle for something half done. I want the real deal. I want cream. I want butter. I want carbs in all their glutenous glory.
The craving hit me last week while I was at work. It was a cold and wet day and I just wanted something comforting to eat. I didn’t have time to make something braised, I didn’t want something light like couscous or quinoa. I wanted something heavy in carbs and creamy af. I also had a strange craving for some kind of fish or shellfish. When I got to the market, I saw fresh scallops were on sale and I knew I needed them. I bought a pound of scallops, grabbed some butter, milk and pasta and was out the door.
The result of this craving was a pretty simple and straightforward dish that anyone, I repeat anyone, can make. Scallops are intimidating to some because they are a bit pricy and they can get a little rubbery if you don’t pay attention. All things considered though, they are pretty easy and low maintenance and you don’t need a ton to make a meal feel filling. I learned to make scallops from my mom and she is a pro. Her tip: dry the scallops and dust them with salt to extract any extra moisture. A good dry scallop will brown beautifully.
As for the pasta sauce. This alfredo is also super easy and basic. You don’t need heavy cream like most recipes require but whole milk will make the sauce much more rich and filling.

Seared Scallops with Creamy Linguini
Ingredients
1lb fresh scallops
1 tablespoon salt
1 teaspoon paprika
1 teaspoon black pepper
1/2 teaspoon cumin
1/2lb dried linguini
2 tablespoons olive oil,. divided
4 tablespoons butter, divided
1 onion, finely minced
2 garlic cloves, finely minced
2 tablespoons flour
1 cup milk
Directions
Take the scallops out of the packaging and rinse briefly under cold water. Pat the scallops dry with a paper towel and transfer to a dry plate. Season the scallops with salt and allow them to rest about 5 minutes. Wipe the excess salt off the scallops and transfer them to a small bowl.
In the bowl with the scallops, add paprika, pepper and cumin. Mix everything together until all sides of the scallops are evenly coated. Set the scallops aside.
Bring a pot of salted water to a boil and cook the pasta according to the package instructions. Reserve 1 cup of pasta water before straining.
In a skillet, heat the olive oil and half of the butter over medium heat. Add the onions and cook until translucent, 3 - 5 minutes. Add the remaining butter, when it has melted add the garlic and cook until fragrant, about 30 seconds. Season with salt and pepper then sprinkle the flour over the whole mixture, stirring constantly until the flour is incorporated. Cook 2 - 3 minutes or until the flour mixture turns a very faint brown. Remove from heat and slowly add the milk, stirring constantly to prevent any clumps of flour. If the sauce seems too thick, add a little pasta water until the desired consistency is reached. If it is too thin, reduce the sauce over medium-low heat.
Heat a tablespoon of olive oil in a heavy skillet over medium-high heat. Add the scallops and cook 1 1/2 - 2 minutes on each side. The scallops should have a nice crust on the outside and be opaque on the inside.
Working quickly, toss the pasta and sauce together and nestle the scallops on top, garnish with parsley and serve immediately.

Blueberry-Cardamom Champagne Cocktail

Sometimes in the dead of winter you just need a good, bright, fresh drink to remind you of the warmer days ahead. That’s been the case here lately. While it hasn’t been as cold as some years (nothing below freezing - yet) it has been cold and dreary. We are in the part of winter where there are no major holidays to celebrate and its too early to start seedlings for the garden. I call this the “purging” part of the winter. It is when I go stir crazy and drag things out of closets, the attic and wherever else Anthony and I have been storing things we don’t use regularly. Most of this stuff ends up at Goodwill or the dump.
This week, I was craving something light and bright to drink. I’m drinking less booze in 2020 but I’m not a full-fledged nondrinker. One of my favorite drinks is a French 75, named after a French machine gun used in WW I It is a delightful mix of gin, citrus, syrup and champagne. Indulgent yet light and refined, how very French. I couldn’t just settle on a French 75 though. Naturally, I had to make it a little more…extra. I dug through the spice rack and found some cardamom that was't doing anything useful and grabbed a few blueberries from the freezer. A little muddling, boiling and shaking and boom, a drink is born.
Ingredients
3 oz gin or vodka
8 blueberries
1 1/2 oz cardamom simple syrup (recipe follows)
juice of half a lime
2 dashes aromatic bitters
2 dashes rose water
Champagne
Directions
Muddle the bluerries and lime juice in a cocktail shaker. Add ice, the gin or vodka, simple syrup, bitters, and rose water. Shake well.
Pour the cocktail into two glasses filled halfway with ice, top with champagne and garnish with a lime slice.

Oysters with Mignonette
Maine has a burgeoning oyster scene. Given the cold waters of Maine and the many rivers, Maine, particularly Maine’s midcoast, are prime real estate for oyster farmers and harvesters.
I love oysters and have loved them for as long as I can remember. Raw oysters on the half shell, when fresh, have a clean, briny flavor to them that is just wonderful. Some people think I’m nuts and can’t stand the thought of eating something raw but those people don’t know what they are missing. In addition to being delicious, oysters are incredibly healthy and are quite possibly the most humble of warriors in the fight against climate change.
Health Benefits of Oysters
It pays to eat oysters. With a host of vitamins, minerals, and macronutrients, oysters are a nutrient-dense food.
Low in calories but high in protein
Not that I believe in counting calories but if I did, this would give me one more reason to love oysters. Coming in at a humble 40 calories, these little pups pack 5 grams of protein per oyster. 5 grams might not sound like much but considering the other nutrients found in oysters, its just one more reason to knock a few back.
Plenty of Zinc
Zinc is a critical mineral for a properly functioning body. From your immune system to your sense of taste and smell, zinc is involved in more bodily functions than any other mineral. It is theorized that low levels of zinc also inhibit male performance, hence the belief that oysters are an aphrodisiac.
Heart Healthy
Oysters have high levels of heart-healthy compounds like Omega 3 fatty acids, potassium, and magnesium, all of which are important nutrients for a healthy heart.
Great source of Vitamin D
Vitamin D is another vitamin group that is crucial to overall health. Vitamin D is necessary for everything from healthy bones to lessening the effects of Seasonal Affective Disorder to reducing your risk of developing chronic diseases including diabetes, dementia and some cancers.
More B12 than beef or lamb
Vitamin B12 is important for maintaining healthy red blood cells and a healthy metabolism. Most people think of beef and red meat when they think of B12 but oysters have almost 6 times the amount of b12 found in beef and lamb. The only cut of meat with more B12 than an oyster is beef liver and who wants to eat that?
Environmental Benefits of Oysters
The impact of climate change is becoming more and more dire as years of inaction go by. Water pollution, rising sea levels, and erosion are major issues for coastal communities. Fortunately, oysters offer a solution to some of the threats we face with climate change.
Water Purifiers
Nitrogen is one of the most common pollutants found in water. Often, the source of the nitrogen comes from farms upriver where fertilizer runoff ends up in groundwater and tributaries that make their way to our oceans and lakes. For those of us fortunate enough to live near the sea, oysters offer a great solution. Oysters thrive on nitrogen and are efficient at filtering that and other pollutants from the water.
Erosion Control
Along the coast, one of the biggest threats is coastal erosion during major weather events like hurricanes. As reefs die and harbors and bays are dredged, the seafloor and coast are becoming more and more susceptible to erosion. Fortunately, there is a solution that is a win for everyone. Oysters!
Oysters grow in huge clumps, forming natural reefs that help hold the seafloor and mudflats in place while the water above rages.

Oysters with Mignonette
This is a basic mignonette consisting of simple ingredients. It is fresh and tart, pairing well with fresh oysters. Get creative and experiment with different flavors such as citrus, ginger, spices or other vinegars.
Ingredients
1 dozen oysters
1 shallot finely minced
1 jalapeno, seeded and finely minced
1/2 cup red wine vinegar
1 teaspoon sugar
1 teaspoon ground black pepper
Directions
In a small bowl, combine everything but the oysters. Whisk until the sugar has dissolved, cover and chill for at least 30 minutes.
Shuck the oysters by carefully inserting an oyster knife in the hinge of the shells. Carefully wiggle the knife until it is securely between the shells. Twist the knife until the shells “pop” apart and run the knife along the edge of the shells. Detach the oyster from the shell by running the knife underneath the meat, being careful not to puncture the oyster.
Arrange the oysters on a plate of ice and serve with mignonette and lemon wedges.


Chocolate Dipped Pretzels
Chocolate covered pretzels are the ultimate canvas for fun snacks. Whether your craving something sweet and salty or looking for something fun to do with the family or on a date night, these are low pressure, easy and delicious!

Chocolate Dipped Pretzels
Ingredients
1 bag of chocolate chips
2-3 cups pretzel sticks
¼ cup chopped hazelnuts
1 tablespoon ancho-chili pepper
1 tablespoon of sea salt
Directions
Place a metal bowl over a pot of boiling water. Add the chocolate chips and stir constantly until the chocolate is melted and smooth. Remove from heat and make sure not to let the water touch the chocolate.
Working quickly, dip the pretzels into the chocolate and place on wax paper. Season with your topping of choice and allow the chocolate to harden on the counter for about 2 hours, you can put them in the freezer if you need to speed up the process.