
Lemon Pecan Sugar Cookies
Christmas is 5 short days away and after the year we’ve all had, some merriment and celebrations are what we all need. This season will look different, it certainly does for us, but that doesn’t mean we can’t think about what gives our lives color and depth.
I was listening to Brene Brown’s podcast, Unlocking Us, and she was speaking with Emily and Amelia Nagoski about burnout and the stress cycle. It was a great interview and I highly recommend you listen to it. What caught my attention was an analogy they shared about being chased by a hippo.
“You manage to run away from the hippo because hippos actually don't have a lot of stamina. So you run all the way and somebody waves you in through their door and you you shut it and the hippo gives up and is like “nevermind” and just runs away and you look at this person who just saved your life and you feel this rush of exhaustion, and this joy to be alive and it seems like the sun is shining brighter and you love your friends and family and you're so grateful to be alive.”
It's easy to think that it is the hippo going away…that relieves the stress but its acually the person who opened the door.
It’s easy to overlook this simple concept that people are what relieve stress, not the absence of stressors. How many times have we learned that this year? When we first locked down, we were all terrified and unsure of what the future held. What did we do? We banded together and took care of one another. We wore masks, donated food, called friends, had zoom cocktail hours, zoom holidays, and stayed home. We did what people do in times of need, took care of each other. We are each other’s safe harbor in the storm.
My wish for you this holiday season, whoever you are, is that you recognize those safe harbors in your life. There will always be storms in our lives, there will always be the metaphorical hippo chasing us. All we can do is rely on each other and open the door to each other.

Lemon Pecan Sugar Cookies
Ingredients
1 ½ C sifted flour
½ teaspoon baking soda
½ teaspoon salt
½ C butter
1 C sugar
1 egg
1 tablespoon lemon juice
2 teaspoon lemon rind
½ c finely chopped pecans
Directions
Sift all the dry ingredients and set aside.
In the bowl of a stand mixer, beat the butter and sugar until fluffy, about 5 minutes. Add the egg, lemon juice, rind, and pecans and mix until evenly mixed. Add half of the dry ingredients, mix, and mix the rest until a soft dough is formed.
Turn the dough out onto a lightly floured surface and divide in half. Shape the dough into 2 long rolls, wrap in plastic wrap or wax paper, and chill overnight.
When you’re ready to bake the cookies, preheat the oven to 375 and slice the logs into ¼ inch rounds. Place the cookies on baking sheets, dust with extra sugar if desired, and bake 8 minutes or until golden around the edges. Remove and cool on a wire rack.

Chocolate Glazed Tahini Cookies
What could be better than cookies with chocolate glaze? Nutty, salty, and sweet all in one bite. I based this recipe on a cookie recipe I found in my mom’s old recipe tin. The card was folded and stained - evidence of their popularity. If you’re unfamiliar with tahini, it is a paste made from sesame seeds that tastes similar to peanut butter, only better. If you can’t find tahini, sub any nut butter you want.
Anthony and I have been running around like madmen over the last week, trying to get Christmas presents together, cards sent, and the house decorated. Every year we say we’re going to take it easy and make life simple but somehow we end up doing more than the year before. I bragged in November that I had finished most of our holiday shopping before Thanksgiving, only to rest on my laurels until now and it is a mad dash to get things together in time.

Ingredients
for the cookies
2¼ teaspoon yeast
2 tablespoons warm water
½ cup granulated sugar
½ cup packed brown sugar
1 egg
½ cup tahini
¼ cup butter, softened
¼ cup shortening
1 ½ cup flour
¾ teaspoon baking soda
¼ teaspoon salt
for the glaze
1½ cup powdered sugar
¼ cup cocoa powder
3 tablespoons milk
1 teaspoon vanilla
Directions
Dissolve the yeast in warm water in a large bowl. Mix in the sugars, egg, peanut butter, butter, and shortening until smooth.
Sift together the flour, baking soda, and salt. Stir the flour mixture into the sugar mixture and beat until smooth. Cover and refrigerate for 30 minutes.
Preheat the oven to 375.
Roll the dough into 1 inch balls and place 2 inches apart. Press down with a fork to create a criss-cross pattern and bake for 8 minutes or until light brown. Remove from the oven and cool on wire racks.
While the cookies cool, make the glaze by mixing all the ingredients until smooth, adding additional milk, ½ teaspoon at a time until the desired consistency is met.
Dip the top of each cookie in the glaze and sprinkle with sea salt.

Coconut Thumbprint Cookies
‘Tis the season to go digging through the tin of recipes my mom gave me a few years ago! I have an old recipe tin that belonged to my great Aunt Ruth, full of old family recipes from my great grandmother, grandmother, great aunt, and friends of the family. I love it and though I don’t cook from it often, I do reach for it when I think of cookies. Sadly, I never met my biological grandmother or great-grandmother but I do have their recipes and all the family lore to go with them. Gladys, my great grandmother, lived on a farm and had a ritual of baking cookies every Sunday for the week ahead. As a result, I have cookie recipes for days.
Thumbprint cookies happen to be one of my favorites both because they satisfy a sweet tooth but also because they are so easy to riff on. For example, this recipe called for strawberry preserves, which I used, but I also swapped in some other jams I had laying around. Cardamom Blueberry jam? Done! Orange-Apricot Marmalade? Yes, hunty.
These cookies are pretty straight forward and simple. Nothing elaborate, no resting, no rolling. Just mix it all together, form the dough into balls, bake, press, bake, fill, enjoy. The coconut in the cookies opens the possibilities up to all kinds of fillings. Maybe something with lime? Or something creamy with a touch of rose? Go wild!

Ingredients
1/2 C butter
1 package yellow cake mix
1 T water
2 eggs
1 1/2 C flaked coconut
1 C favorite jam, jelly, or preserves
Directions
Preheat the oven to 375
Cream the butter in a mixing bowl with a hand mixer or a stand mixer until soft, creamy, and light.
Add half the cake mix, water, and eggs and mix. Add the rest of the cake mix and beat until smooth. Stir in the coconut.
Roll the dough into small balls using a tablespoon. Place the balls about 2 inches apart on a greased cookie sheet. Bake for 10 minutes.
Remove from the oven and make a small indentation using either a teaspoon or your thumb. Bake another 5 minutes longer or until the bottoms are golden brown.
Remove from the oven and cool on wire racks. Place about 1 teaspoon of jam, jelly, or preserves in the center of each cookie.

Rhuberry Handpies
When I was very young, my nana had rhubarb growing in her back yard and I can recall her cutting off two stalks, sprinkling them with sugar, and handing one to me; we would eat and laugh and be happy. Now that Anthony and I have a home of our own, we also have rhubarb. Our plants were there long before we bought the house and are very well established. They poke their heads out of the ground shortly after the snow is gone and by memorial day, they are typically 3 - 4 feet high.
This time of year, pies reign supreme, and rhubarb pie is one of my favorites. With such a pleasantly tart flavor that all you need is a touch of sugar to really make rhubarb sing. This year, as the rhubarb was coming up, I began to think about what I want to do with it. Pies of course came to mind, then unusual things like jams and sauces (more on that at a later date). As I harvested a dozen or so stalks, I came inside and looked through my freezer and found a bag of frozen blueberries that needed to go, and this recipe was born. Rhubarb Blueberry Handpies. These puppies are delicious, easy to make and freeze exceptionally well so you can make a big batch and enjoy them later.
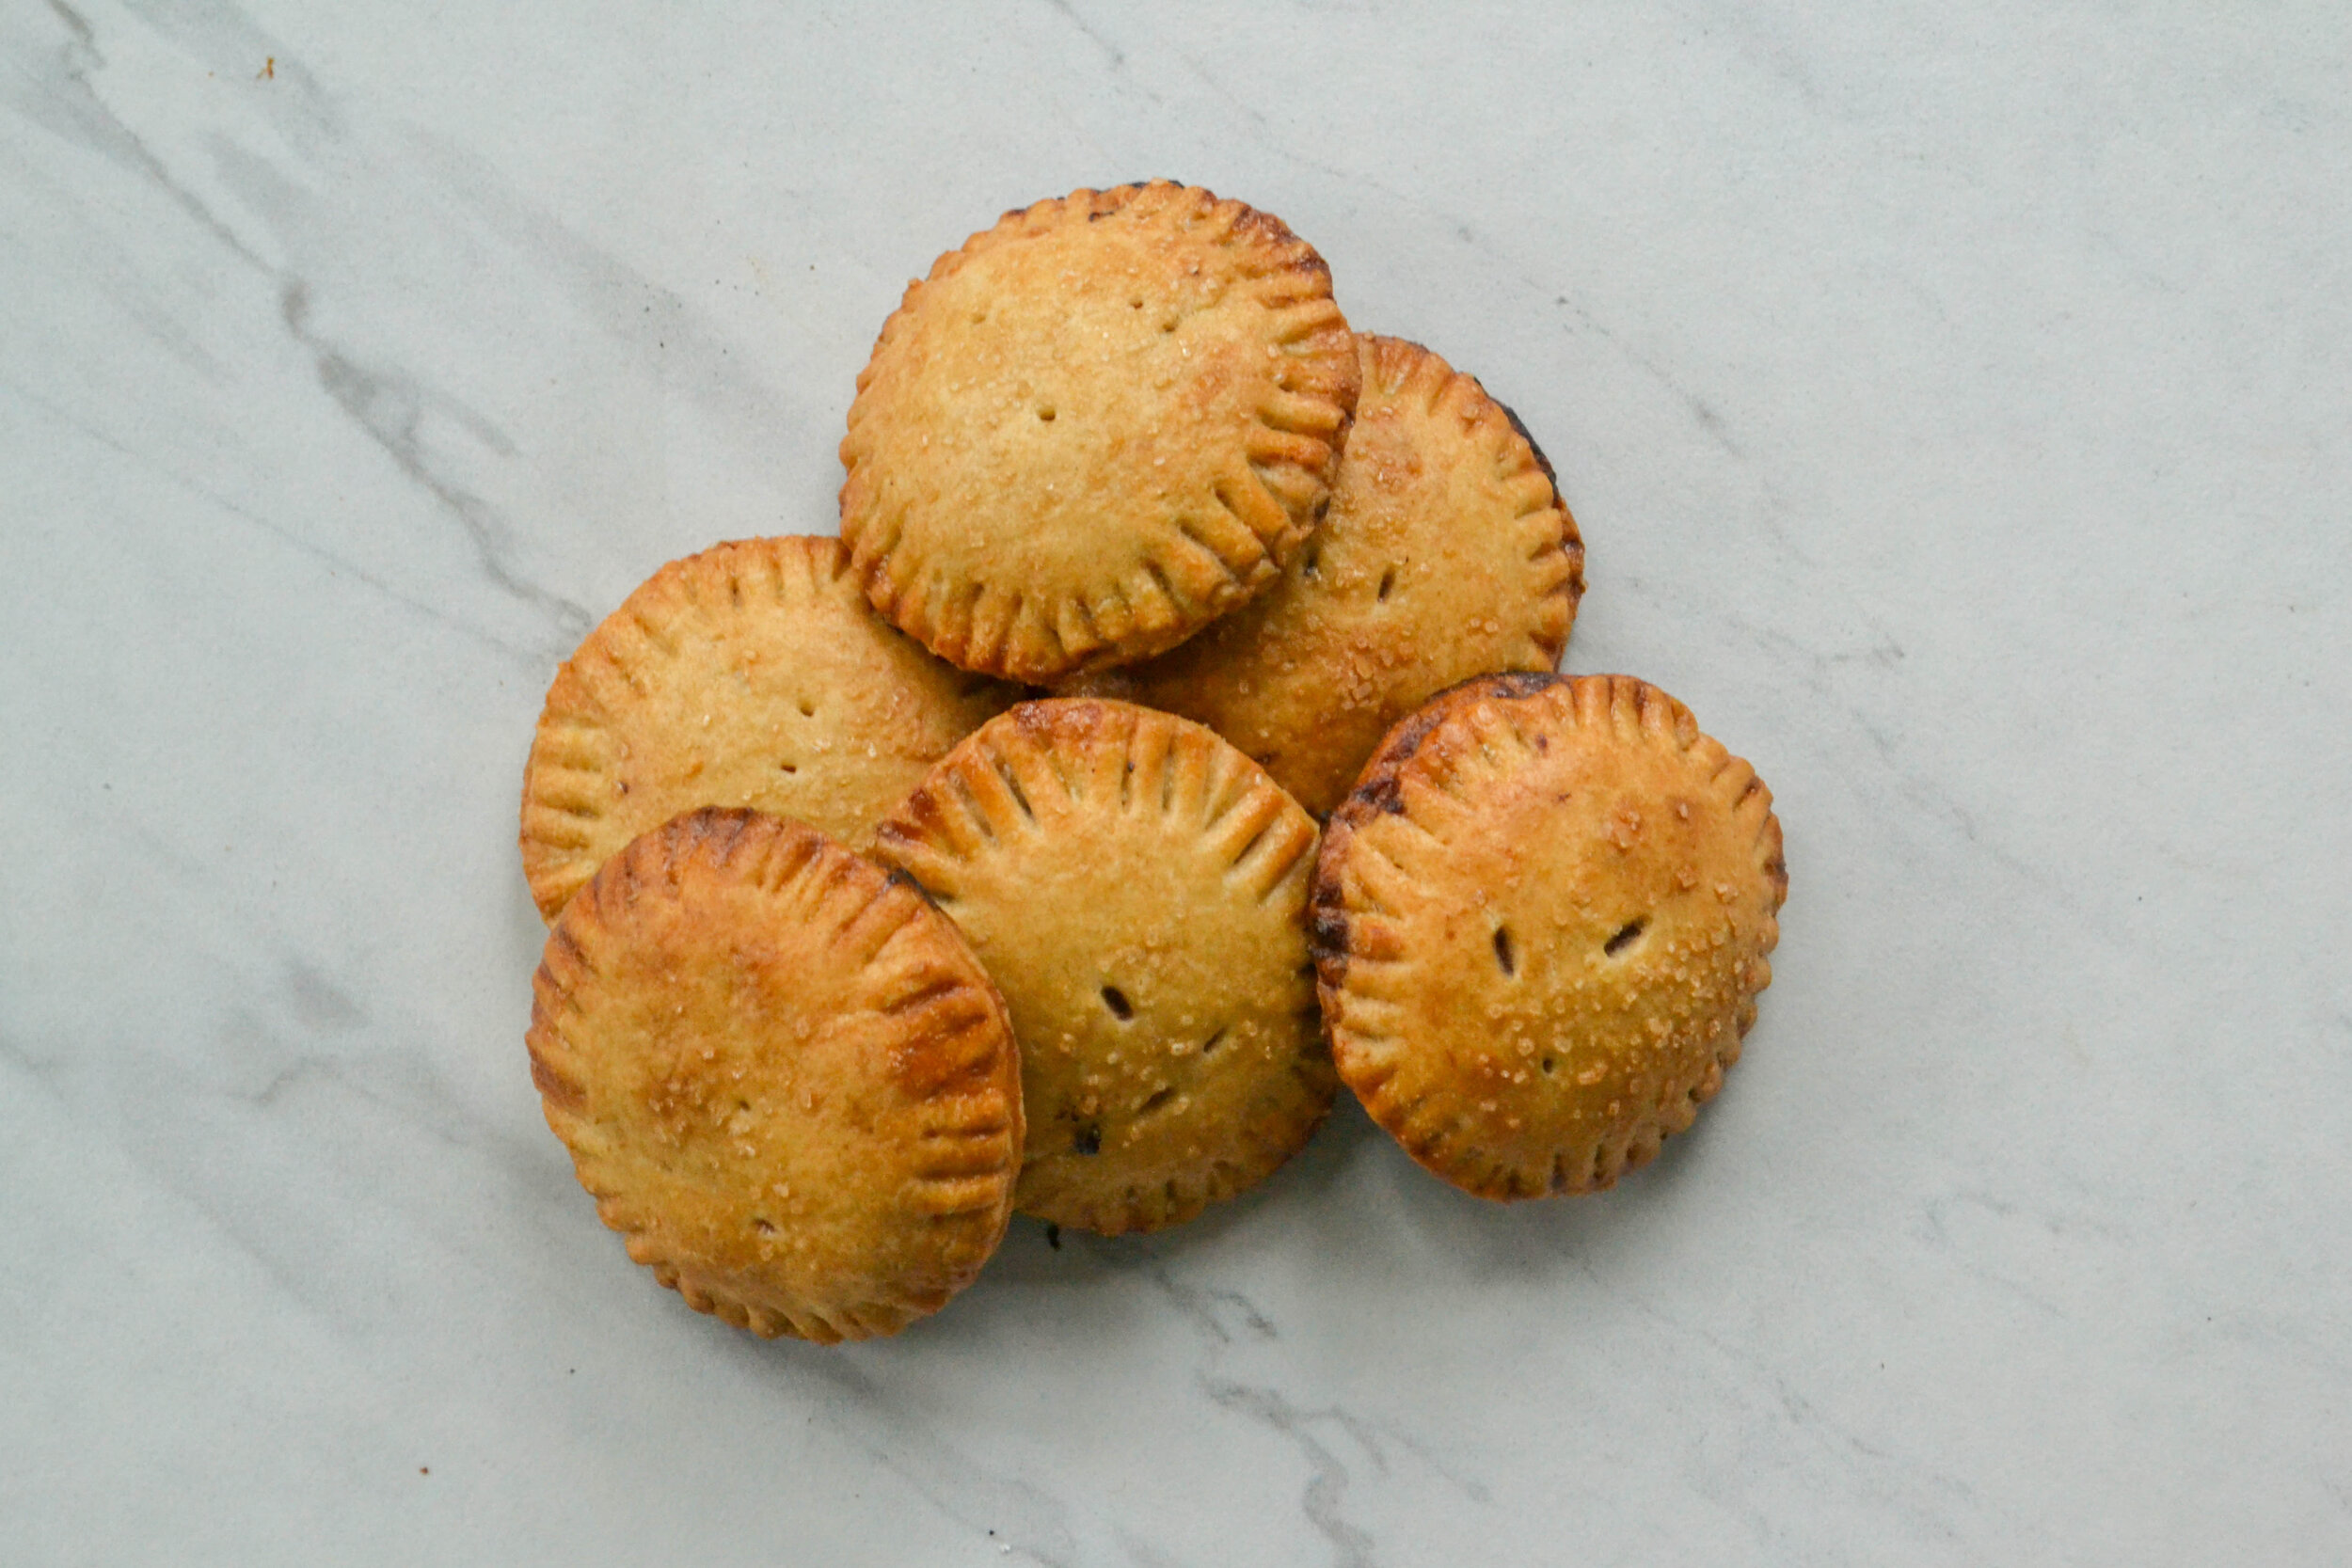
Blueberry-Rhubarb Handpies
Ingredients
For the filling
4 cups rhubarb, chopped
1½ cups blueberries
1 cup sugar
2 tablespoons lemon juice
1 tablespoon brandy
1 tablespoon corn starch
For the dough
4 cups flour
1 teaspoon baking powder
1 tablespoon sugar
1¾ cups crisco
1 egg
½ cup cold water
1 tablespoon vinegar
For baking
1 egg, whisked
¼ cup raw sugar
Directions
In a large pot, cook the rhubarb, blueberries, sugar, and lemon juice over medium heat until the sugar has dissolved and the fruit is softened. Add the brandy and cornstarch, simmer for 2 minutes, and remove from heat to chill.
Combine the flour, baking powder, and sugar in a large bowl and set aside.
In a food processor, pulse the crisco, egg, vinegar, and water. Slowly add the dry ingredients and pulse until a dough forms. Dump the mixture out onto a floured surface and gather it together to form two disks, chill for an hour.
Roll out the dough until it is about ⅛ inch thick. Using a biscuit cutter or knife, cut the dough for the hand pies. Line the dough up on a parchment-lined baking sheet.
Roll and cut the second dough disk and set them aside.
Place one tablespoon of filling on top of a dough cutout and wet the edges lightly with water. Top it with another piece of dough and use a fork to seal the edges.
Cut slits in the tops of the hand pies, brush the tops with the egg and sprinkle with sugar. Bake for 35 - 40 minutes or until the pies are golden and flakey.

Chocolate Dipped Pretzels
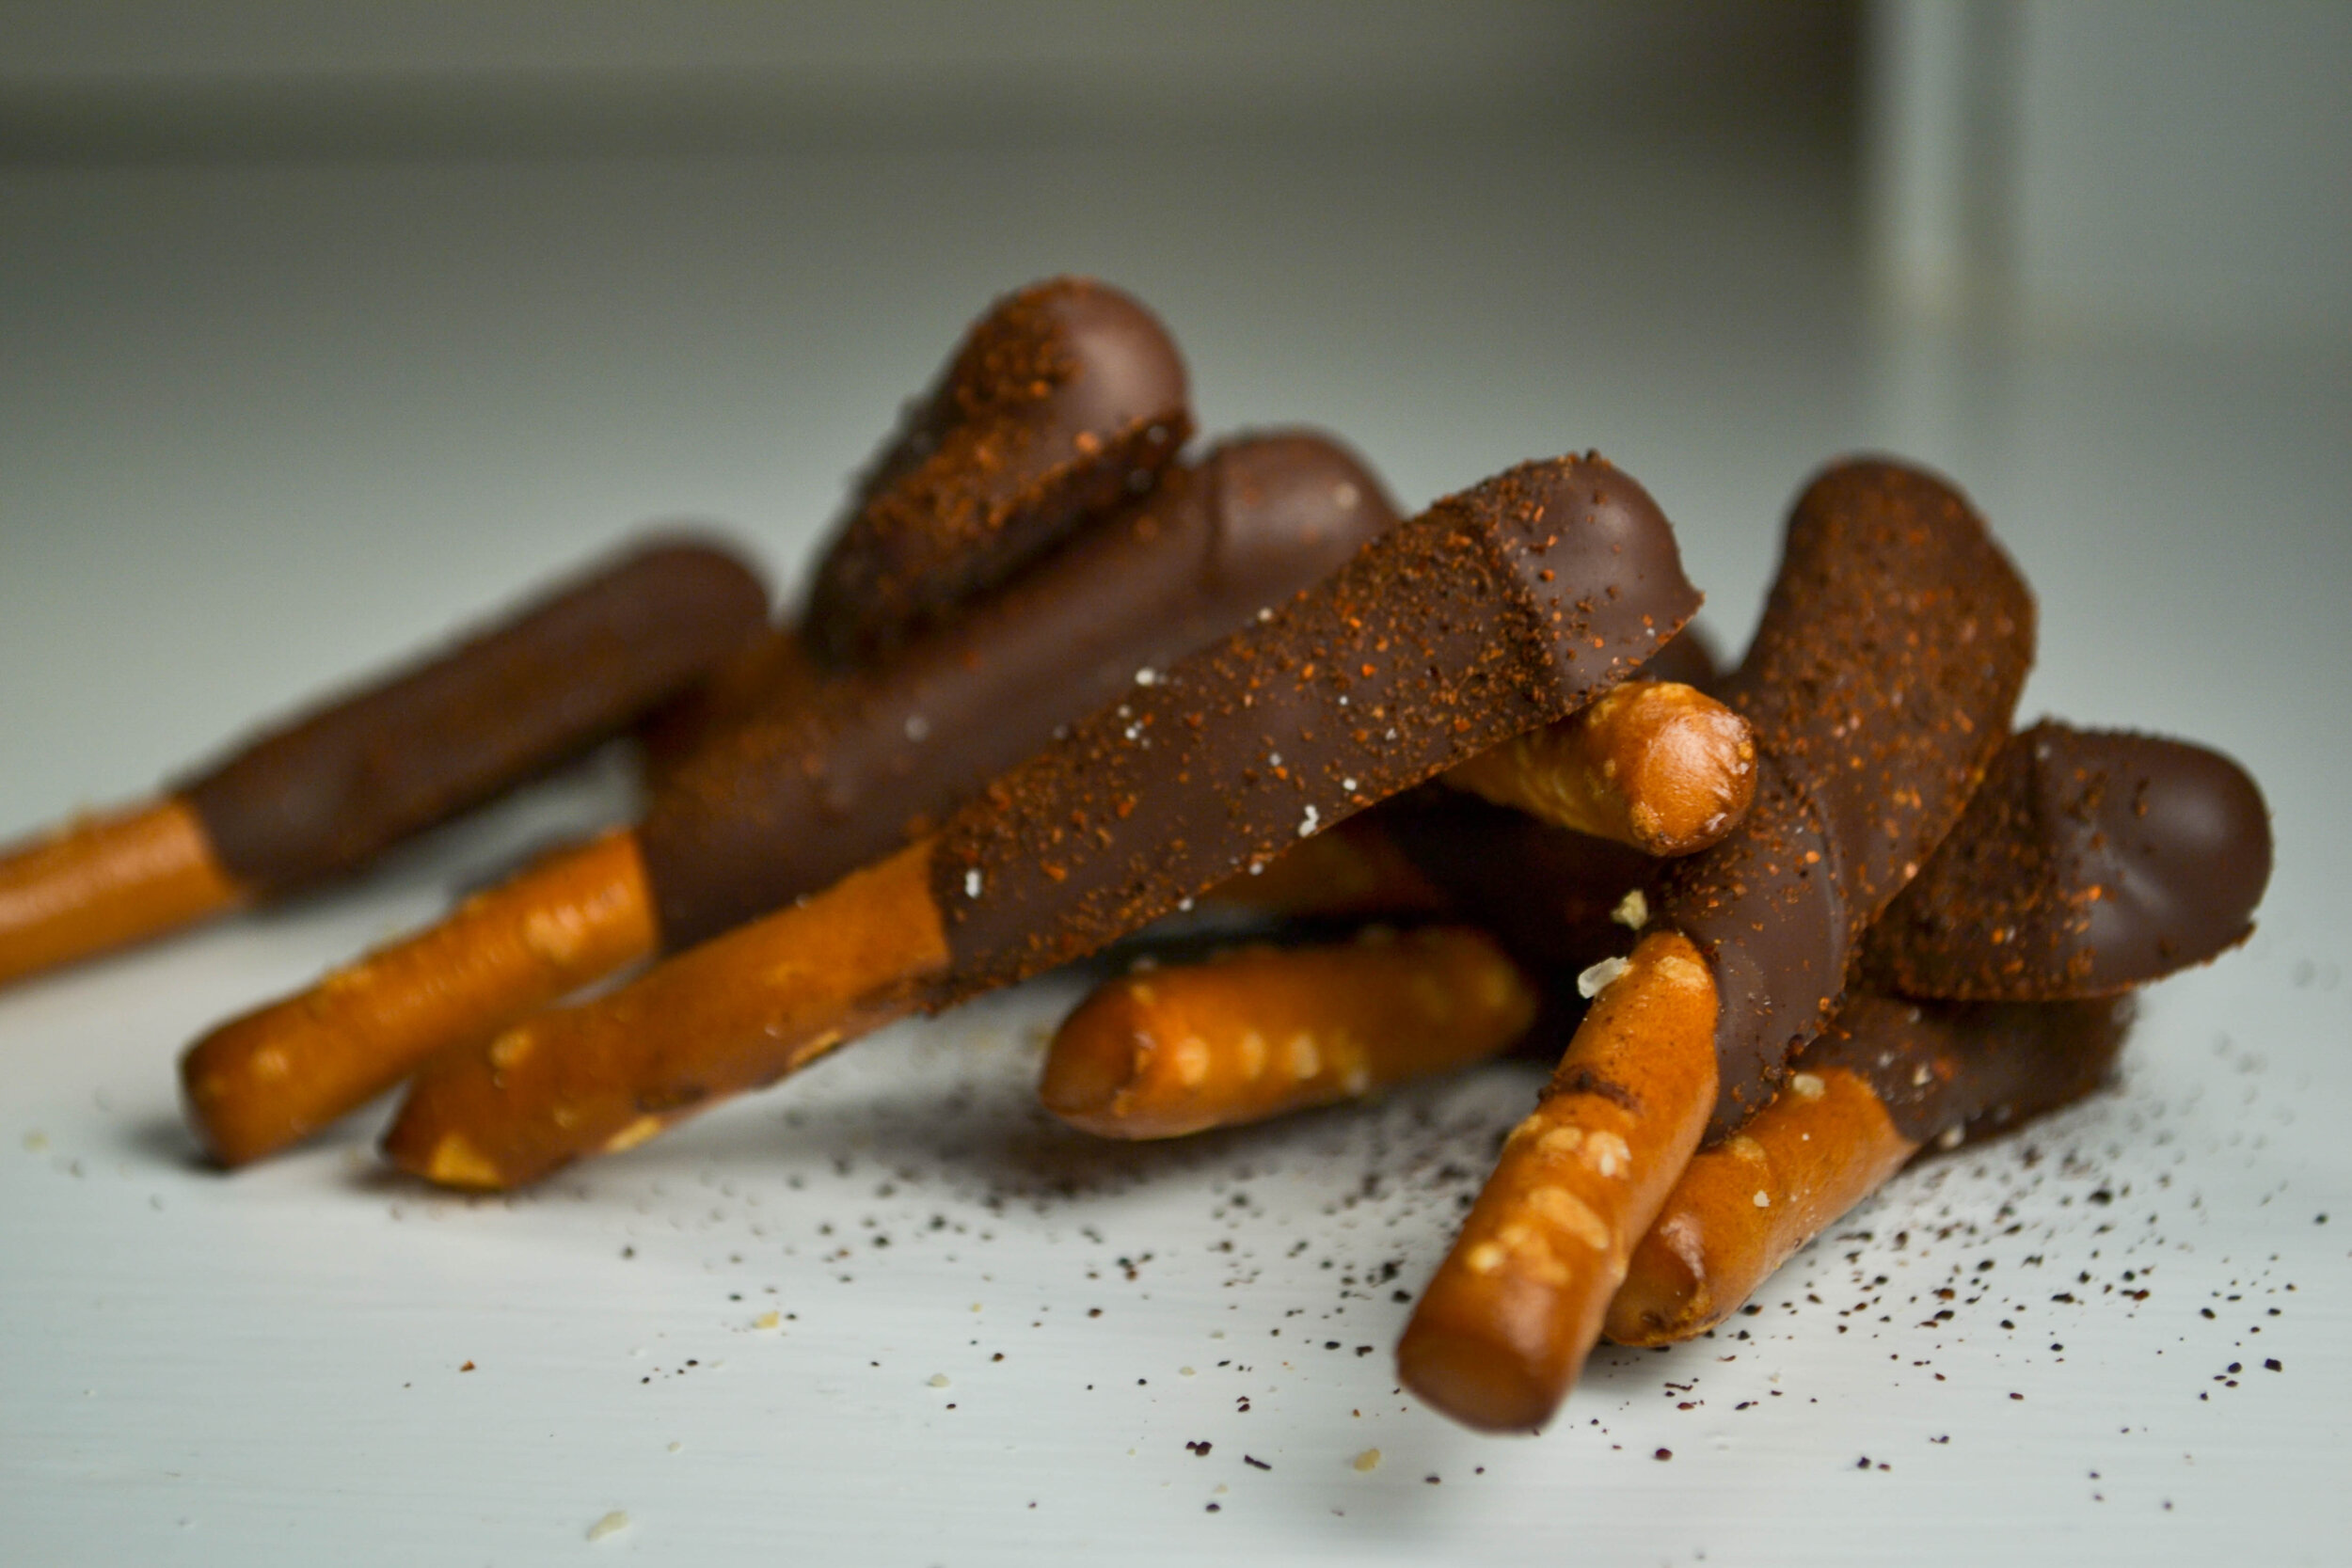
Chocolate covered pretzels are the ultimate canvas for fun snacks. Whether your craving something sweet and salty or looking for something fun to do with the family or on a date night, these are low pressure, easy and delicious!

Chocolate Dipped Pretzels
Ingredients
1 bag of chocolate chips
2-3 cups pretzel sticks
¼ cup chopped hazelnuts
1 tablespoon ancho-chili pepper
1 tablespoon of sea salt
Directions
Place a metal bowl over a pot of boiling water. Add the chocolate chips and stir constantly until the chocolate is melted and smooth. Remove from heat and make sure not to let the water touch the chocolate.
Working quickly, dip the pretzels into the chocolate and place on wax paper. Season with your topping of choice and allow the chocolate to harden on the counter for about 2 hours, you can put them in the freezer if you need to speed up the process.



Spiced Chocolate Chip Cookie Bars
I spent yesterday driving home to Ohio. My friends all think I’m crazy to drive instead of fly but I would rather spend my day in my car with my own music under my control than sit around in an airport full of strangers and overpriced food and booze. Trust me, I’ve done my fair share of drinking in airports and its not a pretty sight.
Interstate 90 is very familiar to me. This is the route my family and I would take every summer to get to Maine and I have come to know it in all seasons and all conditions. I’ve almost wrecked with my dad during a mid-April snow squall in upstate New York and I’ve seen the trees coming back to life when I drove out in May a few years ago.
This year, I will be spending my first Thanksgiving in Ohio since I moved to Maine in 2012. I’ll be back for ten days and will be catching up with family and friends and even teaching a workshop at my sister’s store, The Collective. Most importantly, I’ll be spending plenty of time with my niece and new nephew. It is a trip I’ve been looking forward to for months.
To save myself from the blight of eating fast food all day, I made sure to prepare a cooler full of food for my trip. This included chicken salad croissants, apples, nuts, cheese, and my favorite: spiced chocolate chip cookie bars. After all, diets don’t count when you’re driving for 12 hours alone, right?
These cookie bars are no joke. I love them. Anthony loves them. You’ll love them too. These are the result of a gamble taken in the kitchen a few months ago. I might have had a few cocktails before deciding I wanted something sweet to round out my evening. I’m a big fan of salty-sweet-spicy combos and felt bold. As I was sifting the flour and baking soda, I grabbed a bottle of cinnamon and a bottle cayenne and did my best Emeril impression and BAM. Spiced chocolate chip cookies were born. Truth be told, this first batch was OK but not great. I went a little heavy on the cinnamon and not heavy enough on the cayenne. Fast forward through a few more iterations and a lot of note-taking and a recipe is born.


Spiced Chocolate Chip Cookie Bars
Ingredients
8 T butter, room temp
1/2 C granulated sugar
1/2 C brown sugar
1 egg, room temp
2 t vanilla
1¼ C flour
1/2 t baking soda
1/2 t kosher salt
1/8 t cinnamon
¼ t cayenne
1 C chocolate chips
Directions
1. Preheat oven to 350
2. Combine the flour, salt, baking soda, cinnamon and cayenne in a large bowl and sift once.
3. In a stand mixer, beat the butter and both sugars until creamed. It should look light and fluffy, about 3 minutes.
4. Add the egg and vanilla and mix until well combined.
5. Slowly, add the flour in batches. Mix until smooth. Fold in the chocolate chips and pour into a greased pan. Bake 20-25 minutes, remove from oven and cool on a wire rack.

Orange Pumpkin Bread
Its early October, the leaves have begun to change and I can see my breath when I run in the morning. Fall has officially arrived.
To celebrate the season, I dragged out an old family recipe given to me by my mother. What goes better with a chilly morning that a hot cup of coffee and Orange Pumpkin Bread?
This recipe belongs to my great-grandmother Gladys. A woman I’ve only known through stories and pictures as a child. She was married to William, my great-grandfather and namesake and lived on a farm where she and my great-grandfather raised horses and cattle.
Earlier this year, my mom gave be two boxes of family recipes from my great-aunt, grandmother and great-grandmother. As I’ve been working through the recipes, I’ve thought about who these women were, what they were like and what they would think of me. Of these three ladies, I only met my great-aunt Ruth. My great-grandmother passed long before I was born and my grandmother passed away from cancer at 49 (one more reason why I quit smoking). All the same, I’ve known these women through stories told to me by my mother, uncle and their family friends. Despite not meeting them, cooking their food is giving me a connection to a life I didn’t know and gives me a comfort I struggle to articulate.

Orange Pumpkin Bread
makes two loaves
Ingredients
2/3 C Crisco
2 2/3 C granulated sugar
1 orange
2/3 C water
1 (16 oz) can pumpkin
3 1/3 C all purpose flour
2 t baking soda
1 1/2 t salt
1 t ground cinnamon
1/2 t baking powder
2/3 C chopped pecans
2/3 C raisins
Directions
Preheat the oven to 350 and grease two 9x5x3 loaf pans.
In a stand mixer, cream shortening and sugar thoroughly
Cut the orange into wedges and carefully remove any seeds, then toss it into a blender or food processor with the water and puree until smooth.
Add the orange mixture to the creamed sugar and shortening along with the pumpkin and eggs.
Sift the flour, baking soda, salt, cinnamon, and baking powder in a separate bowl and carefully add to the pumpkin mixture in batches. Fold in the pecans and raisins.
Pour the mixture into the loaf pans and bake 1 hour and 10 minutes. Remove from the pan and allow to cool.
Spiced Blueberry Hand Pies
It is no secret to those who know me that I absolutely love pie. Sweet, savory, freeform or meticulously styled, I love it all. I have been trying to hone my baking skills lately and have turned to pie on a number of occasions. What I have found from trying recipes including this great one with vodka from Cook's Illustrated that tends to be my standby. With a solid foundation, anything is possible.
This year, I was responsible for bringing pie to Thanksgiving at my cousin Jen's house. Wanting to stretch the imagination a bit and do something new, I scoured the internet for inspiration. I wanted something unique and admittedly a little showy. I found two that fit the bill; Cranberry Chiffon by from Saveur and Crème Brulee Pie from Erin McDowell on Food52.

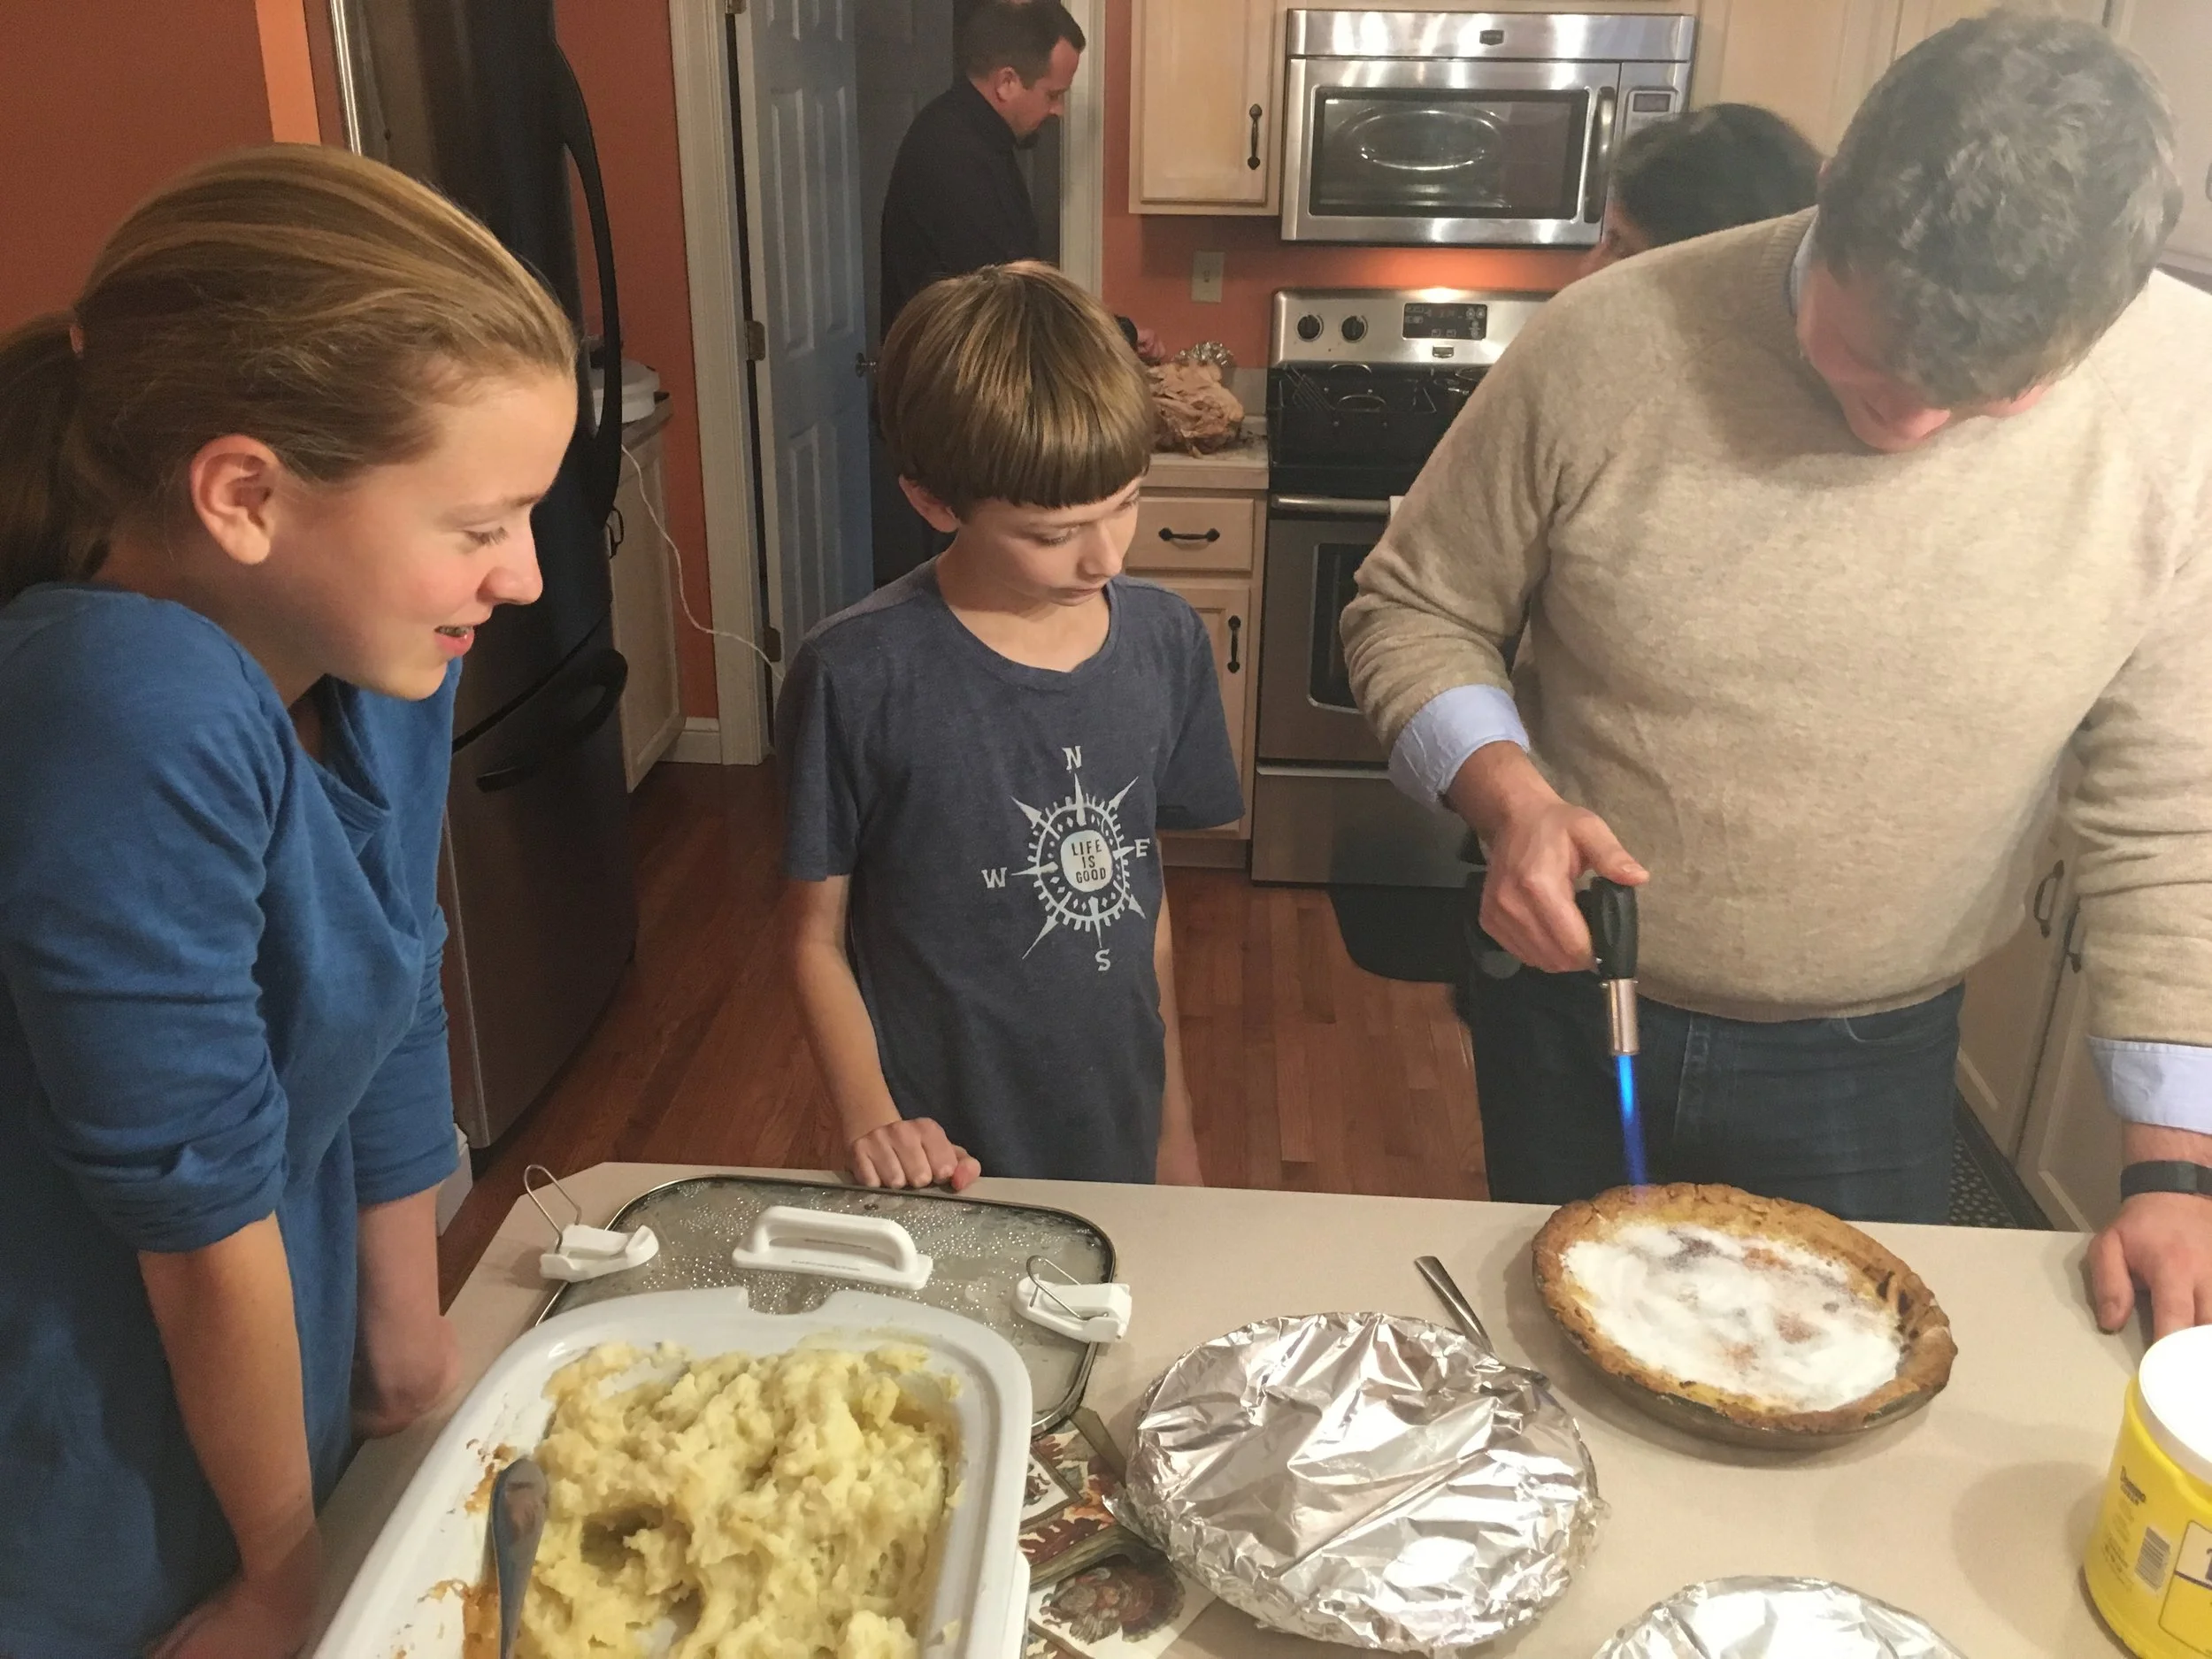
I am happy to report that I tried both this year at Thanksgiving and they were a success. Naturally, I had to bring the Crème brûlée pie to Jen's house so her kids and I could play with the obligatory blow torch. There are other ways to brûlée some sugar but a blow torch is 1 - the easiest way and 2 - the most fun way.
I have been trying to use up some blueberries leftover from the summer. Sticking with the pie theme, I opted for spiced blueberry handpies. For those of you unfamiliar with hand pies, they are basically pop tarts for adults. I wanted something flakey, handheld and complex in flavor. The blueberries, cinnamon, lemon and chili powder (yes, chili powder) combine to make a great filling.
Spiced Blueberry Hand Pies
Ingredients
1 pie disc
1.5 C. frozen blueberries
3 T. sugar
1 T. ginger
1 T. cinnamon
1/4 t. nutmeg
1/8 t. chili powder
zest of 2 lemons
a pinch of salt
1 egg
1/4 C. heavy cream
Directions
Preheat the oven to 300
Roll out the dough into 9 inch circle 1/4" inch thick.
Toss the blueberries with the sugar, ginger, cinnamon, nutmeg, chili powder, lemon zest, and salt until evenly mixed.
In a small bowl, whisk together the egg and cream.
Cut the pie dough into 8 even sections and coat with the egg mixture.
Spoon the blueberry mixture onto the dough wedges, top with more dough and seal around the edges with a fork.
Brush the tops of the handpies with the remaining egg mixture and sprinkle with sugar. Bake for 30 minutes or until the tops are golden brown.